Unleashing the power of ELT in AWS using Airbyte
I am a computer engineering undergraduate highly interested in Data engineering, Artificial intelligence, Machine Learning and Natural language processing. I like exploring and learning new technologies and I will be writing various blogs here during my learning journey
Introduction
At present, data exists like a vast ocean, and extracting valuable insights from this is like looking for a small needle in a big haystack. Enter ELT(Extract, Load, Transform) the modern way to process and analyze data, and data lakes, a storage capable of storing large amounts of big data of different types. Extract, Load, and Transform (ELT) is a data processing approach widely used in data warehousing and analytics. It involves extracting data from various sources, loading it into a target data store such as a data lake, and then performing transformations like data cleaning, aggregation, and processing within the target storage system. Unlike traditional ETL, where data is transformed before being stored, ELT is a modern approach used in big data fields and is closely related to concepts like data lakes and lake houses. ELT offers greater flexibility and scalability in handling large volumes of data, making it ideal for processing data such as website logs and customer reviews. While there are numerous tools available for ELT in the big data field, Airbyte has emerged as a popular choice due to its simplicity, versatility, ease of use, and open-source nature. Similarly, a data lake is like having a central data source for storing raw data regardless of its format and source, where data can come from various places like sensors, social media, or online transactions. AWS offers Amazon S3, object storage offering virtually unlimited storage and capable of storing any kind of files so it is suitable for use as a data lake solution in AWS platform.
In this article, I have explored the use of ELT in AWS, using AWS S3 as a data lake. This blog serves as a tutorial on how to connect Airbyte with an S3 data lake and perform ELT operations from a REST API to an S3 data lake using Airbyte.
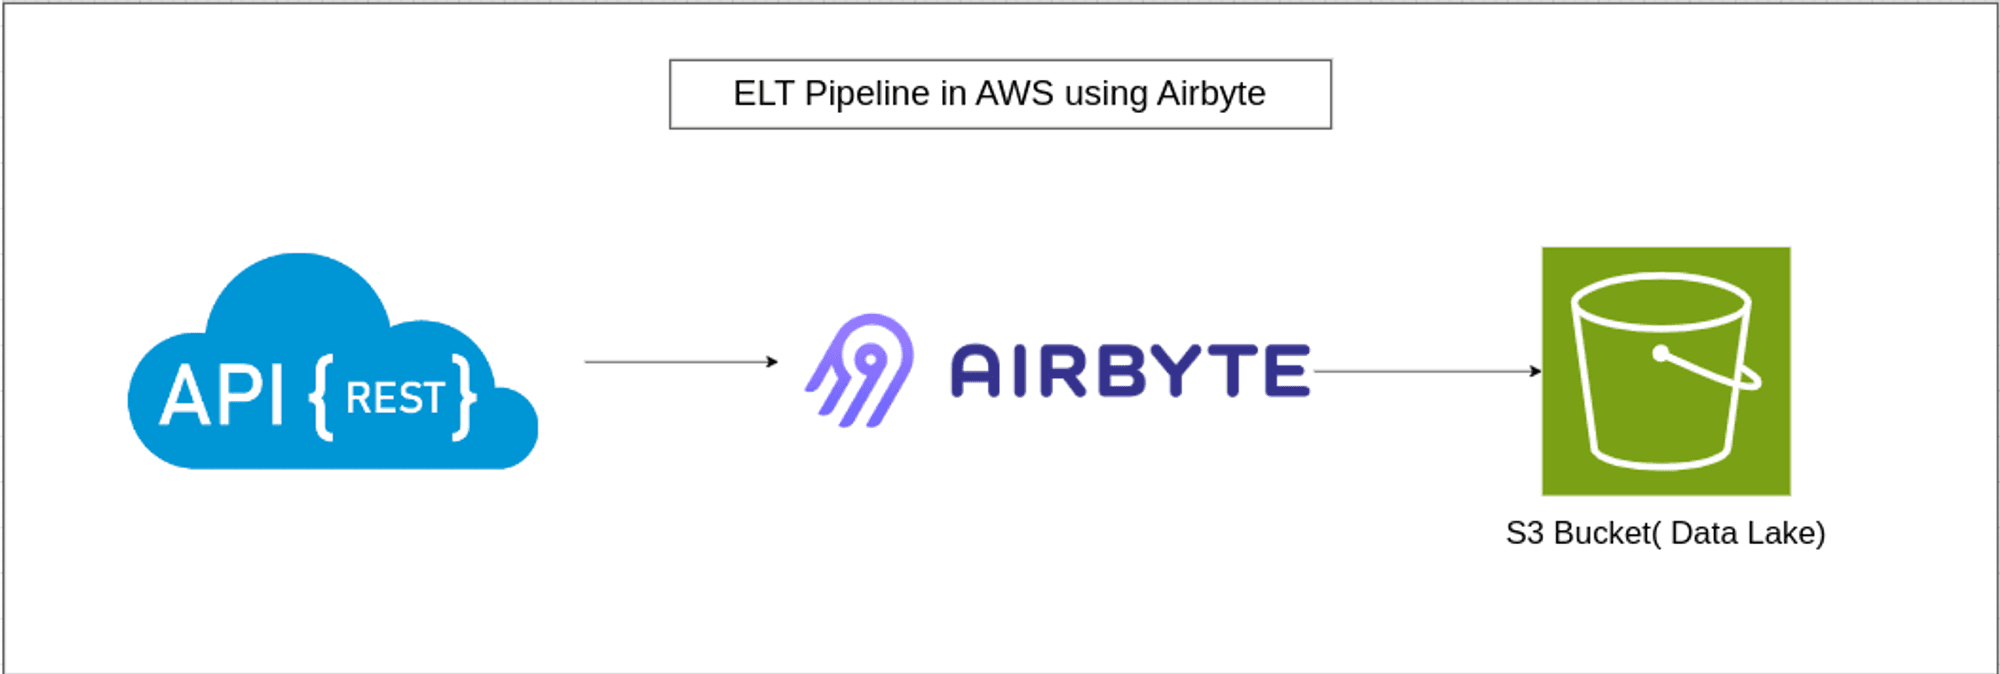
Architecture Overview

In the architecture above, I've illustrated a basic ELT pipeline with a REST API as the data source. In this example, I've utilized the SpaceXAPI, which offers SpaceX-related data and is accessible in Airbyte as a source connector. Airbyte serves as the ELT tool, ingesting data from the REST API and storing it in an AWS S3 bucket. This S3 bucket functions as a data lake.
About Airbyte, The ELT tool
Airbyte is an open-source ELT platform that enables the creation of efficient data pipelines for data ingestion and replication from various sources to different destinations. It utilizes connectors to pull data from specific sources and push the ingested data to the required destination. Being open-source, engineers worldwide contribute to this project, creating and maintaining several connectors. These contributions have positioned Airbyte as a top tool for data integration, replication, migration, and ELT. Airbyte offers a no-code, cost-effective solution for building ELT pipelines. It also facilitates users to configure the frequency of data synchronization, select the data to be replicated, and determine how the data is written to the destination
About Amazon S3, The Data Lake
Amazon S3 (Simple Storage Service) is a highly scalable, secure, and cost-effective object storage service designed to store data in the form of objects. An object consists of the file itself and any metadata describing the file, while a bucket acts as a container for these objects. S3 can accommodate virtually any amount of data, from gigabytes to petabytes and beyond, and can effortlessly scale up as needed. This scalability makes it a cost-effective data storage solution in the big data world, where data volume is rapidly increasing. S3 is versatile and can store various types of data files, including structured CSV files, semi-structured JSON and XML files, and even unstructured text, images, and videos. As part of AWS, S3 follows a pay-as-you-go model, making it cost-effective, scalable, highly available, and fault-tolerant. It also provides robust security, compliance, and support features. These factors have contributed to the widespread use of Amazon S3 and other object stores, such as Minio, which follows the S3 protocol, as data lakes in the big data field.
Implementation Details
Configuring the AWS S3 Data Lake
Firstly, we will need to sign in to the AWS management console with the AWS account and then follow these steps.
Go to the AWS management console.
Search for S3.
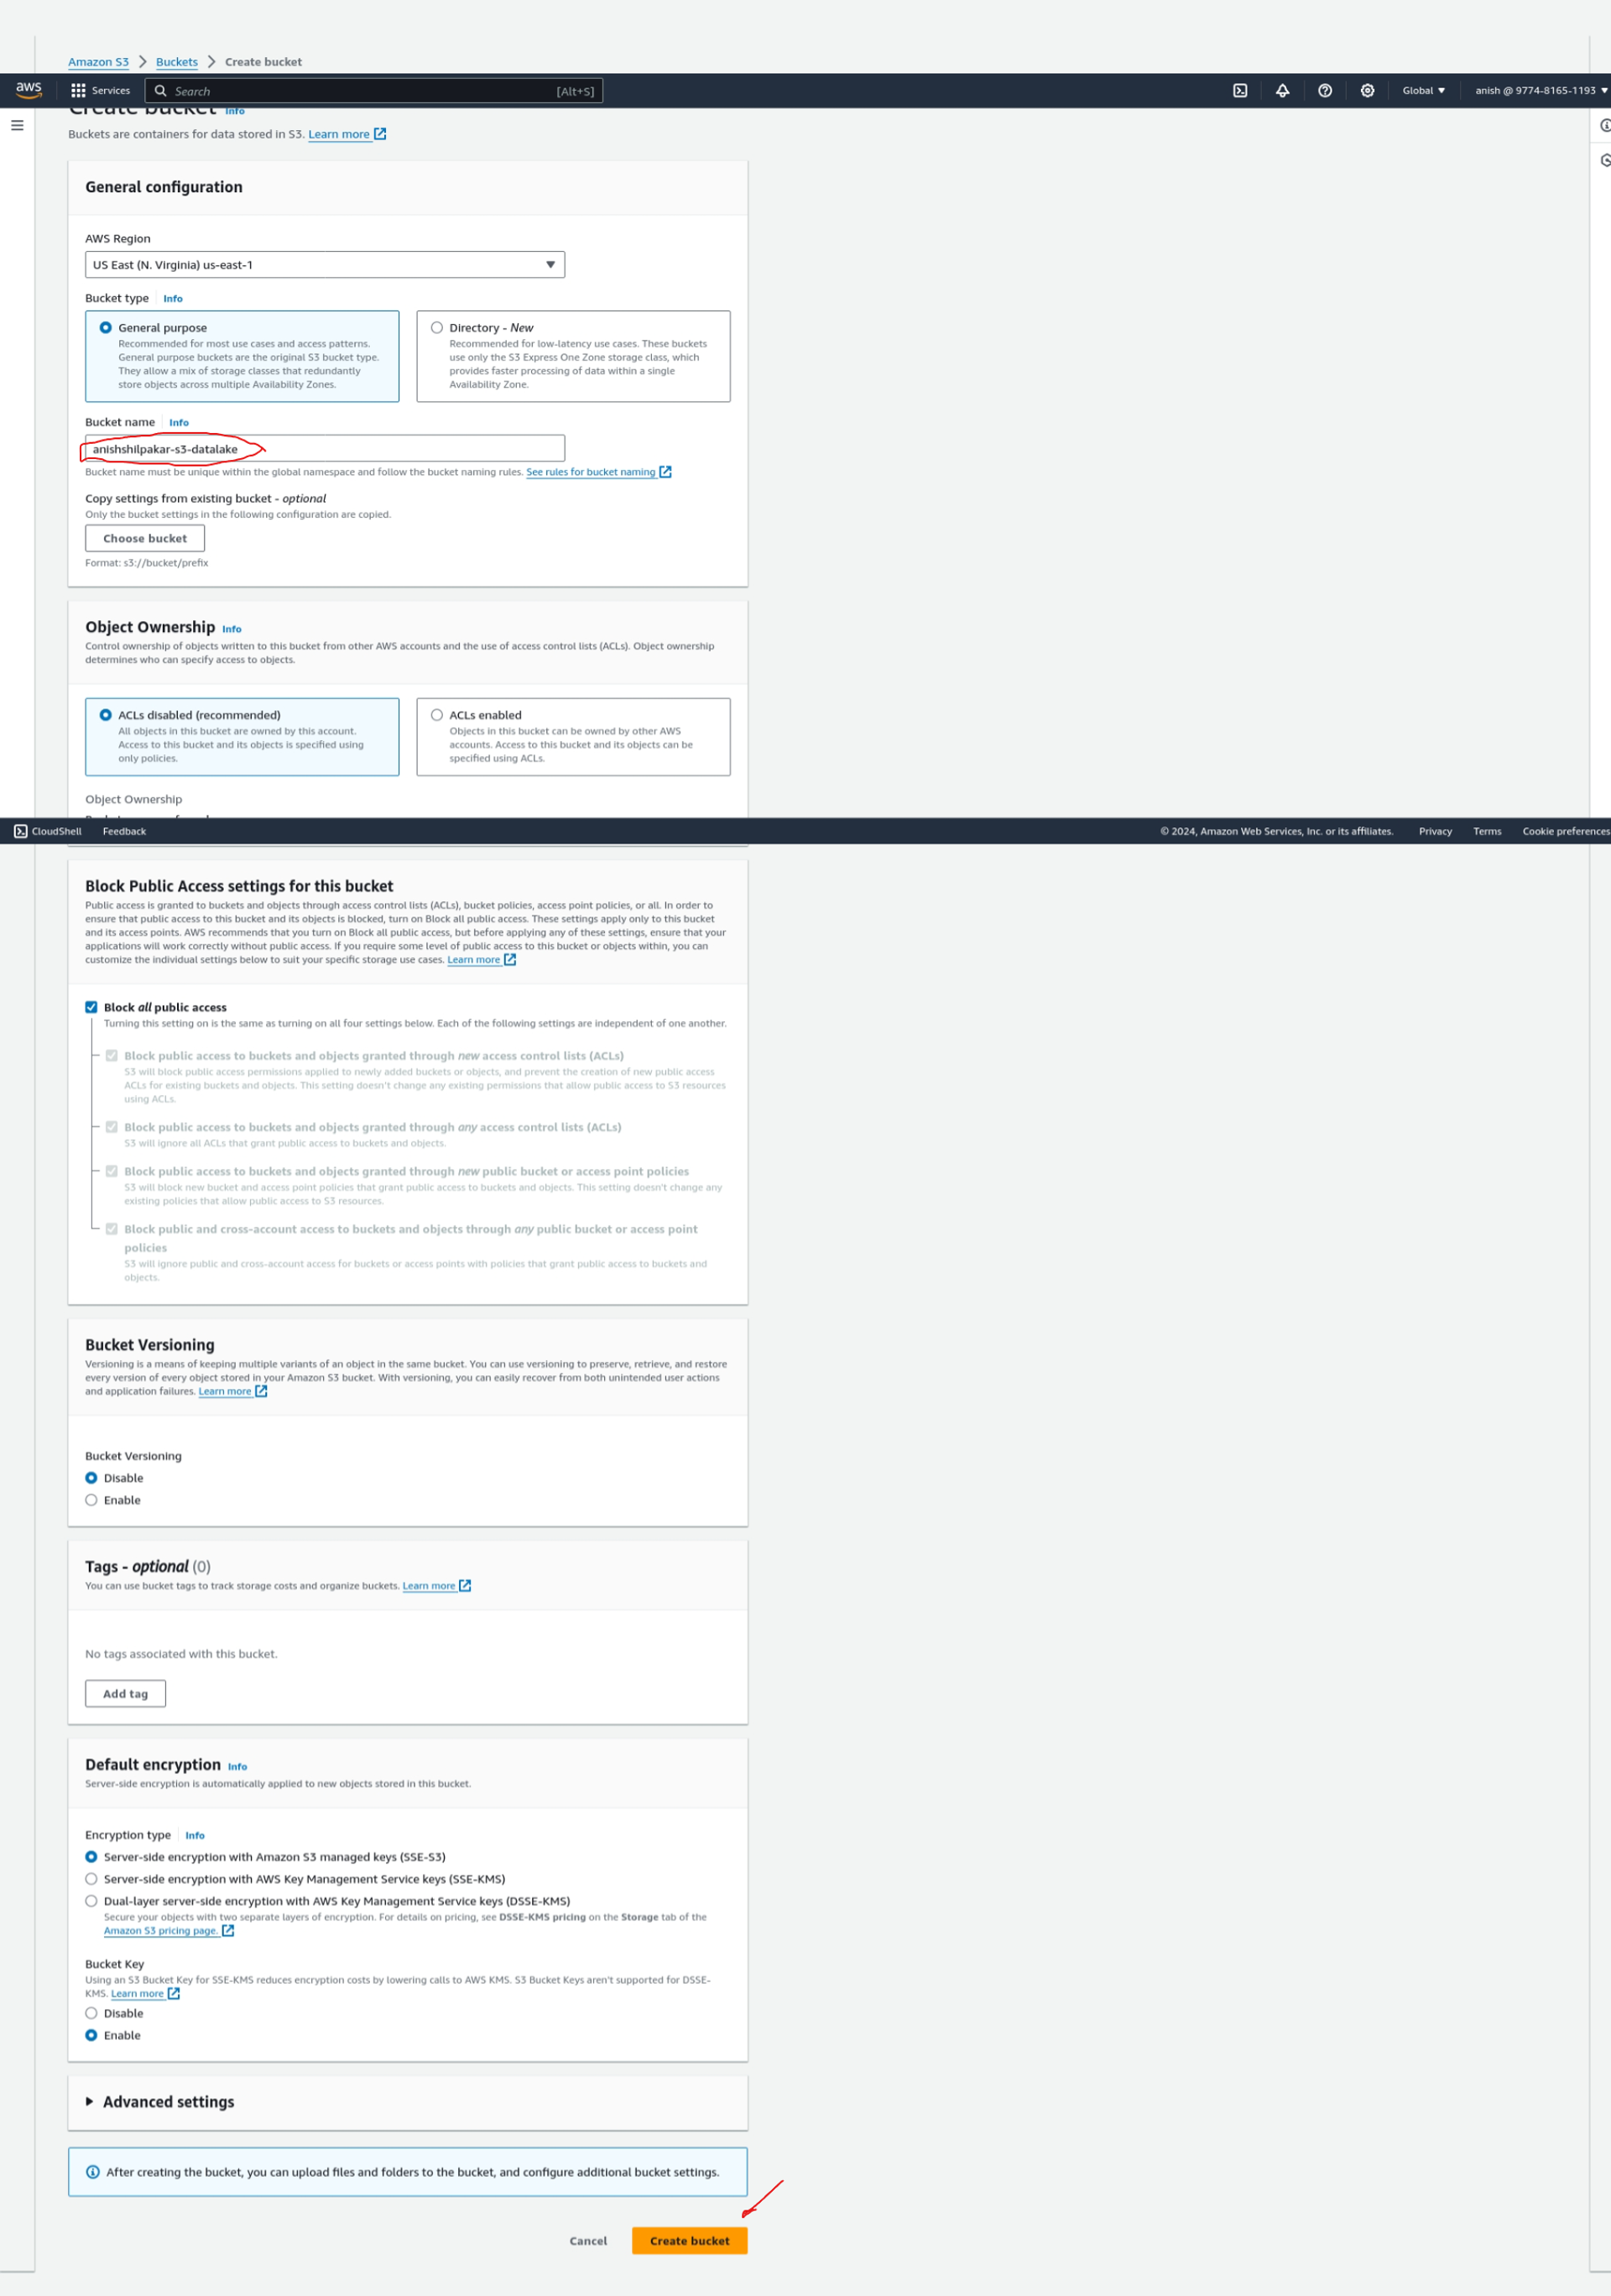
Click on 'Create a new bucket,' select a region of your choice, and give the data bucket a unique name. We can use a format like <your_name>-s3-datalake. For example, in my case, it is 'anishshilpakar-s3-datalake.' We can leave all other default settings, such as versioning and encryption. Then, click on 'Create bucket' to create this new bucket.
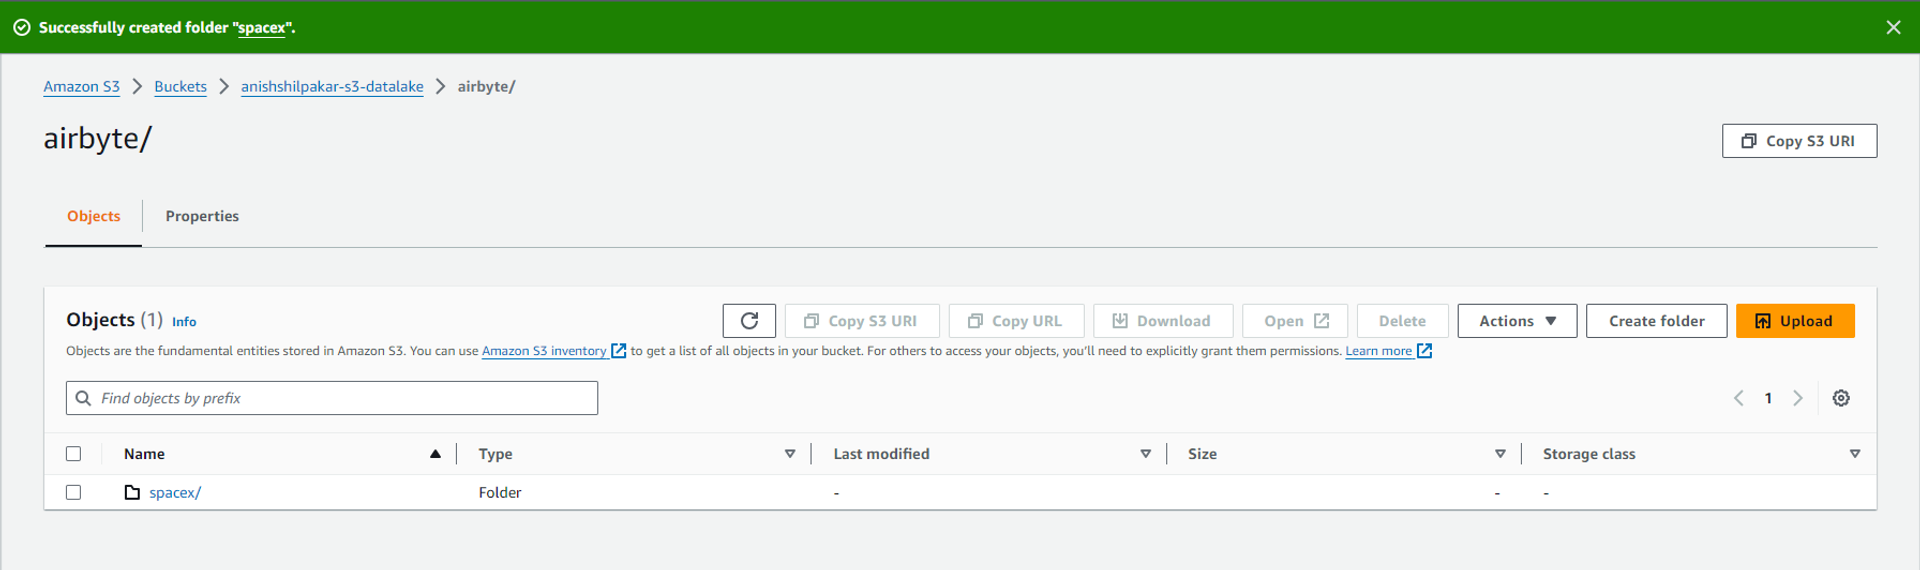
Once the bucket was created, I created a folder named "airbyte" to store data from the ELT operation in Airbyte. Inside the "airbyte" folder, I created another folder called "spacex" to store the data ingested from the SpaceX API.
Configuring Airbyte
In Airbyte, we will configure the source connector, destination connector, and the connection between the source and destination.
1. Configuring the source connector for SpaceX API
Airbyte offers a SpaceX API connector, which can be found in the "Sources" section of Airbyte. This API provides various data related to SpaceX, and I am using it for demonstration in this project. I configured the source connector in the following steps:
a. Once we are in the sources section of airbyte, we click on the new source icon
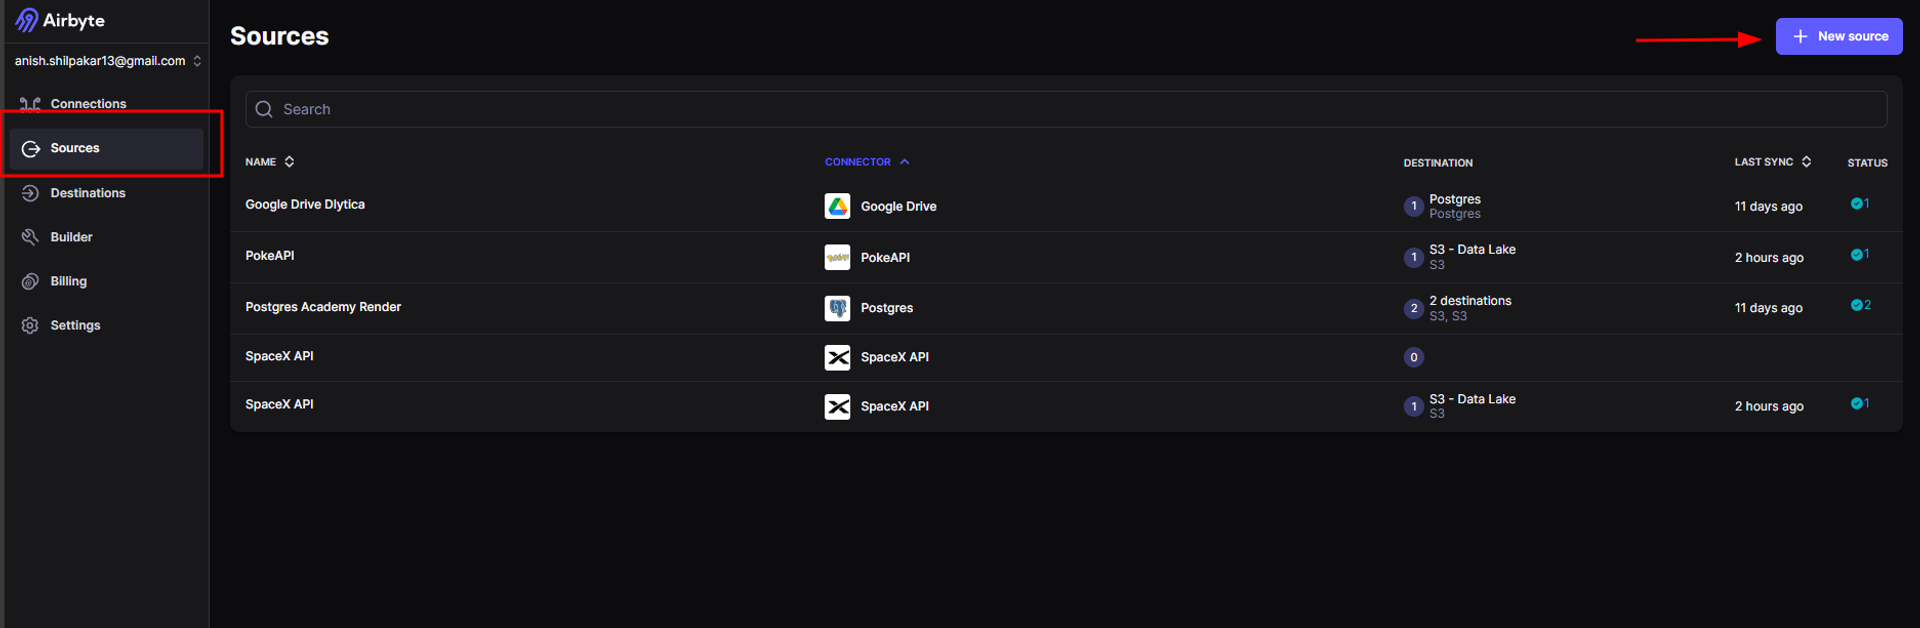
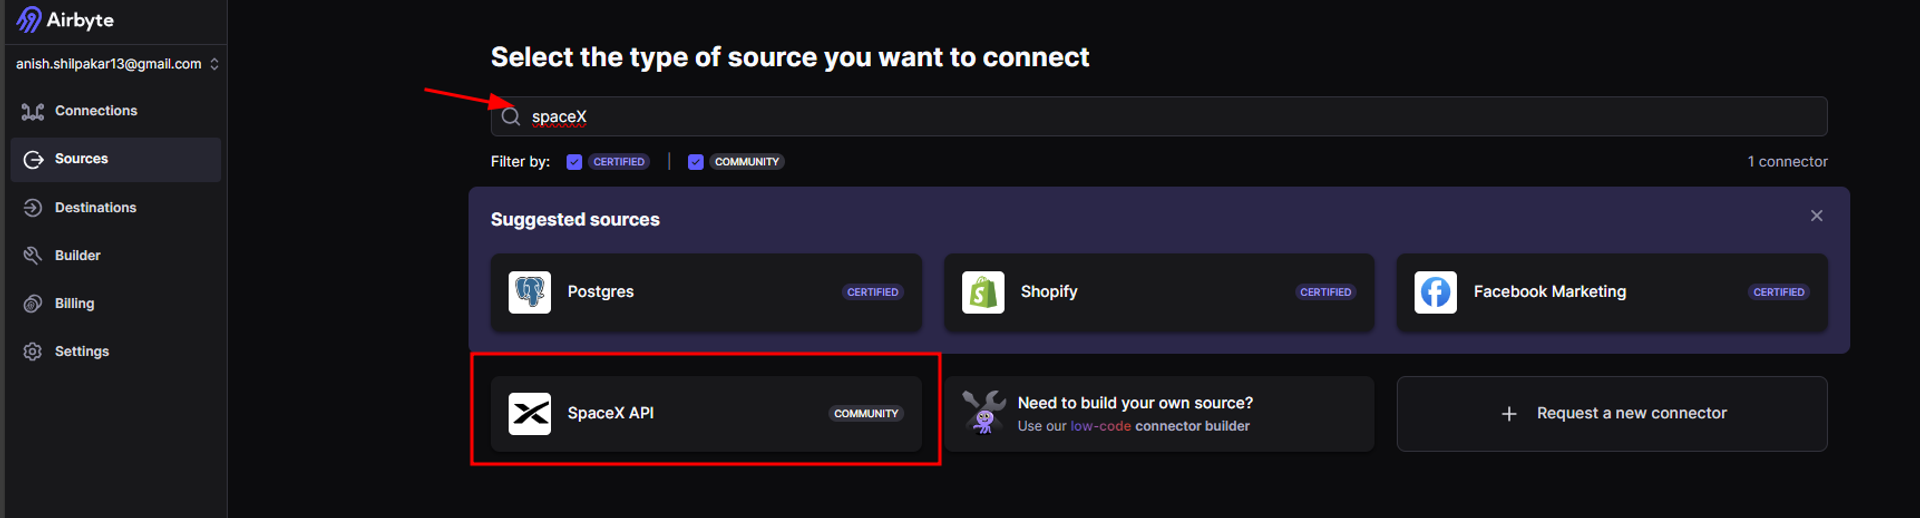
This will take us to a page where we can view all the available source connectors for different kinds of sources. Here, we will search for the SpaceX API.
b. Search for SpaceX API as shown below:
c. Once we select the SpaceX API, we will be redirected to the setup page for the source. Here, we don’t need to configure any fields, as the SpaceX API is a free API included in Airbyte itself. Simply click on the "Setup Source" button, and this will set up the required source connector for the SpaceX API. Additionally, in the right-hand section, we can find a setup guide that provides details for configuring the SpaceX API with our API key, which is an optional step performed to enhance the security of the connection.
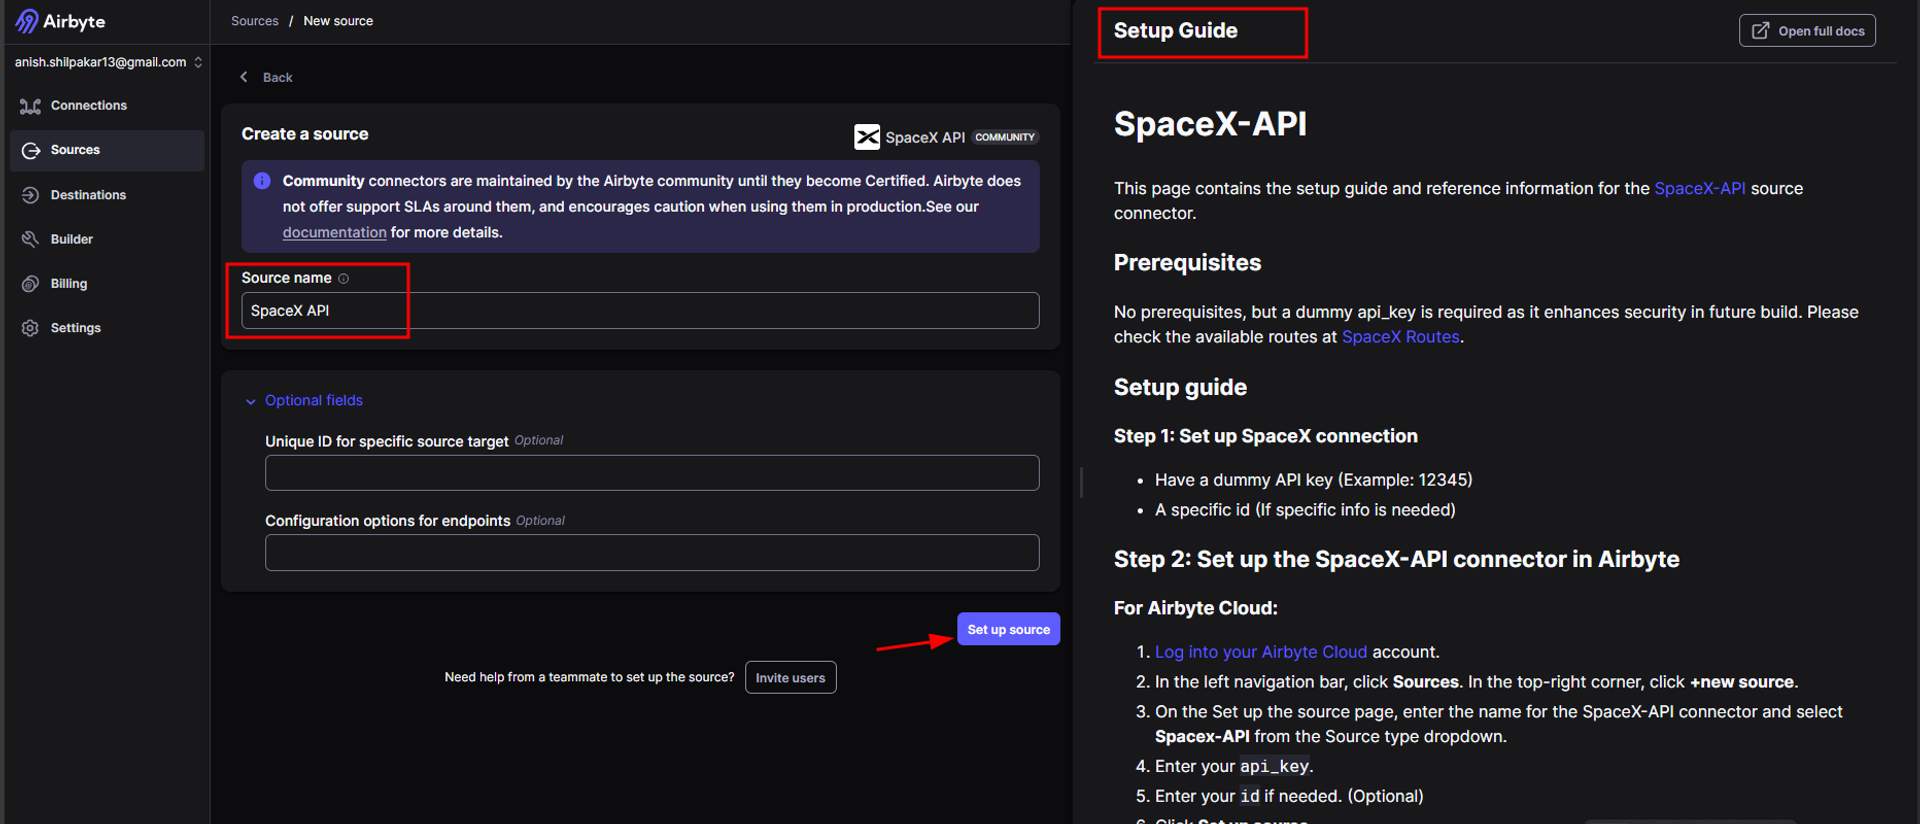
Once we click "Setup Source," Airbyte will start testing the connection. Once the tests are completed, it will show us an output stating that all the connection tests have been passed, as shown below.
Here, since we are using a built-in API available in Airbyte, errors are not expected when performing tests. However, if you use other APIs or sources with different settings, you may encounter errors if the connection settings are not correct.
2. Configuring the destination connector for AWS S3.
Once the source is configured, we will now configure the destination connector, which will connect Airbyte with our AWS S3 bucket, the destination data lake. The following steps are performed:
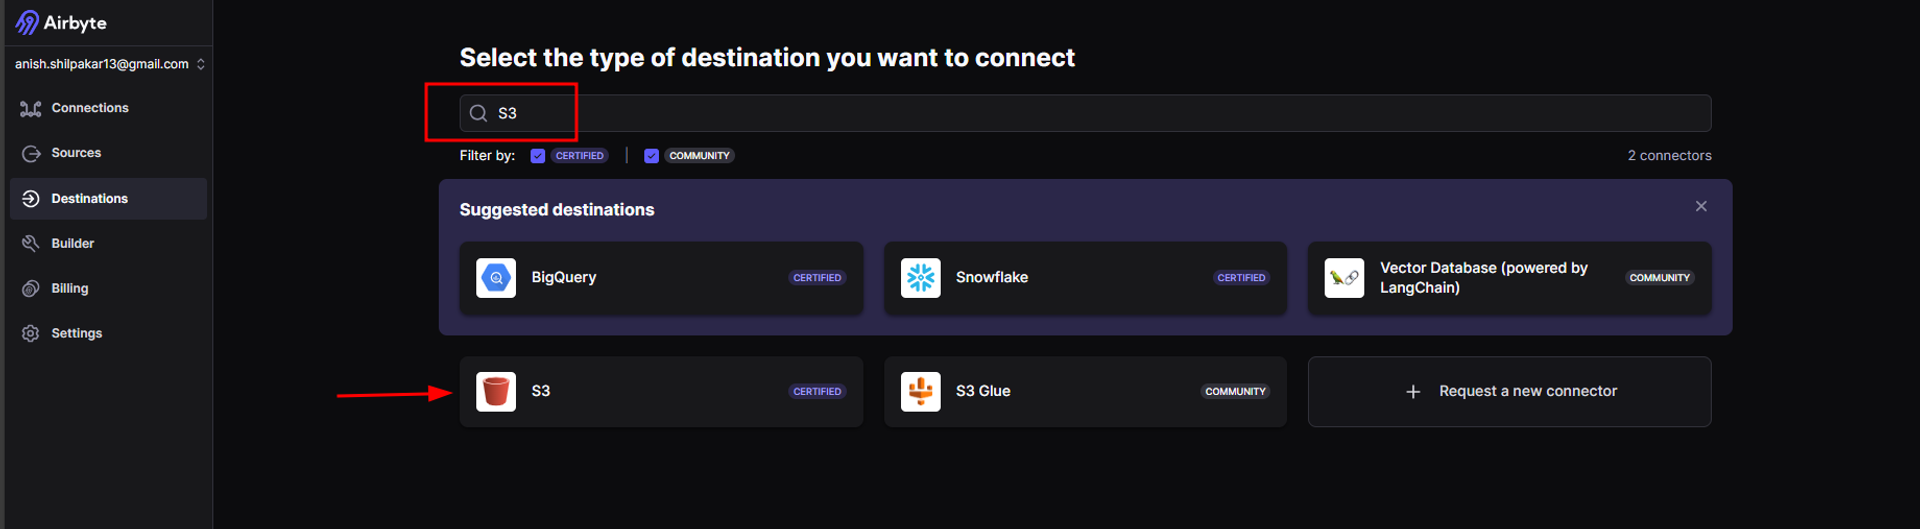
a. Navigate to the "Destinations" section in the Airbyte console and then click on the "New Destination" button.
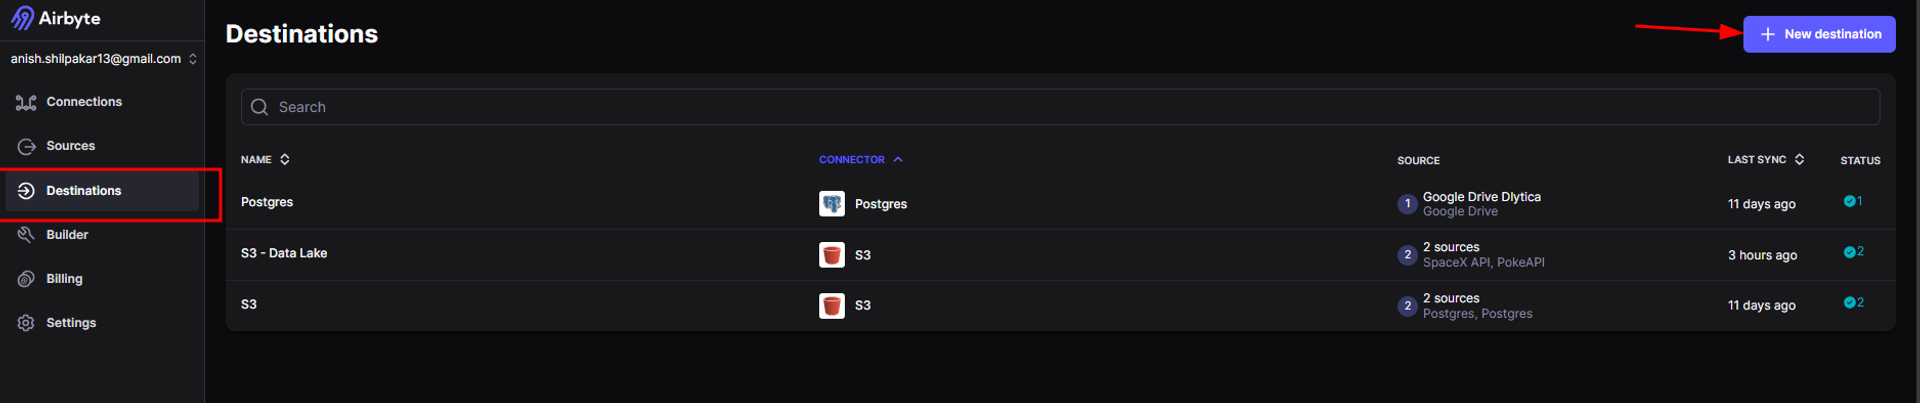
b. Once we click on the "New Destination" button, we will be shown a list of different destination connectors. Here, we will search for S3 and select it.
c. On the next page, we need to configure S3 by providing connection details such as AWS Access Key ID, AWS Secret Access Key, Bucket Name, Bucket Path, Bucket Region, and Flattening and Compression options.
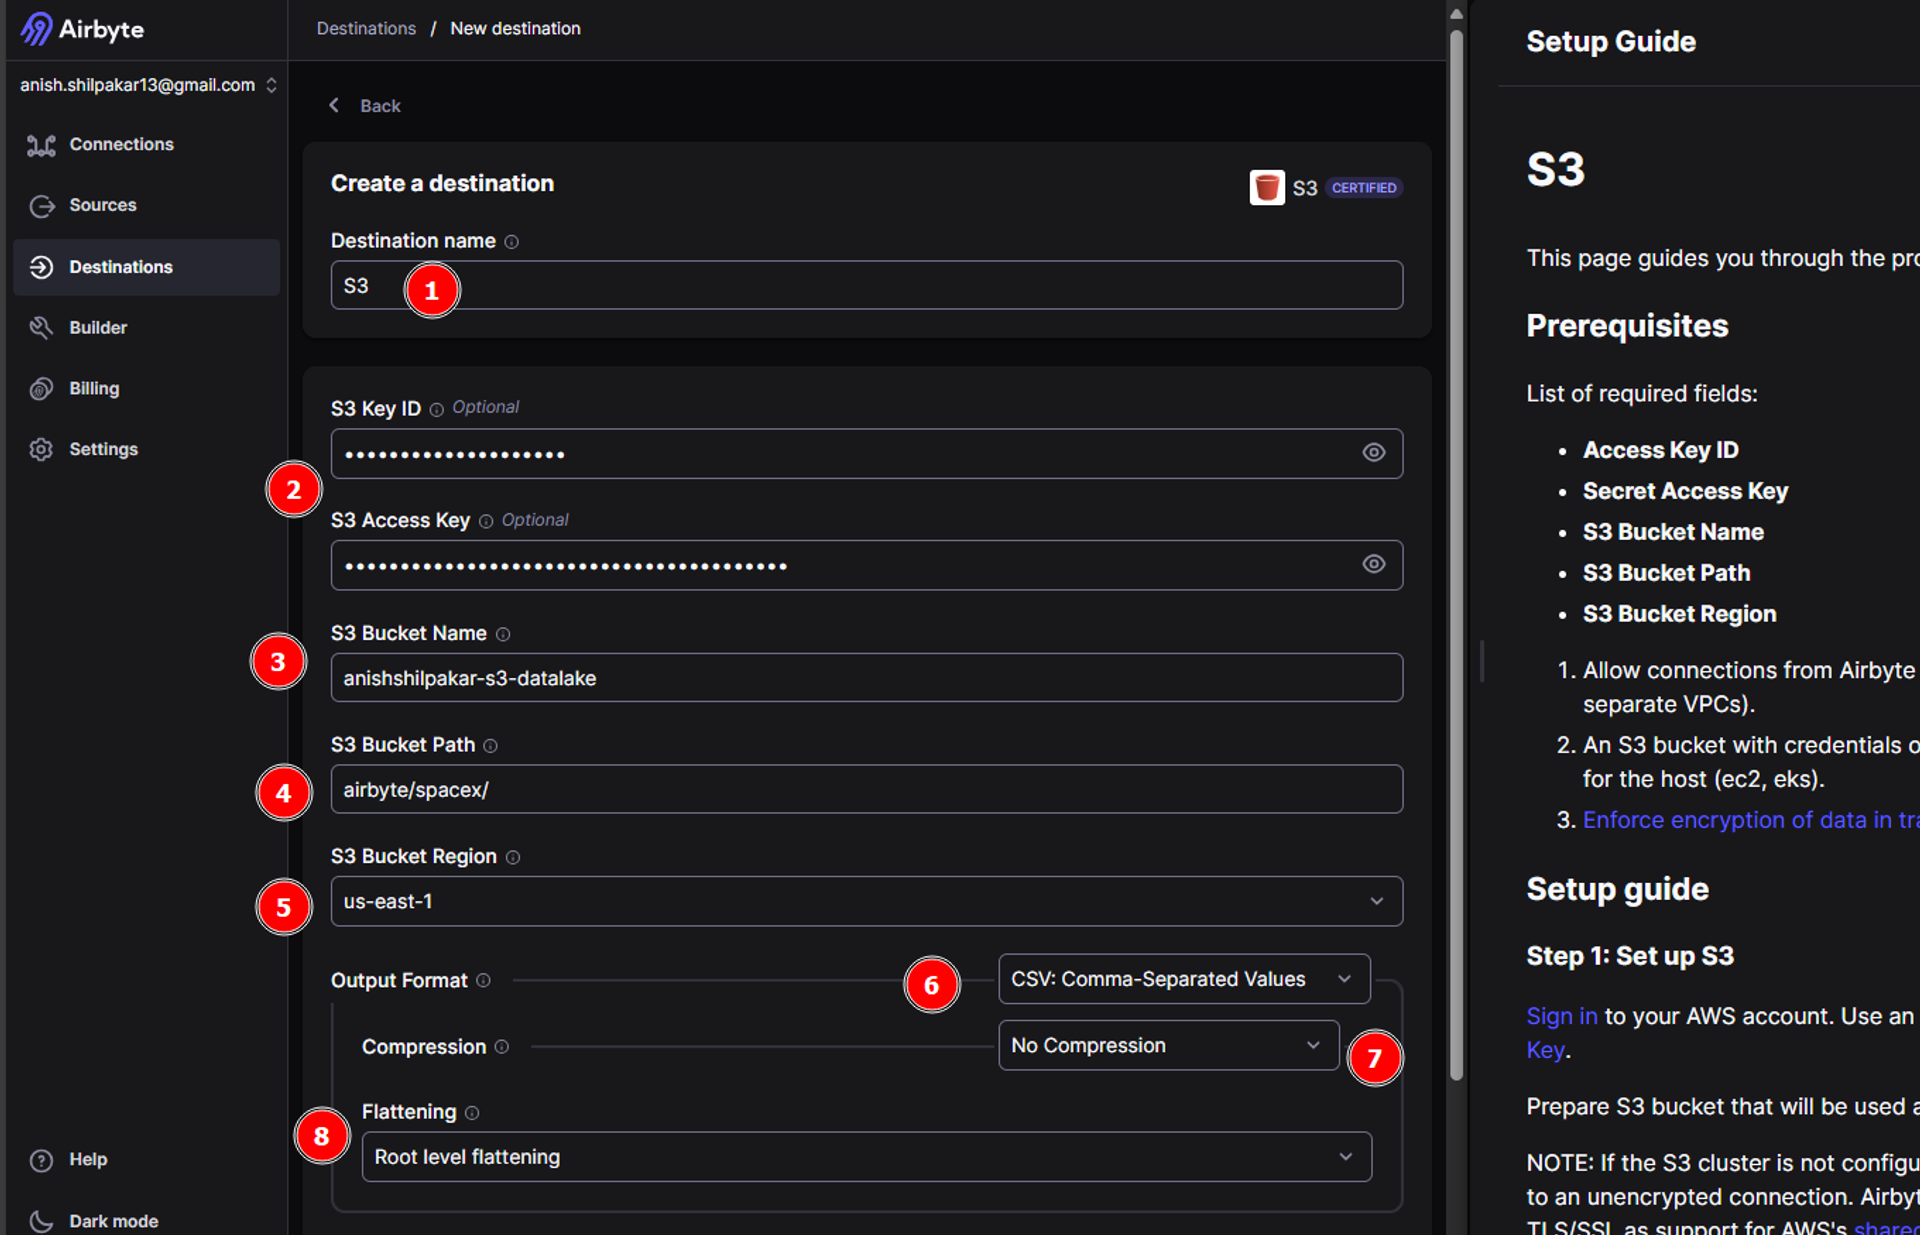
Firstly provide a meaningful name for the destination connector
Then we need to provide the S3 key ID and S3 Access Key for the IAM user/role in the AWS account. This is used for authentication in AWS and will grant airbyte permission to upload the ingested data in your s3 bucket.
Thirdly, provide the name of the s3 bucket that was created for the data lake.
Then provide a bucket path up to your spacex folder.
Then we need to provide the region where s3 bucket is hosted.
In the output format, choose an output format between CSV, JSON, Avro, and Parquet. This determines how the data is stored in the destination.
Select a compression option. Choosing GZIP compression stores the data as compressed .gz files in your S3 bucket, reducing file size and aiding in faster data uploads.
Choose between storing data without any flattening or performing root-level flattening. No flattening stores all the data from the source inside a column called "airbyte_data" in JSON format. Root-level flattening processes the data from the source at the root level, resulting in better-processed data.
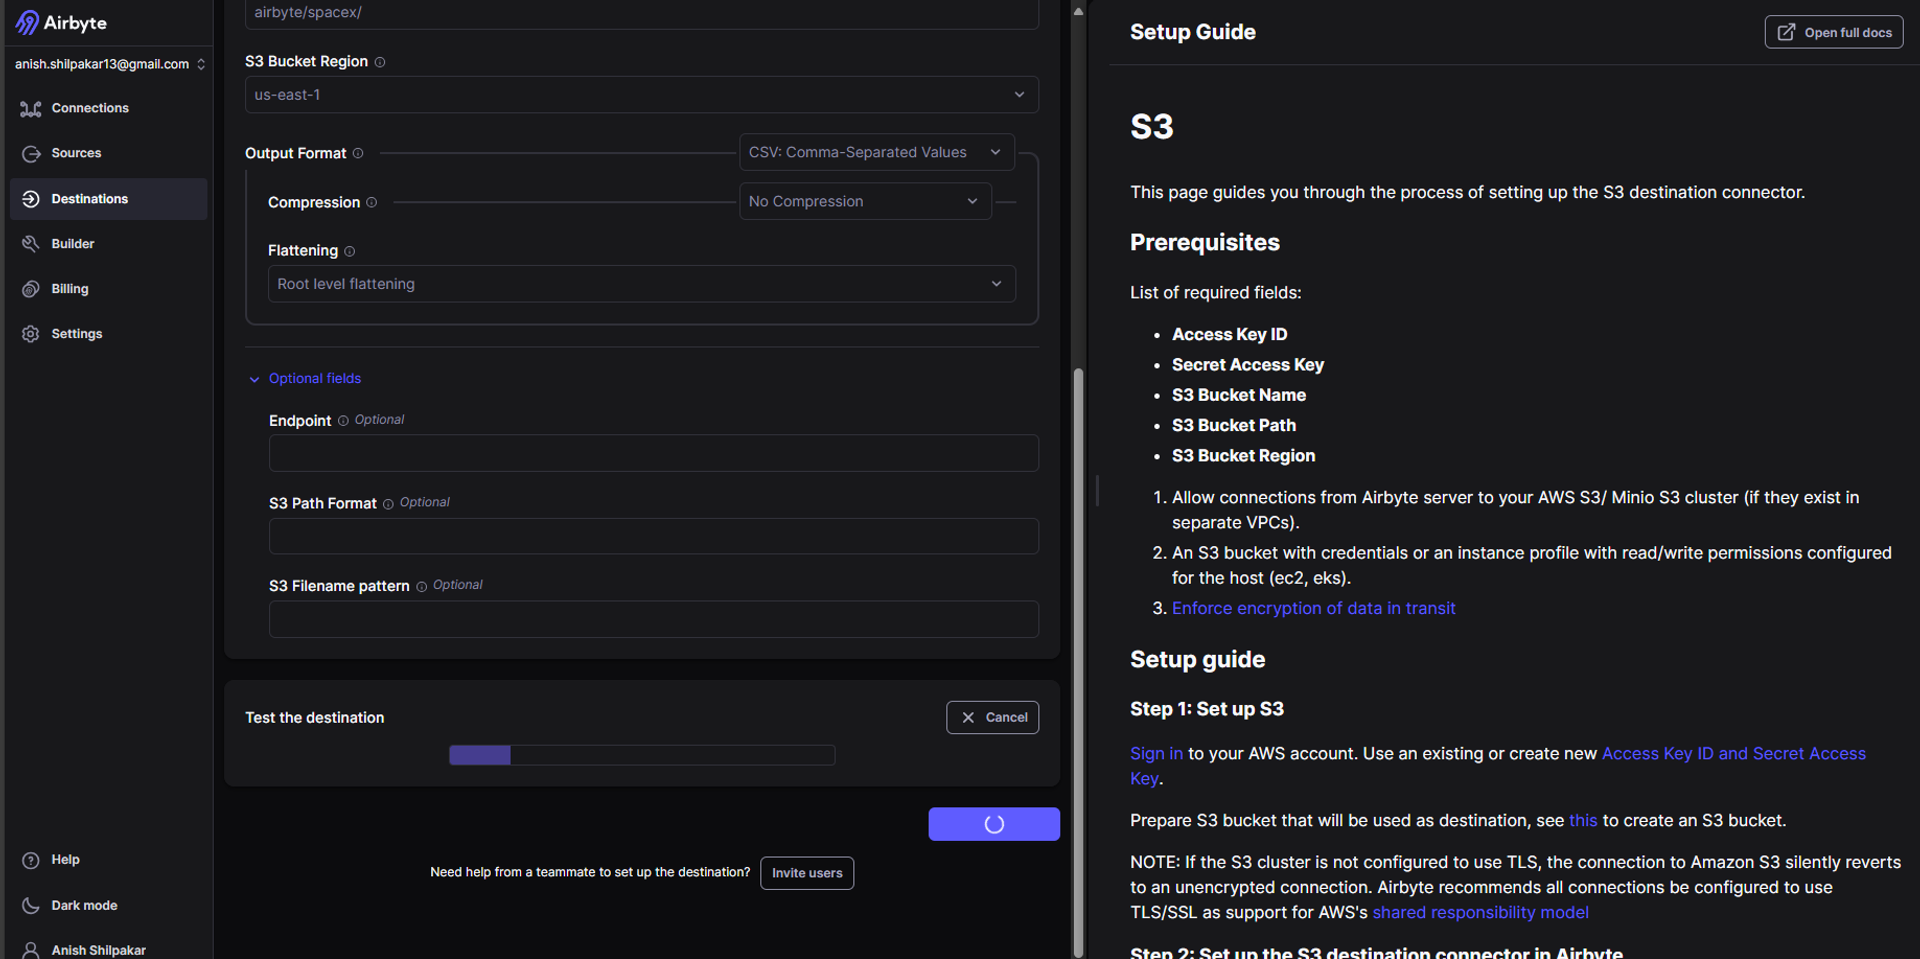
Additionally, there are optional fields where we can specify the S3 endpoint, S3 path format for organizing the data file inside the S3 bucket directory, and S3 filename format for the files stored in the S3 bucket. The endpoint option should be used if we use other object stores that use the S3 protocol, such as Minio object storage, as a data lake for the destination. The setup guide can be found on the right side, which guides us to configure the S3 destination connector.
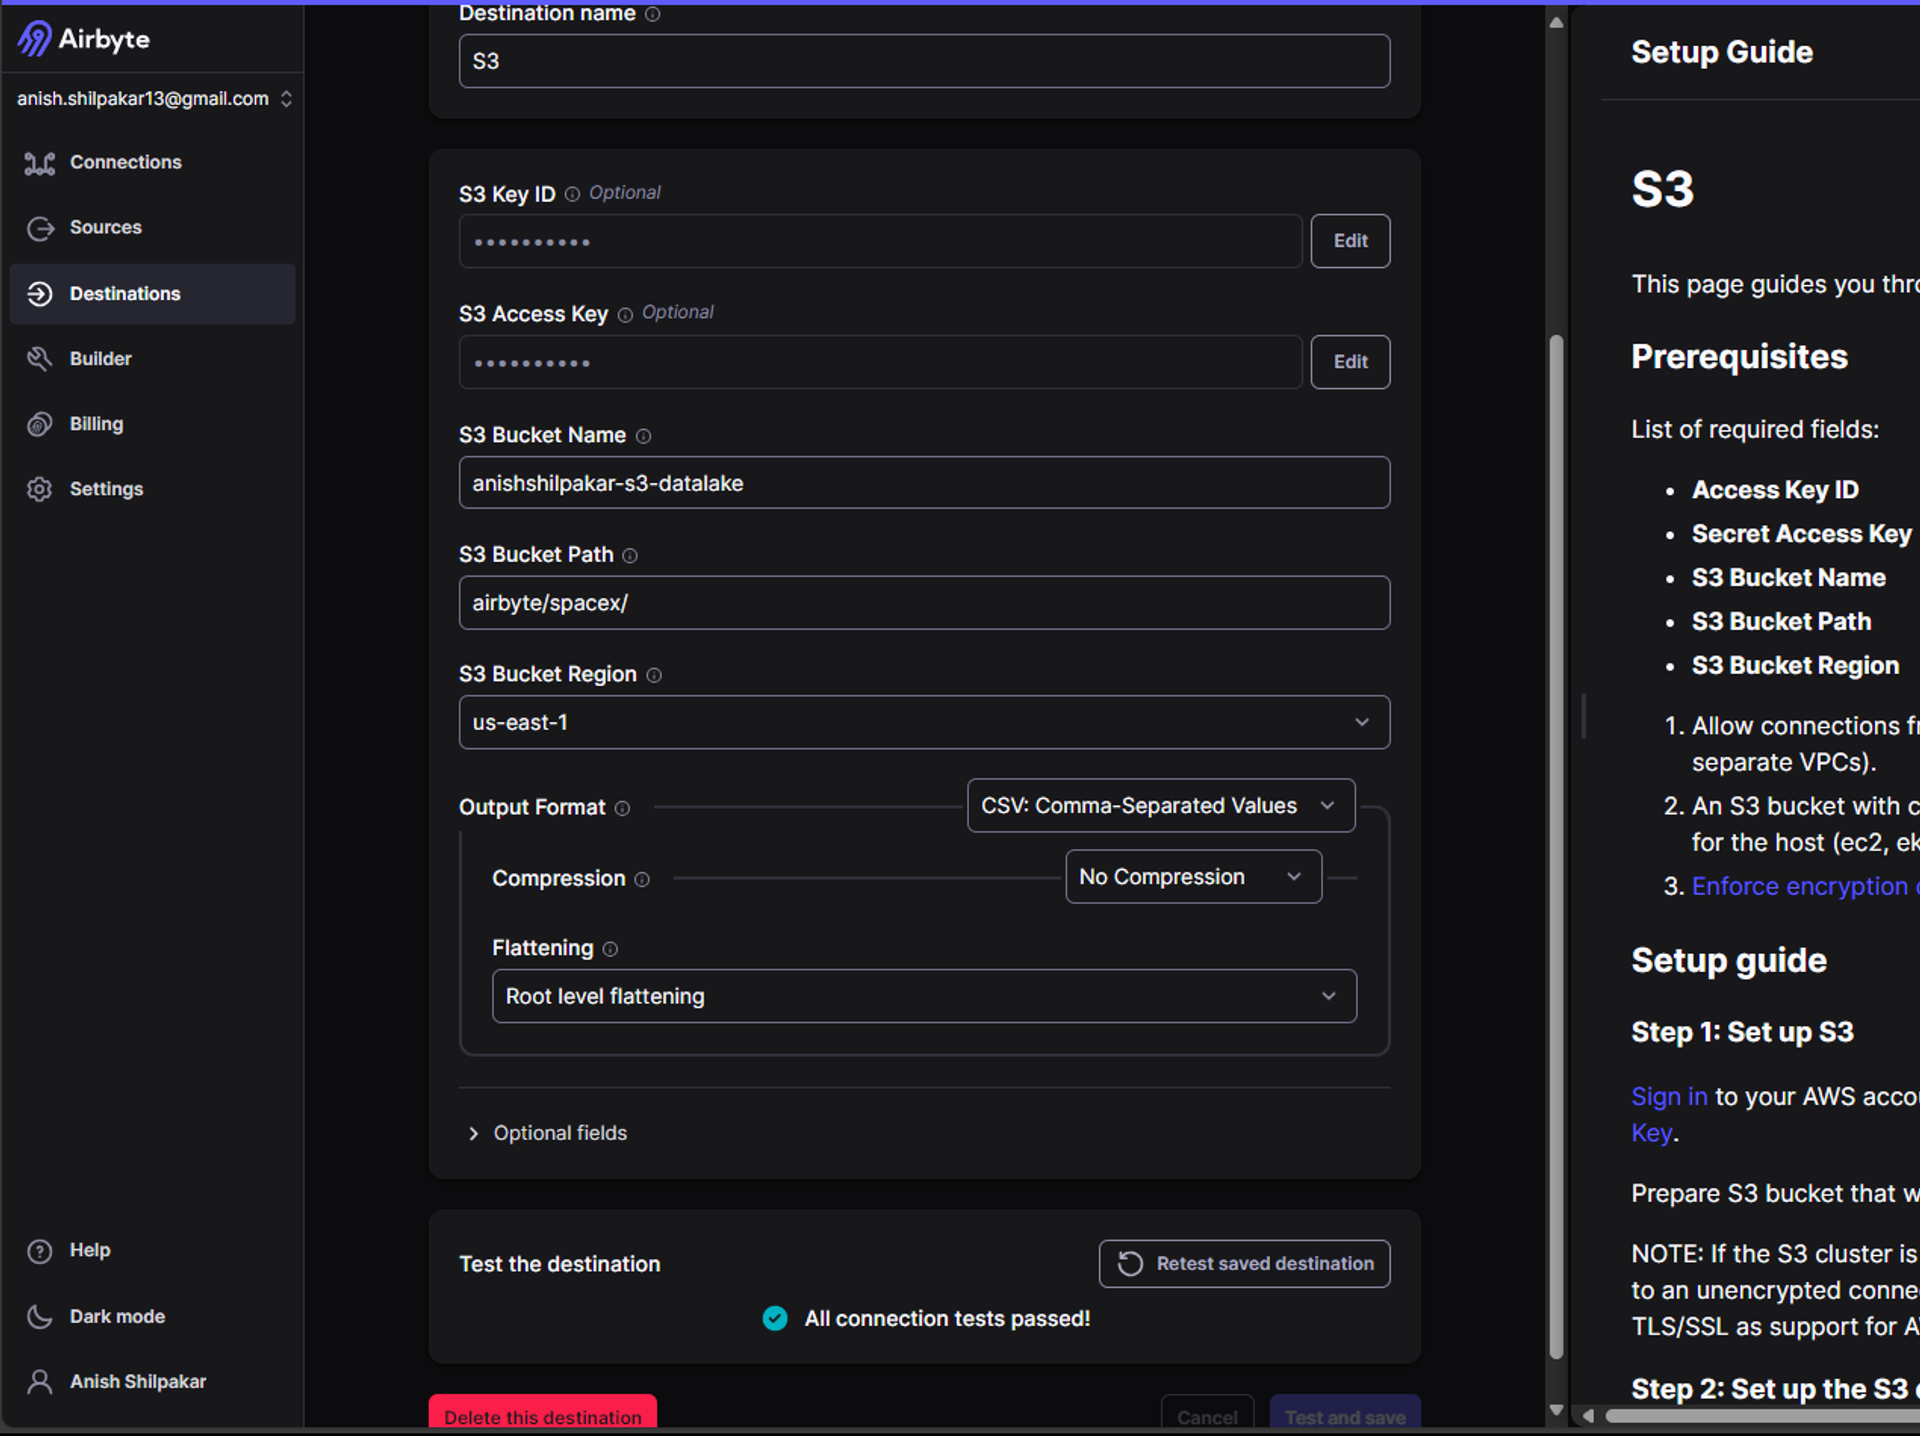
Once all the settings are configured, click on "Setup Destination." Airbyte will then start some tests on the connection, and if all the connection options are correct, we will see an output indicating that the connection looks good as shown below:
3. Configuring the ELT connection in airbyte between source and destination.
Once, the source connector and destination connector are correctly configured and all the tests are passed, we can configure the ELT connection between source and destination.
For this, the following steps are performed.
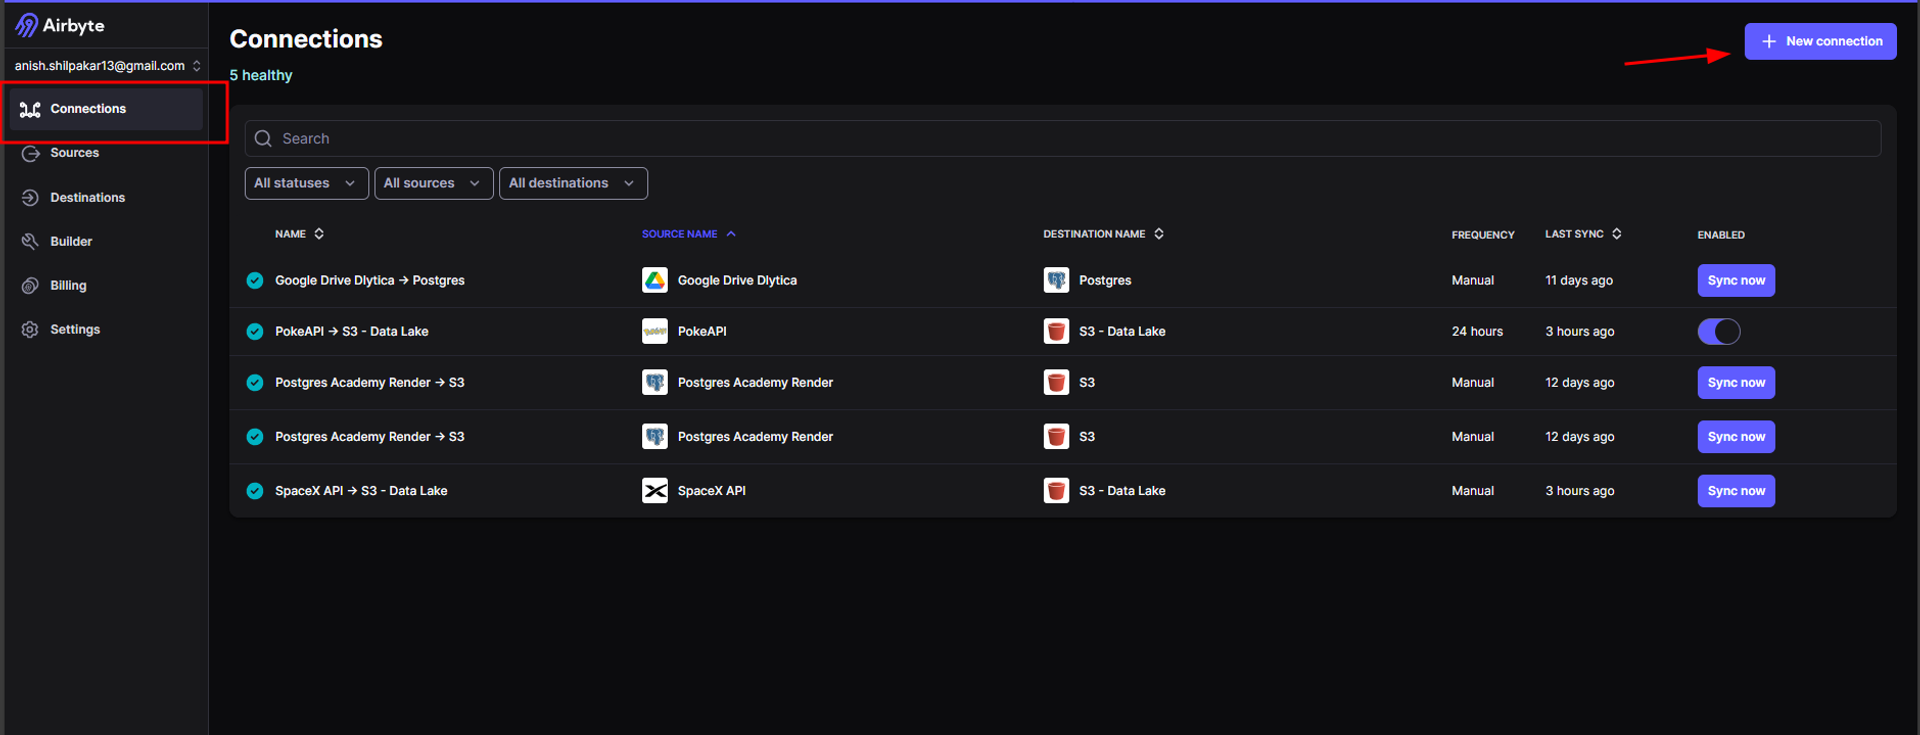
a.Navigate to the "Connections" page in the Airbyte console and then click on "New Connection.”
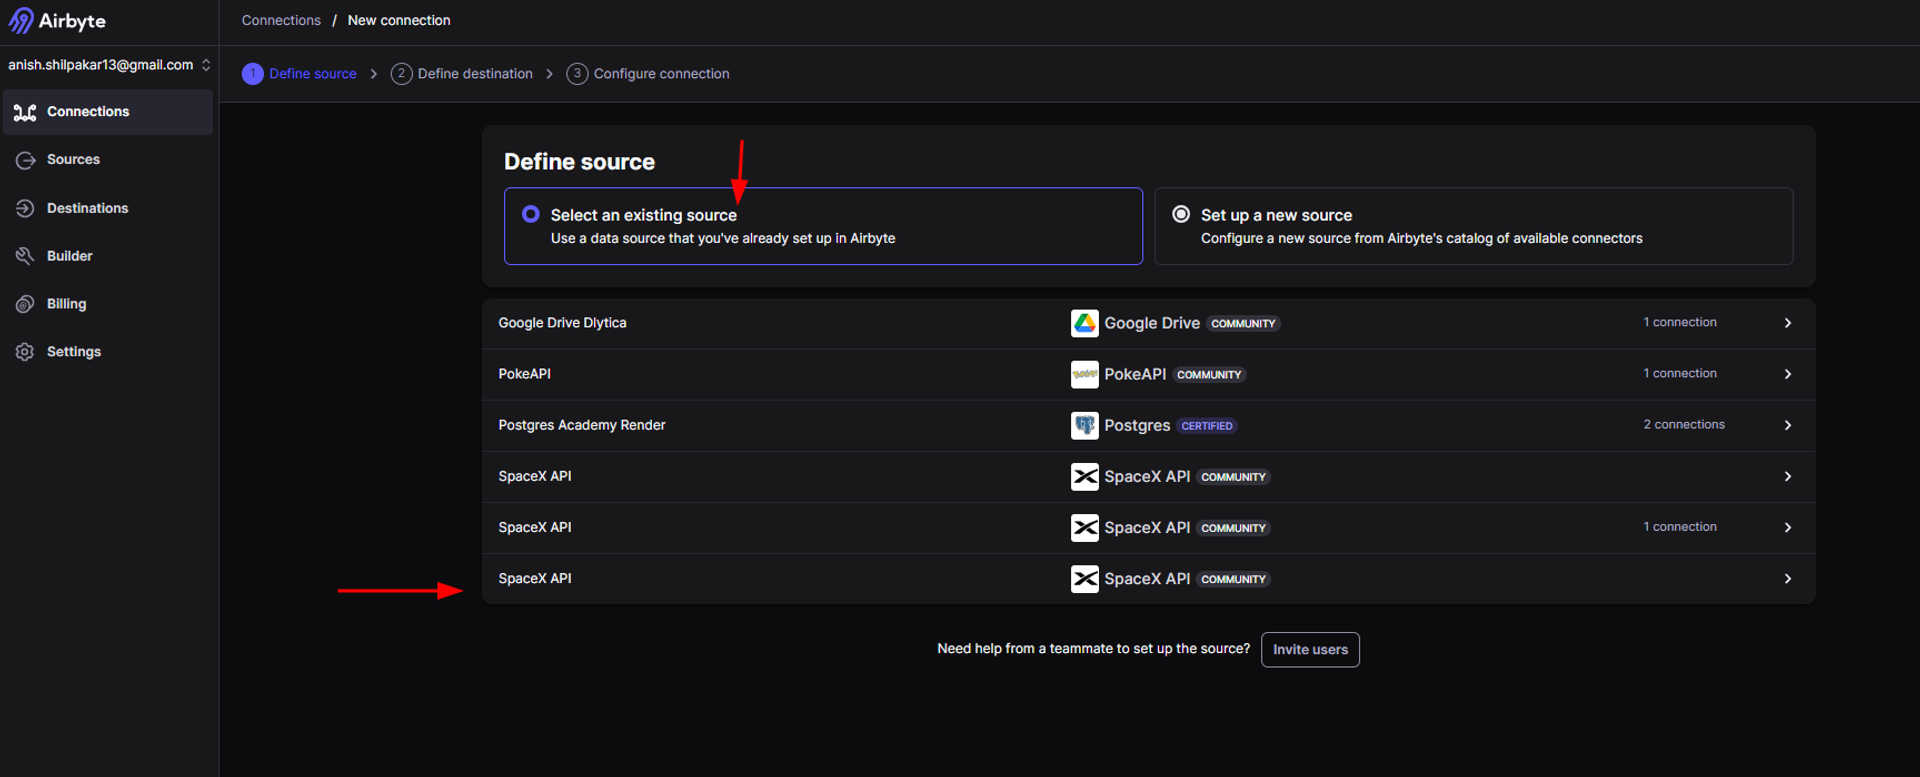
b. In the "Define Source" page, click on the option "Select an existing source" and then select the source connector for our SpaceX API.
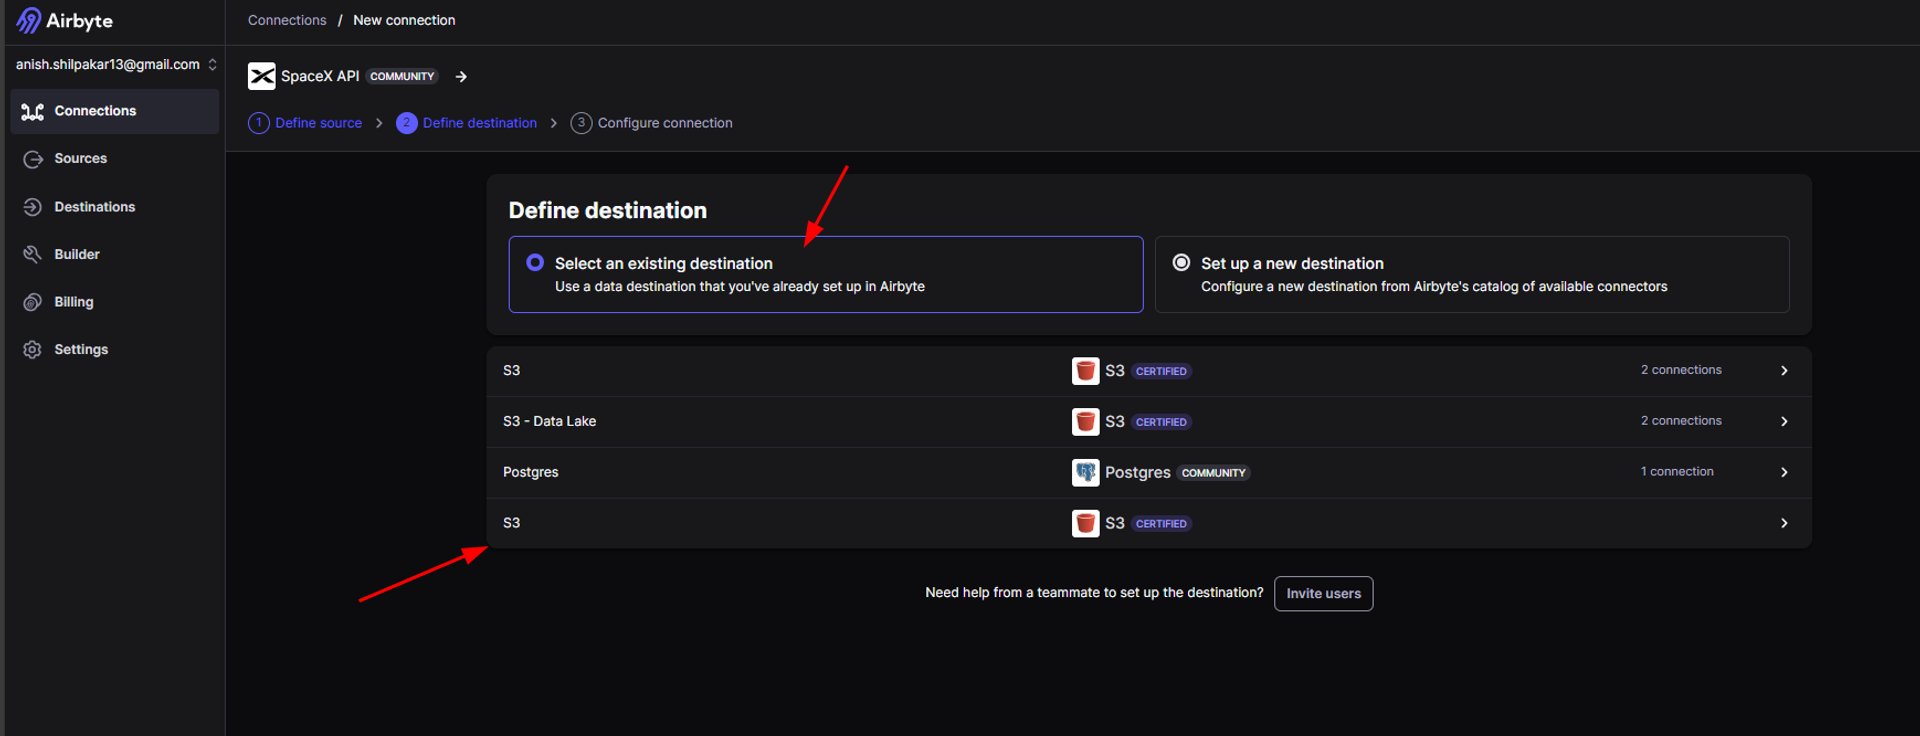
c. In the "Define Destination" page, click on the option "Select an existing destination" and then select the destination connector for our AWS S3 data lake.
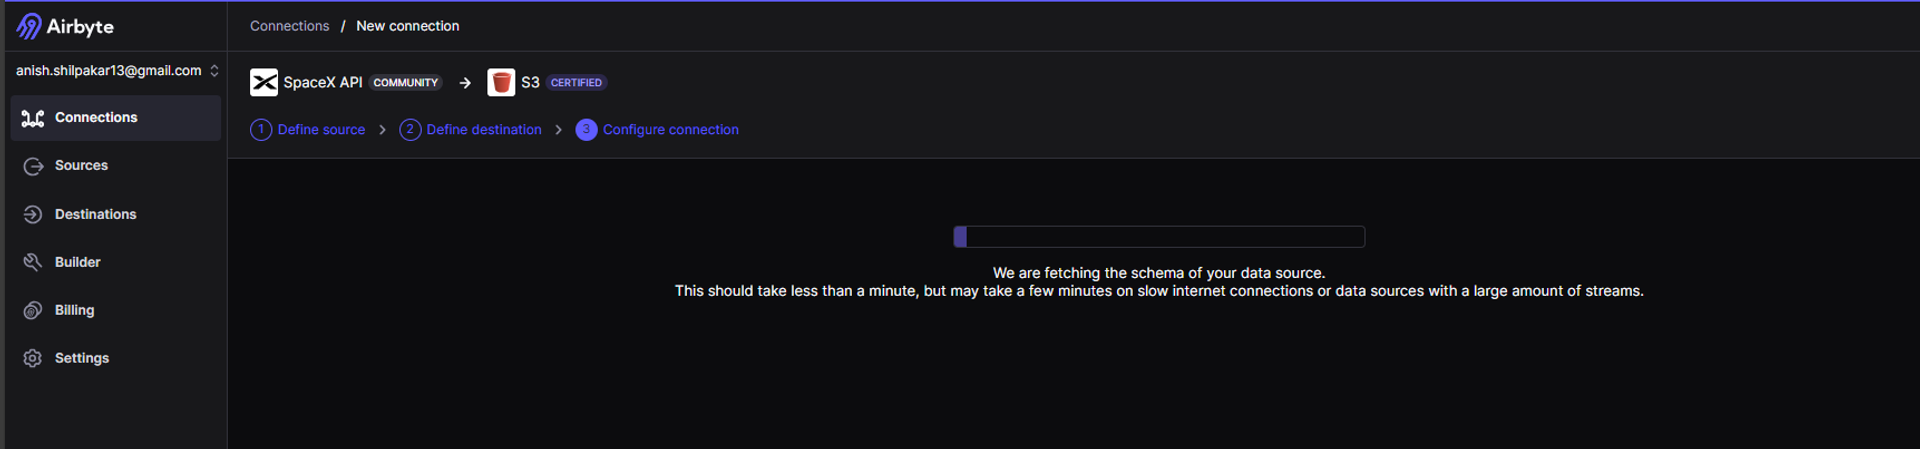
This will now display a page that shows fetching schema as shown below.
d. Once the schema has been fetched, We are redirected to a page where we can configure the different settings for your connection. These settings include the connection name, schedule type, replication frequency, destination namespace, destination stream prefix, mode to detect changes, and the options to activate streams that we want to sync and how we want to sync those streams.
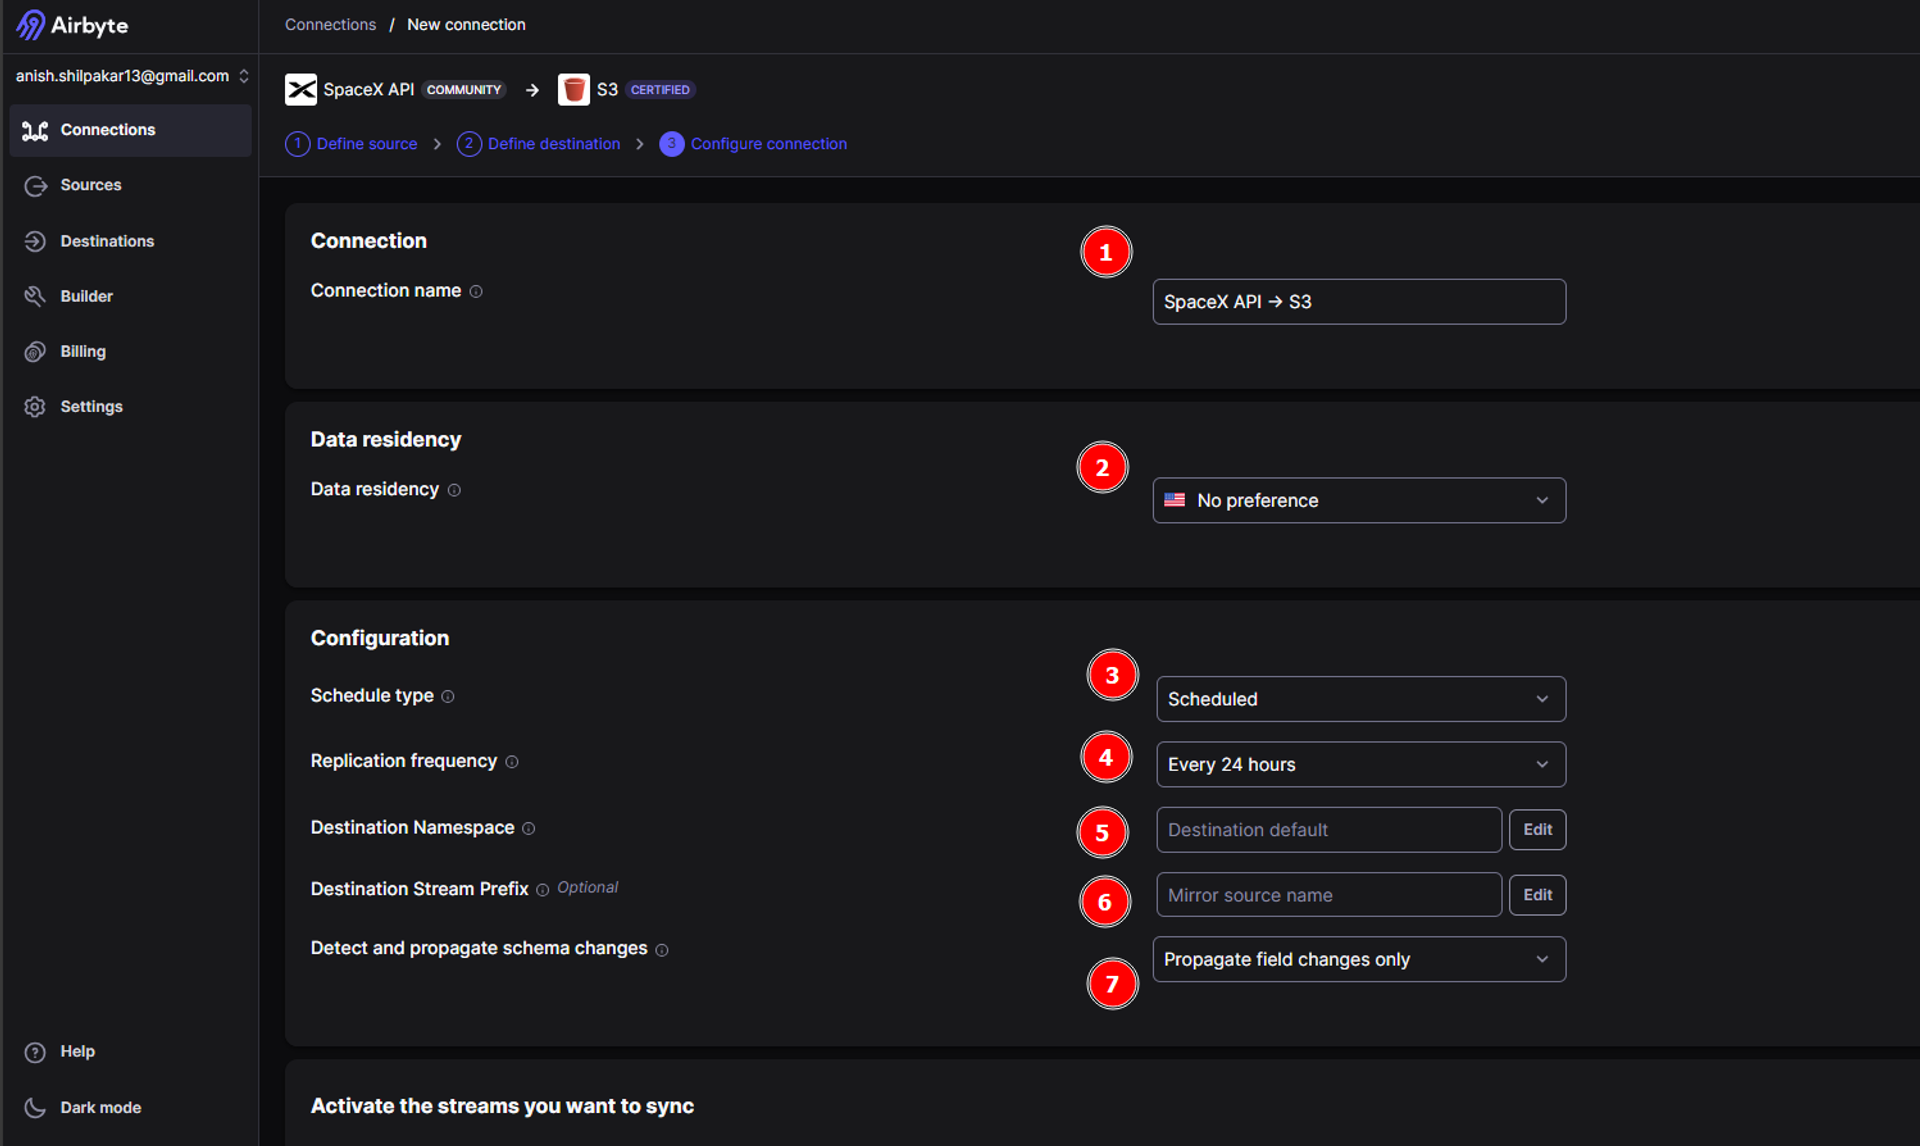
Firstly, we should provide a meaningful name for the ELT connection
We can choose where our data will reside by choosing between locations like US and EU.
Airbyte offers three types of sync schedules: scheduled sync, manual sync, and automated sync using cron jobs. For now, we are using a scheduled sync to automate the running of this ELT pipeline as per the specified schedule.
In the replication frequency, we specify at which intervals we want to perform sync between source and destination.
The destination namespace defines where the data will be synced in the destination folder. Here we can configure folder structure for synced data files and how to name the folders for synced data.
The destination stream prefix can be used to add a prefix before every data folder is synced and is an optional field.
In the next option, we can choose whether to automatically propagate field changes in the source or to propagate both field and schema changes in the source or to manually approve changes.
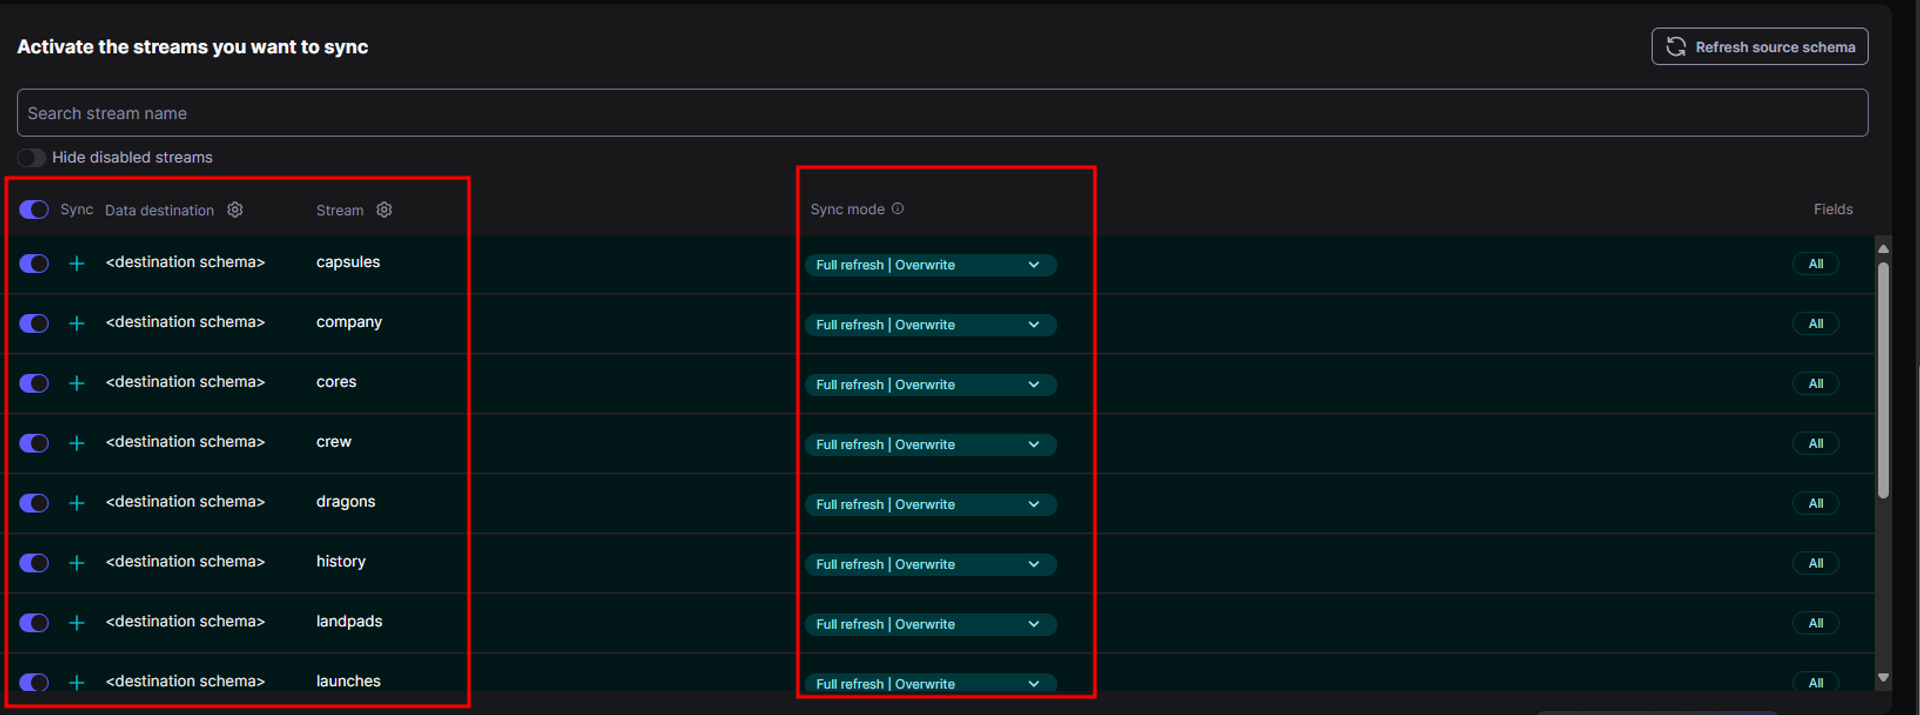
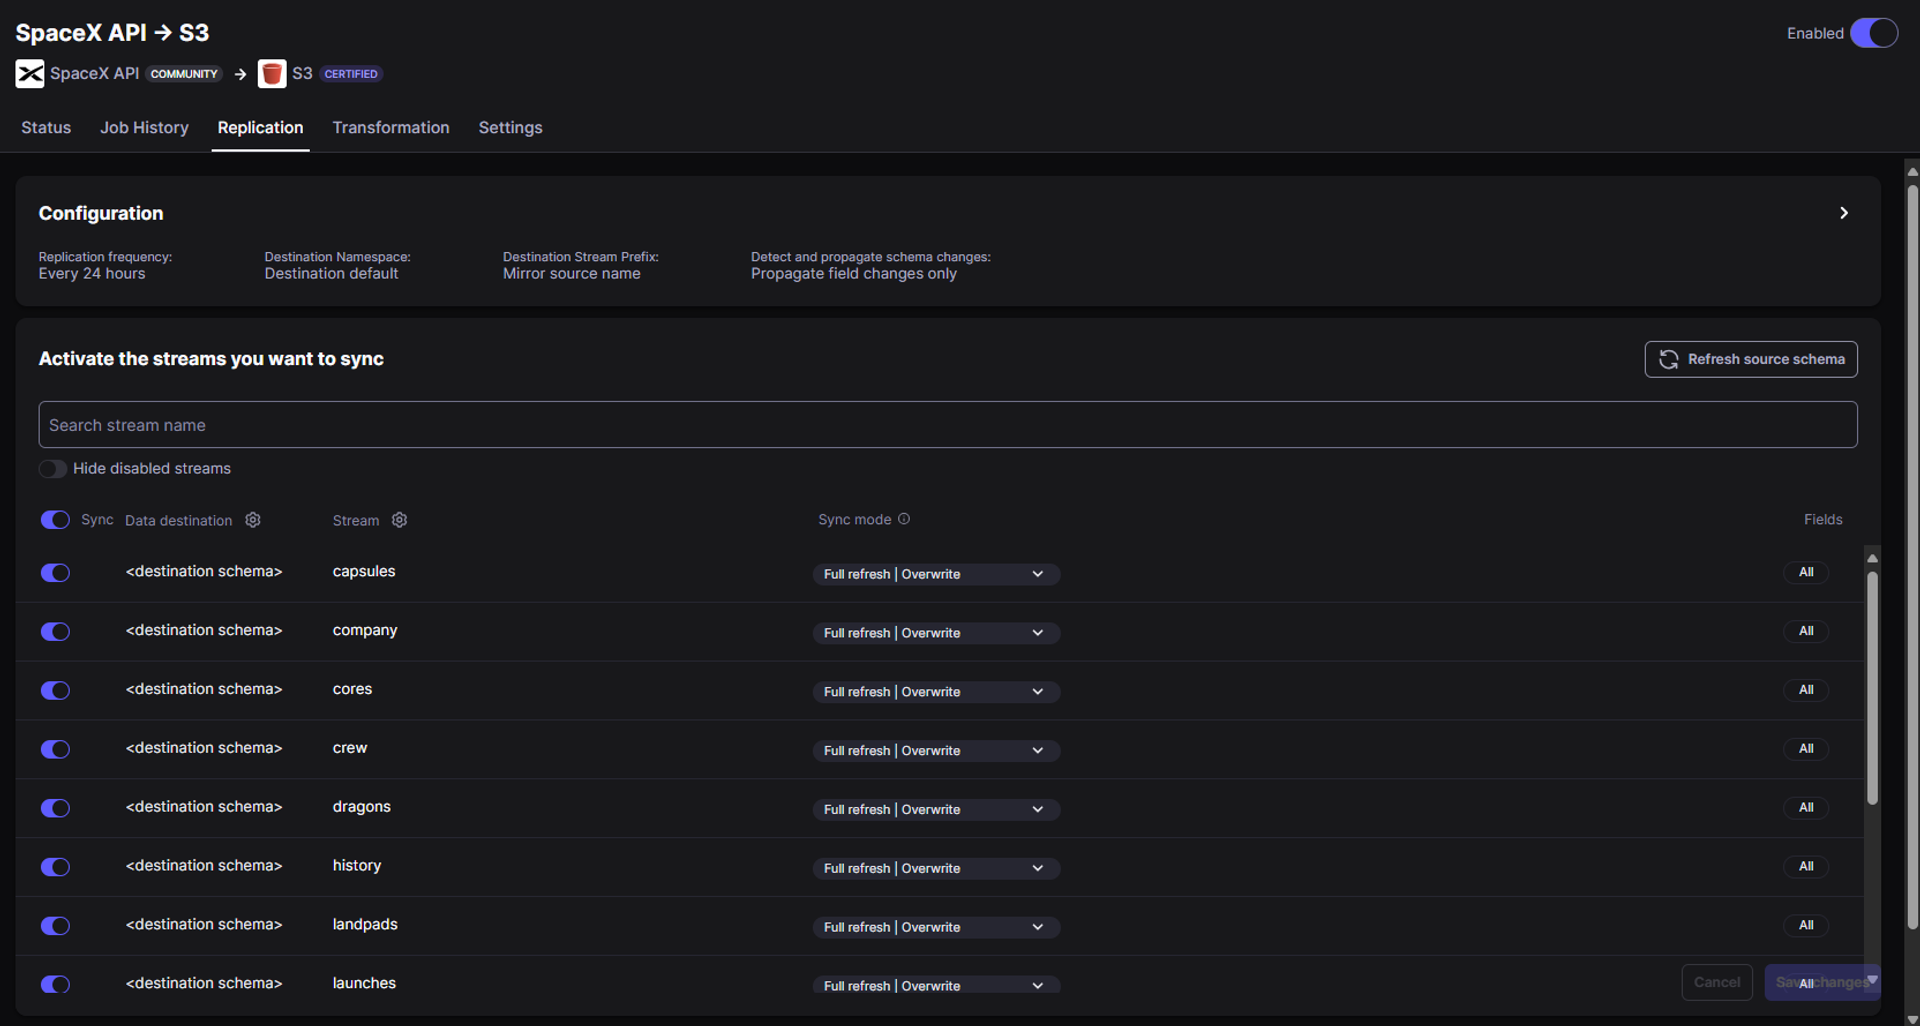
In the next step, we need to activate the streams from the source that we want to replicate/ingest in our destination, so folders are only created for the streams that are activated here inside the destination folder.
Also for each activated stream, we have to select a sync mode. In the sync mode, we have options for full refresh and incremental load in the source side and whether to overwrite all data or append new files on the destination side.
Once all the settings are properly configured, we click on "Setup Connection" and can then move on to run the ELT connection and perform data ingestion from our REST API to the S3 data lake.
Running ELT pipeline in Airbyte
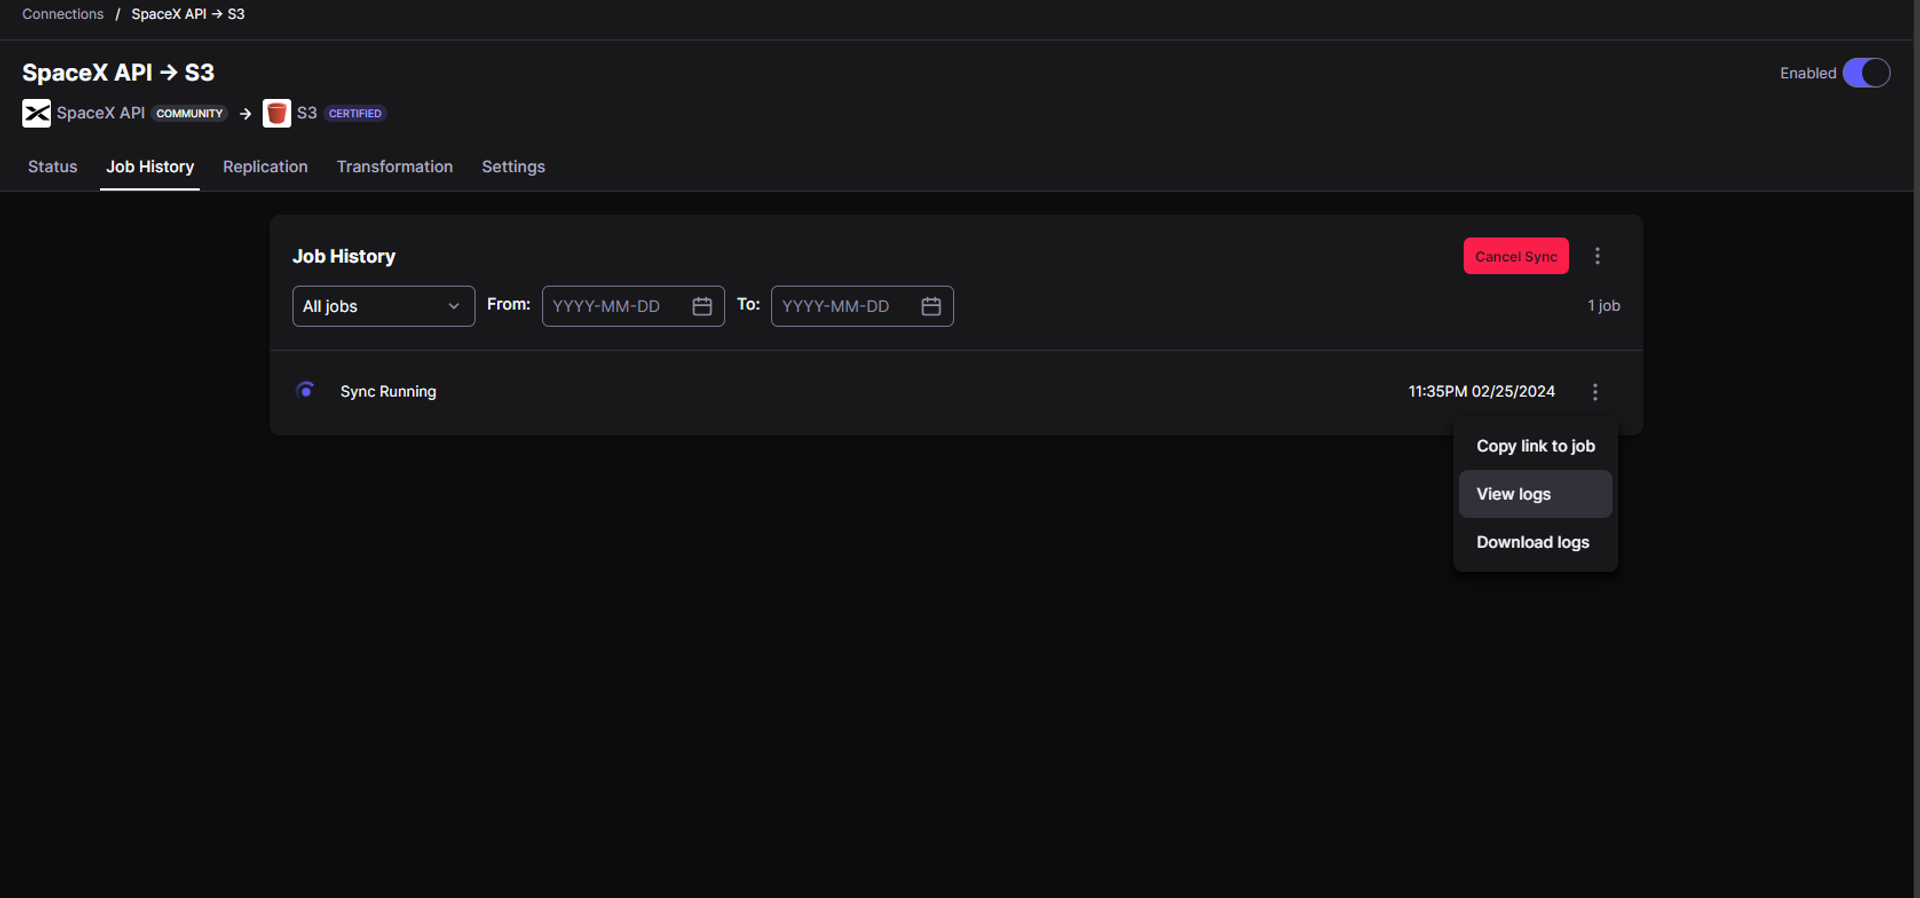
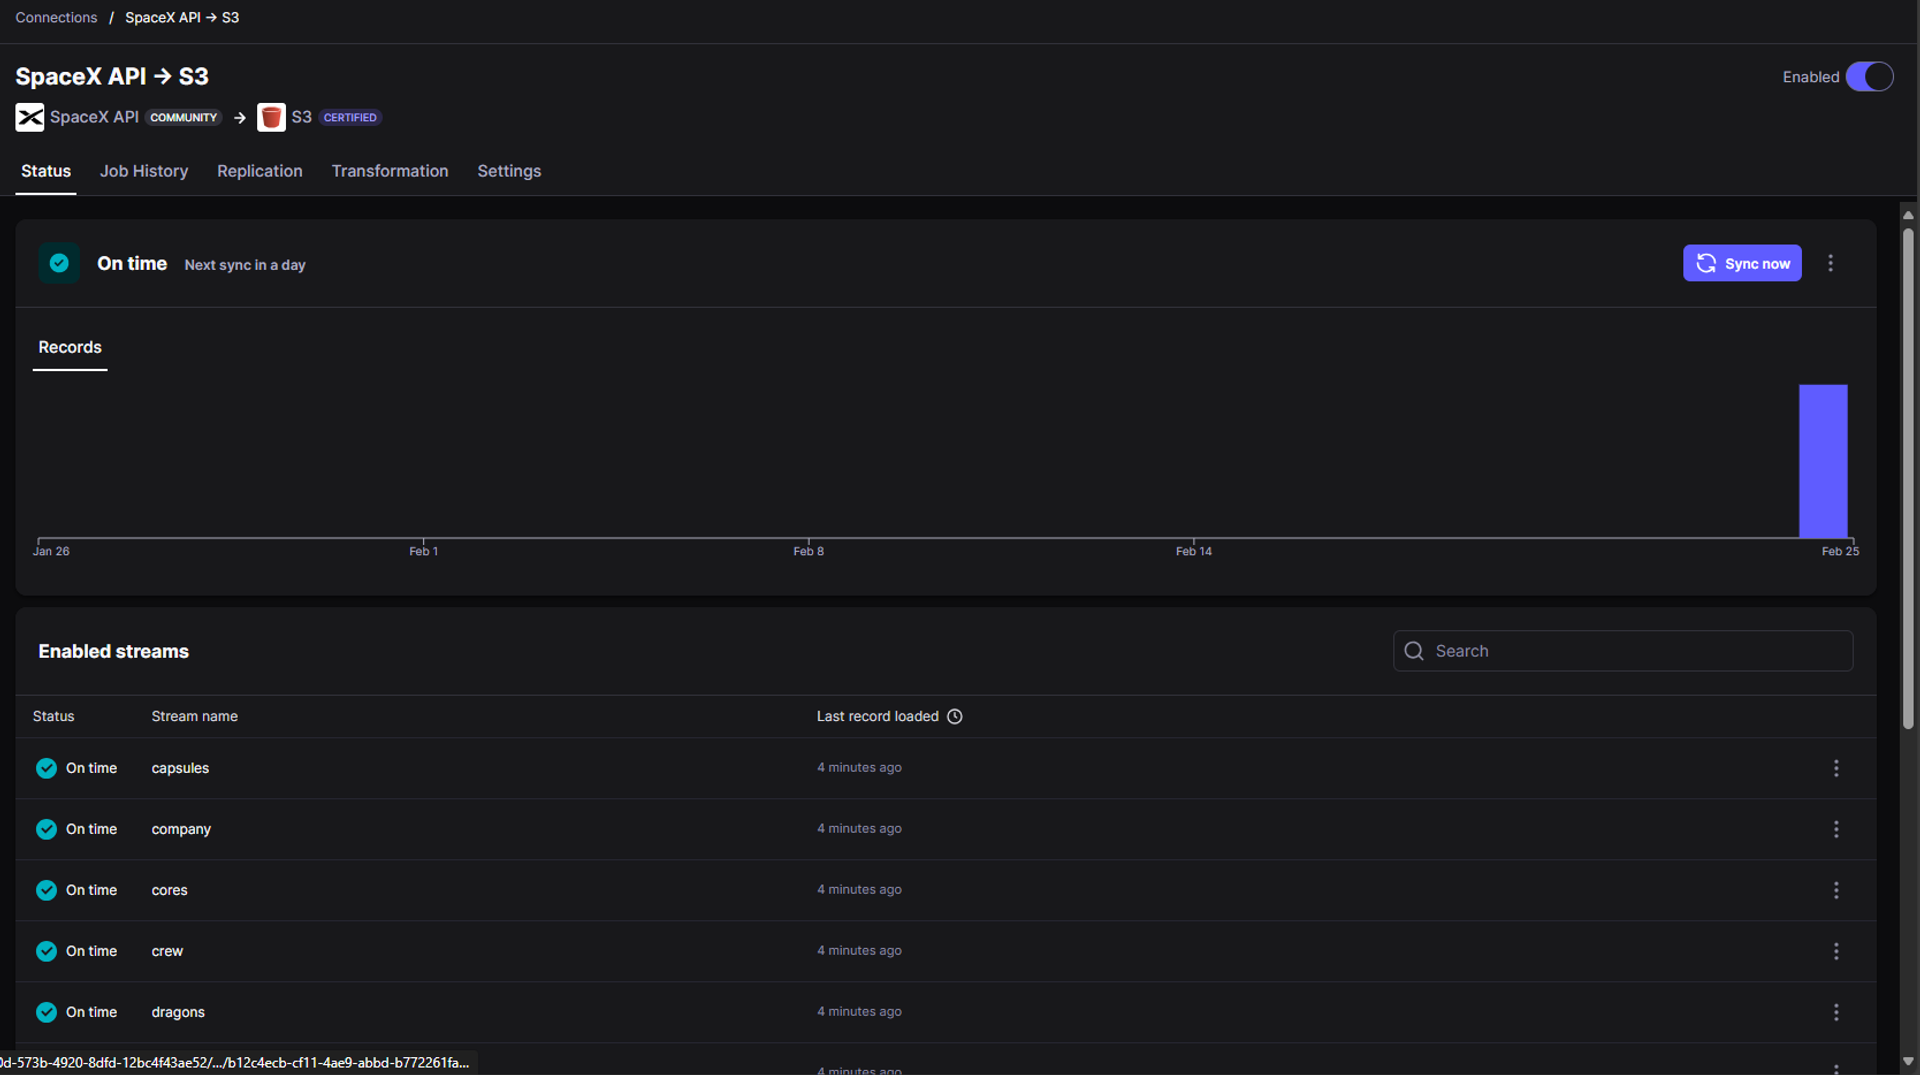
When we perform a scheduled sync, the sync is started once we click on "Setup Connection," and we can see the progress of data sync on the status page.

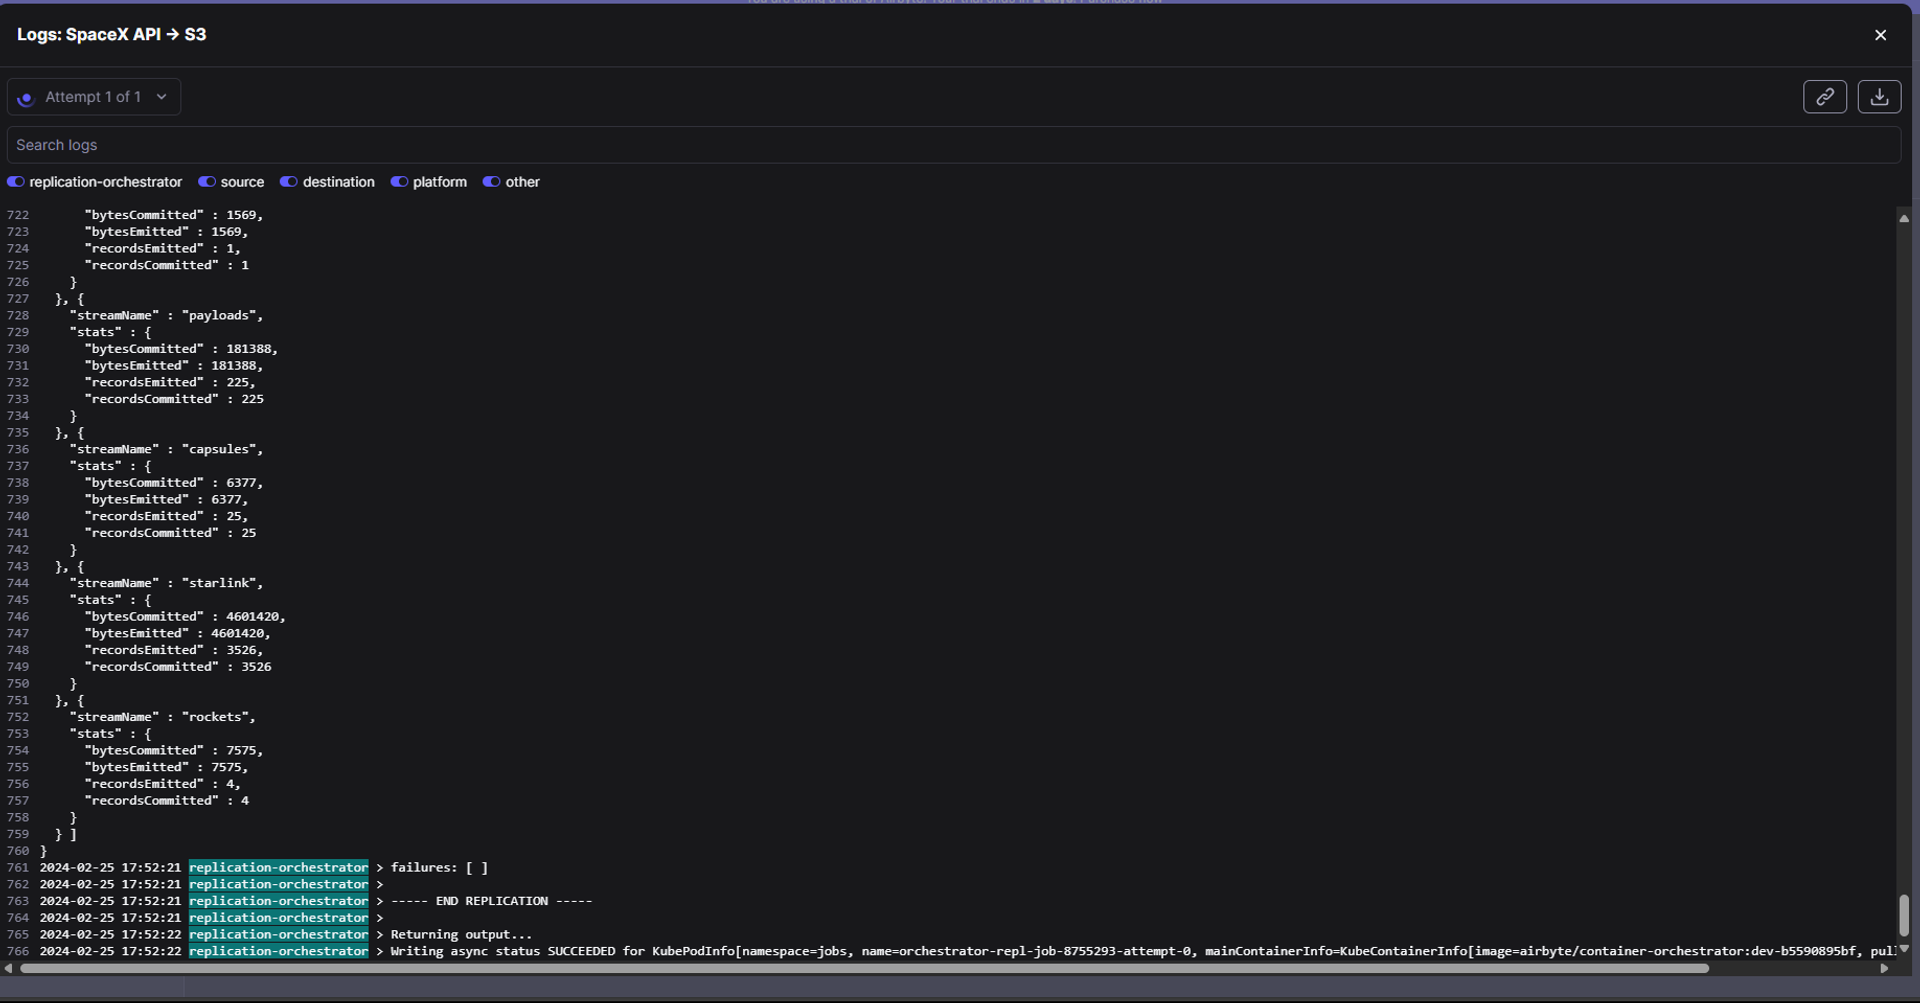
To get more details about the data sync, we can navigate to the Job History page, where we can see the currently running jobs and also check and download logs for that running job.
Once the ELT connection has been established, we can still reconfigure the source streams to be synced and the sync mode for the streams by navigating to the Replication section.
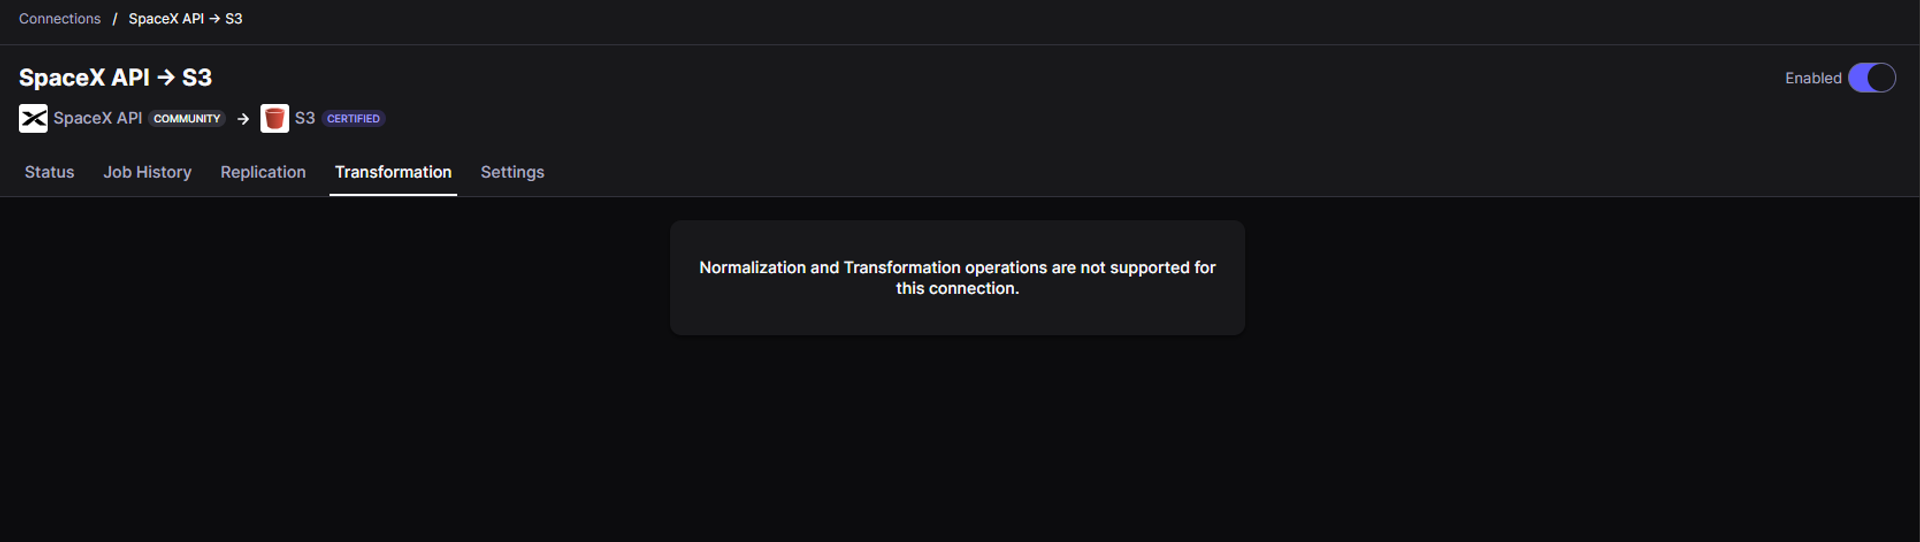
Similarly, the Transformation section provides options to perform post-sync transformations on the ingested data. However, at the moment, post-sync transformations are limited to specific destinations like RedShift, Postgres, Oracle, MySQL, MSSQL, Snowflake, and BigQuery, and are not available for S3 buckets.
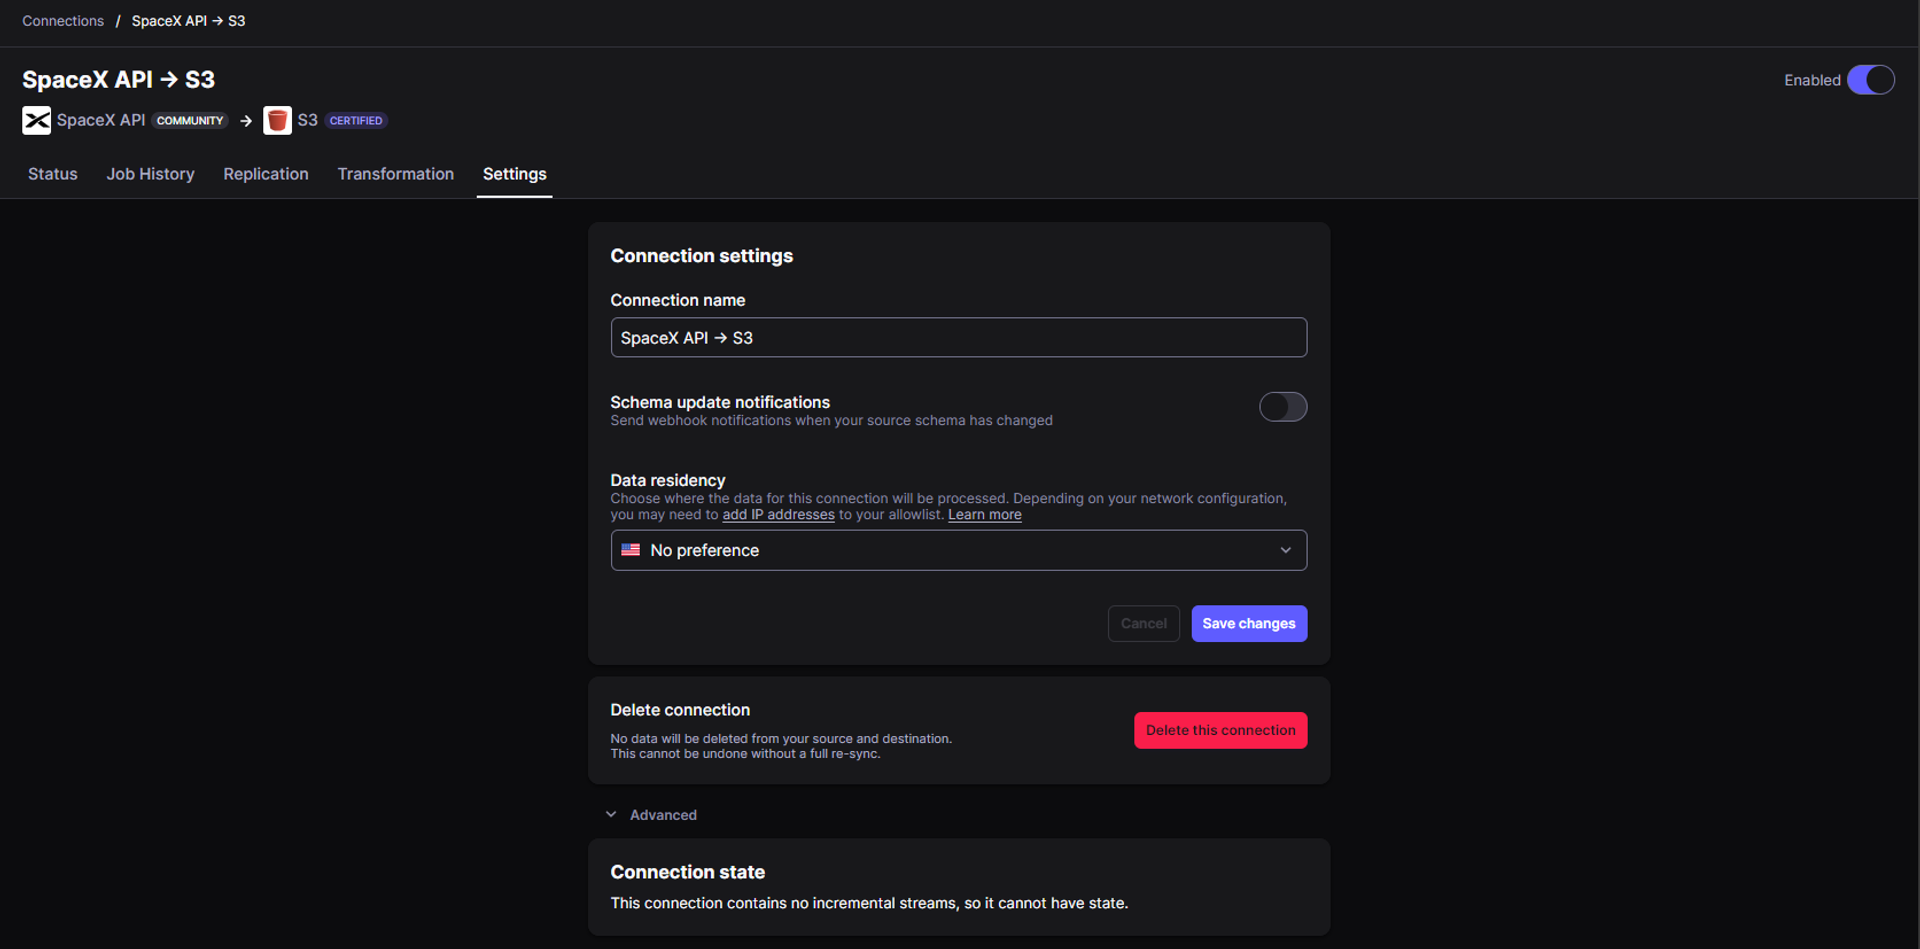
In the Settings section, we can configure the name, schema update notifications, and data residency, and have the option to delete the connection.
Once the data sync has been completed, we can see the output as shown below in the Status section and Job History section

Now we can verify whether the data has been correctly replicated or not by navigating to the AWS S3 Data lake bucket.
Verifying Results in AWS Data Lake
Now if we navigate to our s3 bucket in the AWS management console, we can see the data being ingested successfully as shown below
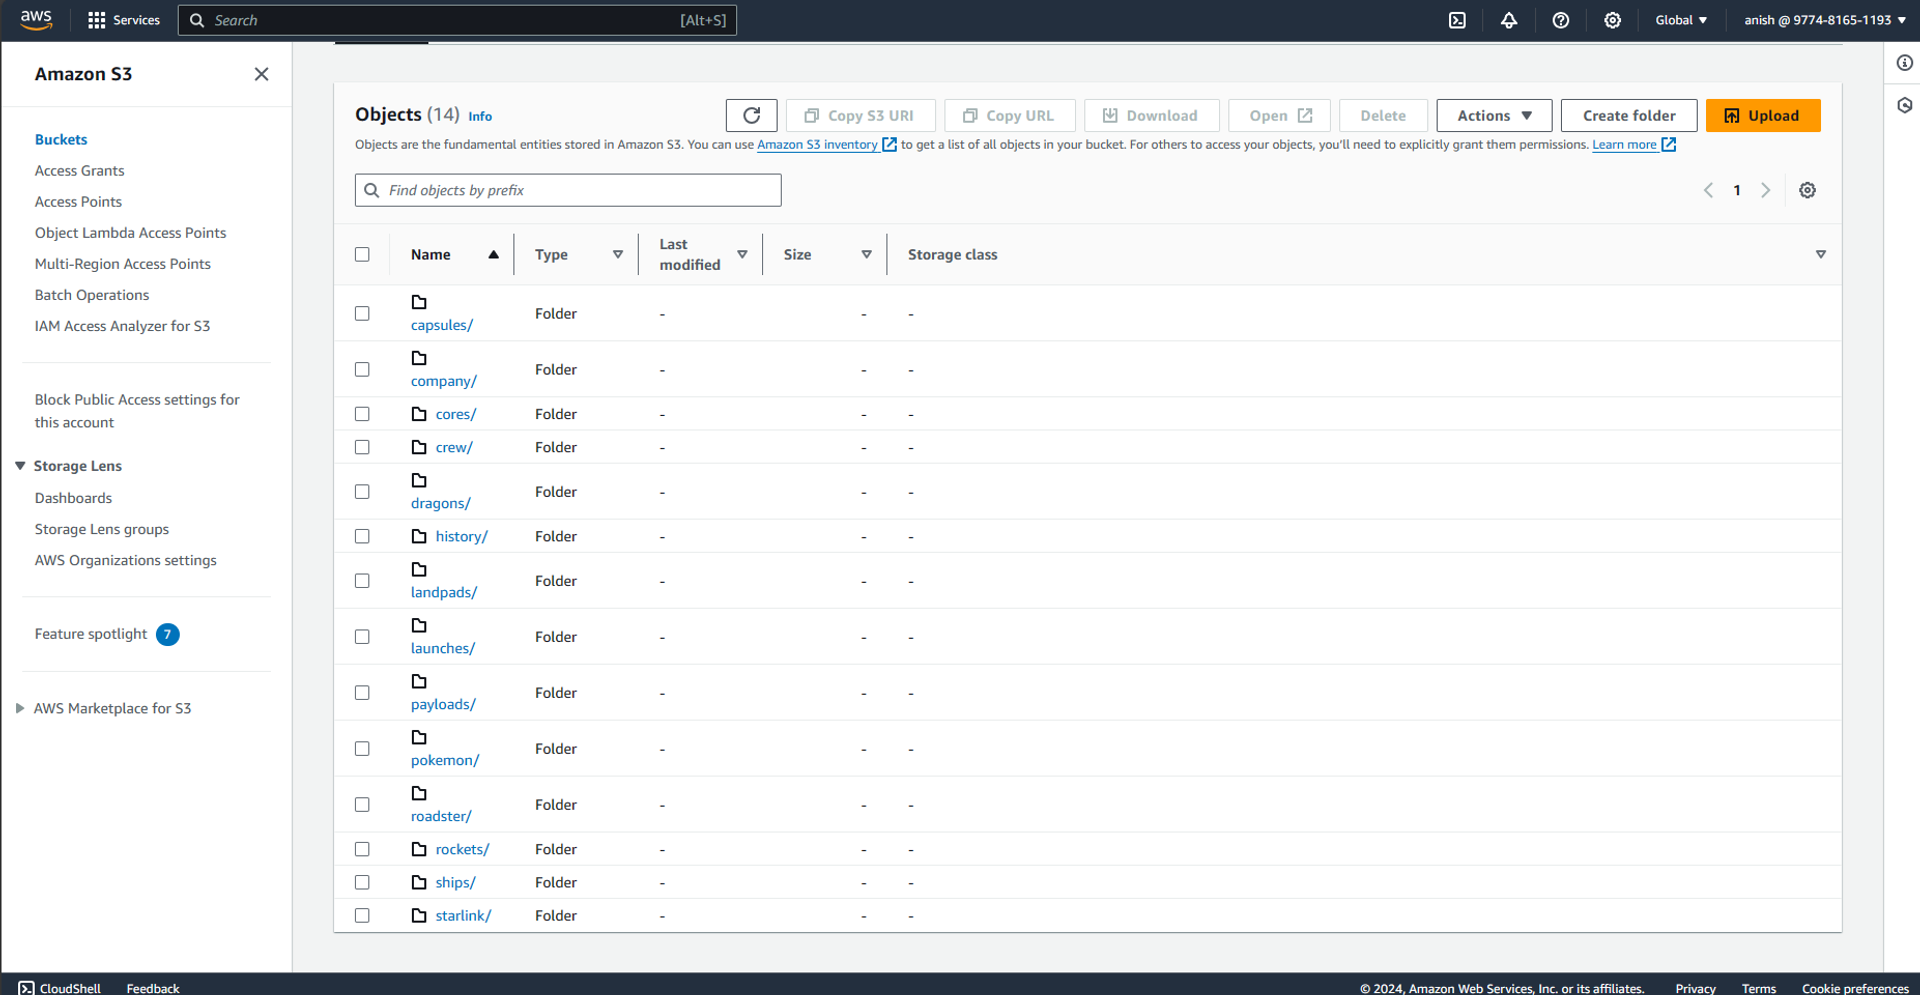
Different folders have been created for the different data streams ingested using Airbyte.
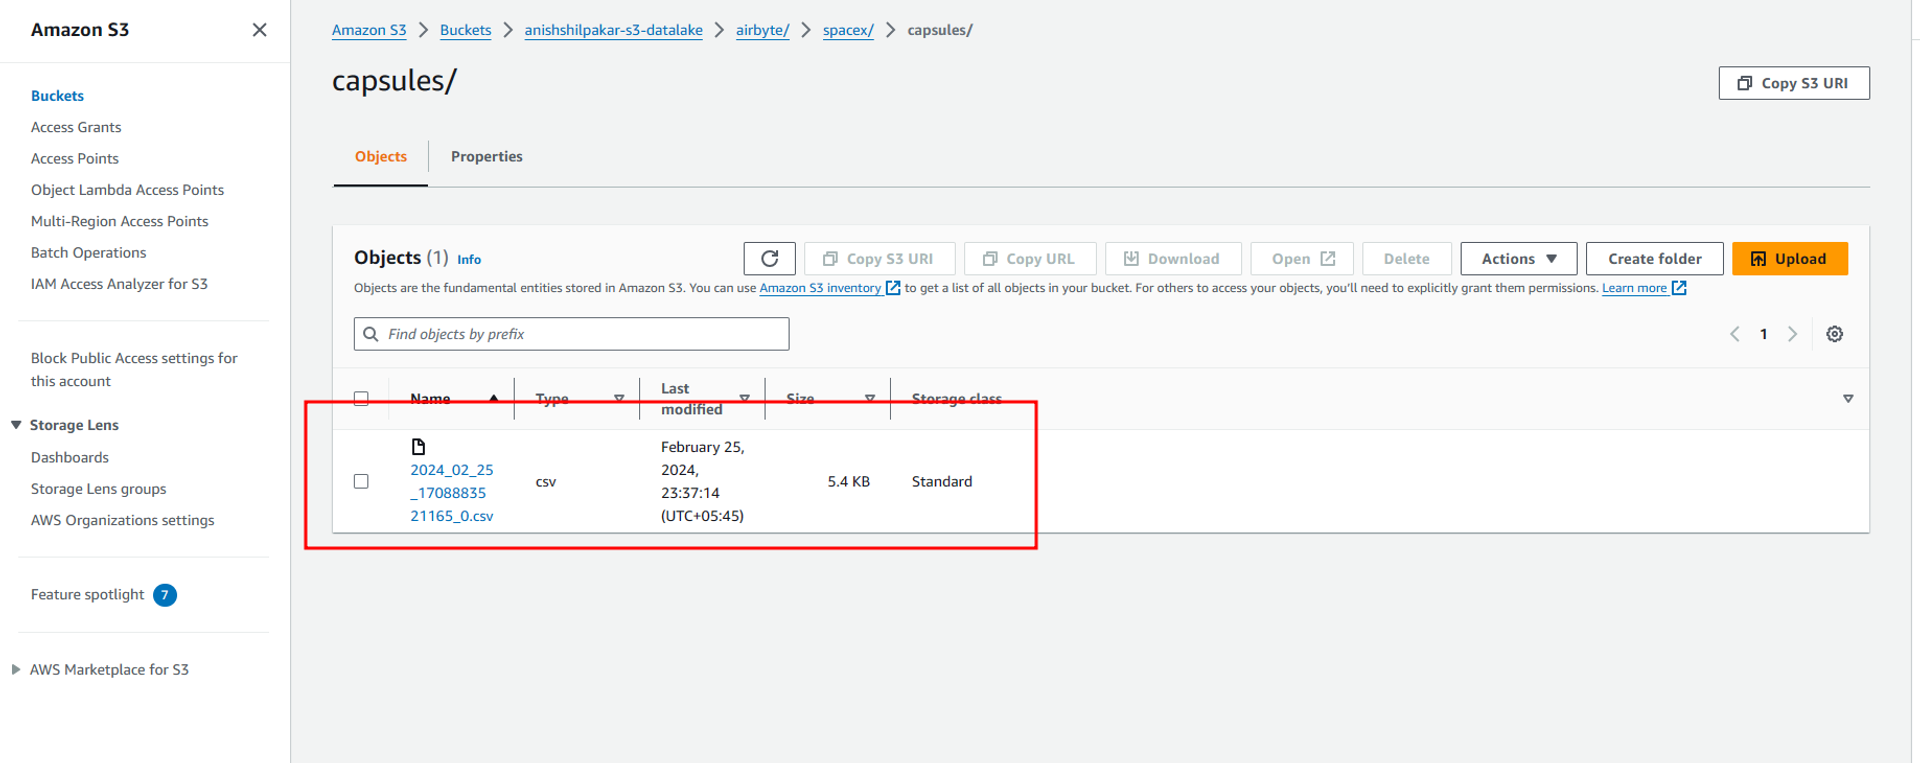
If we enter these folders, we can see CSV files containing the actual data ingested from the API in our ELT process in Airbyte.
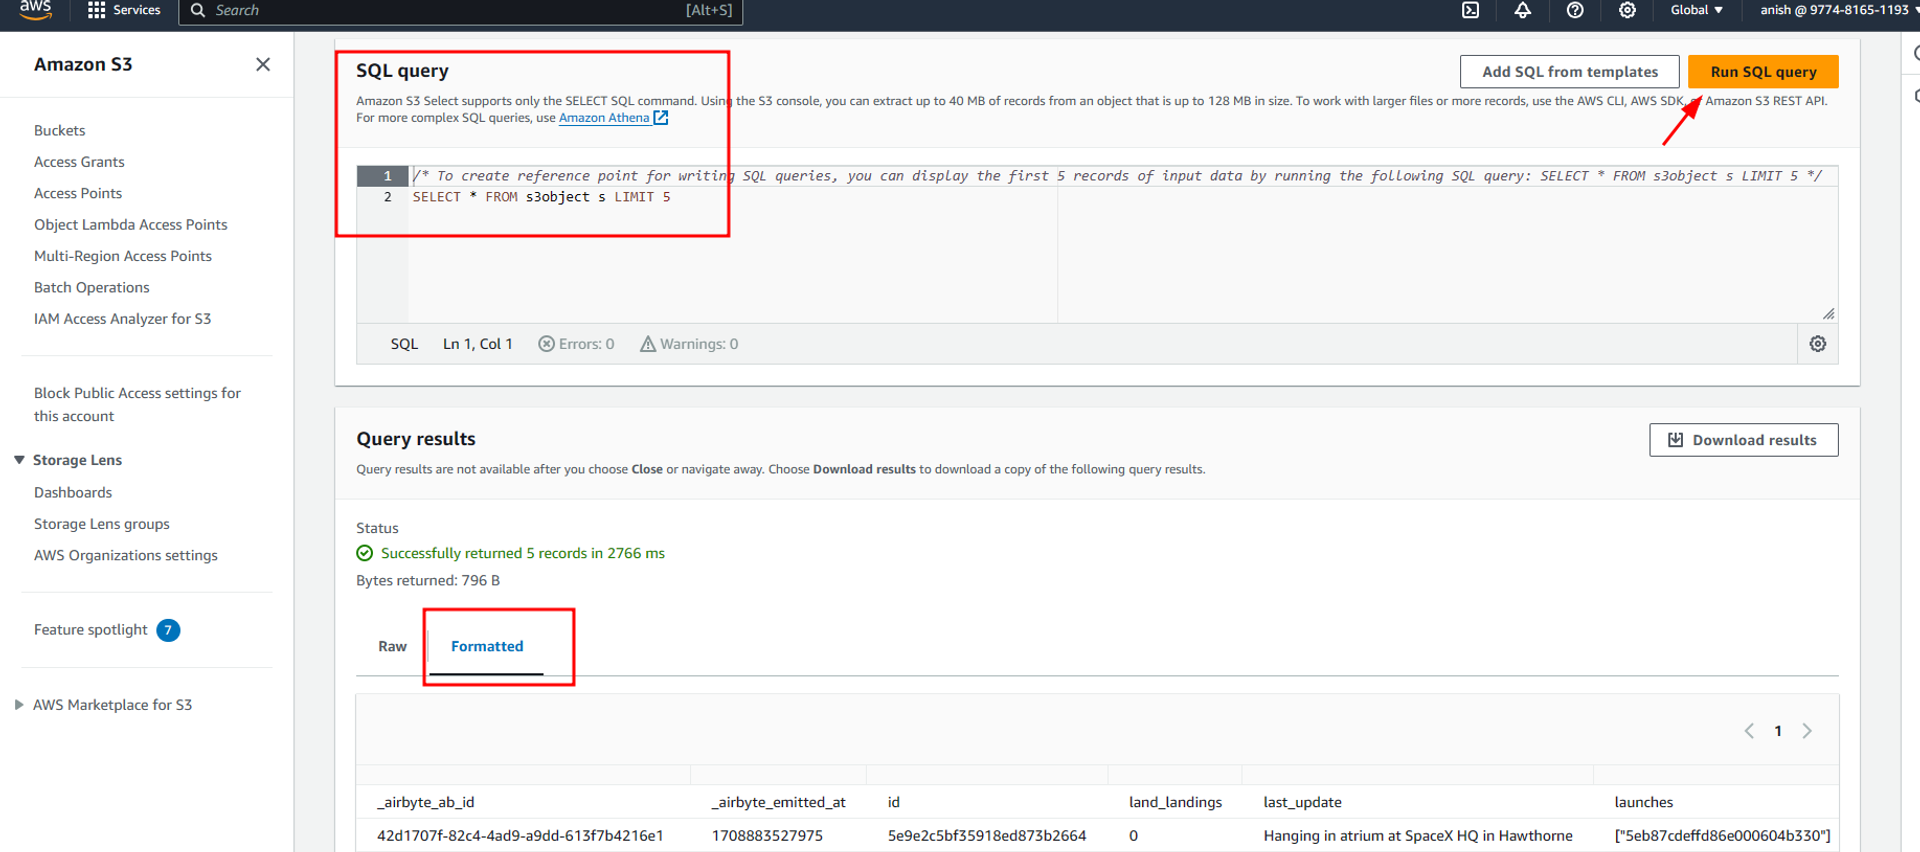
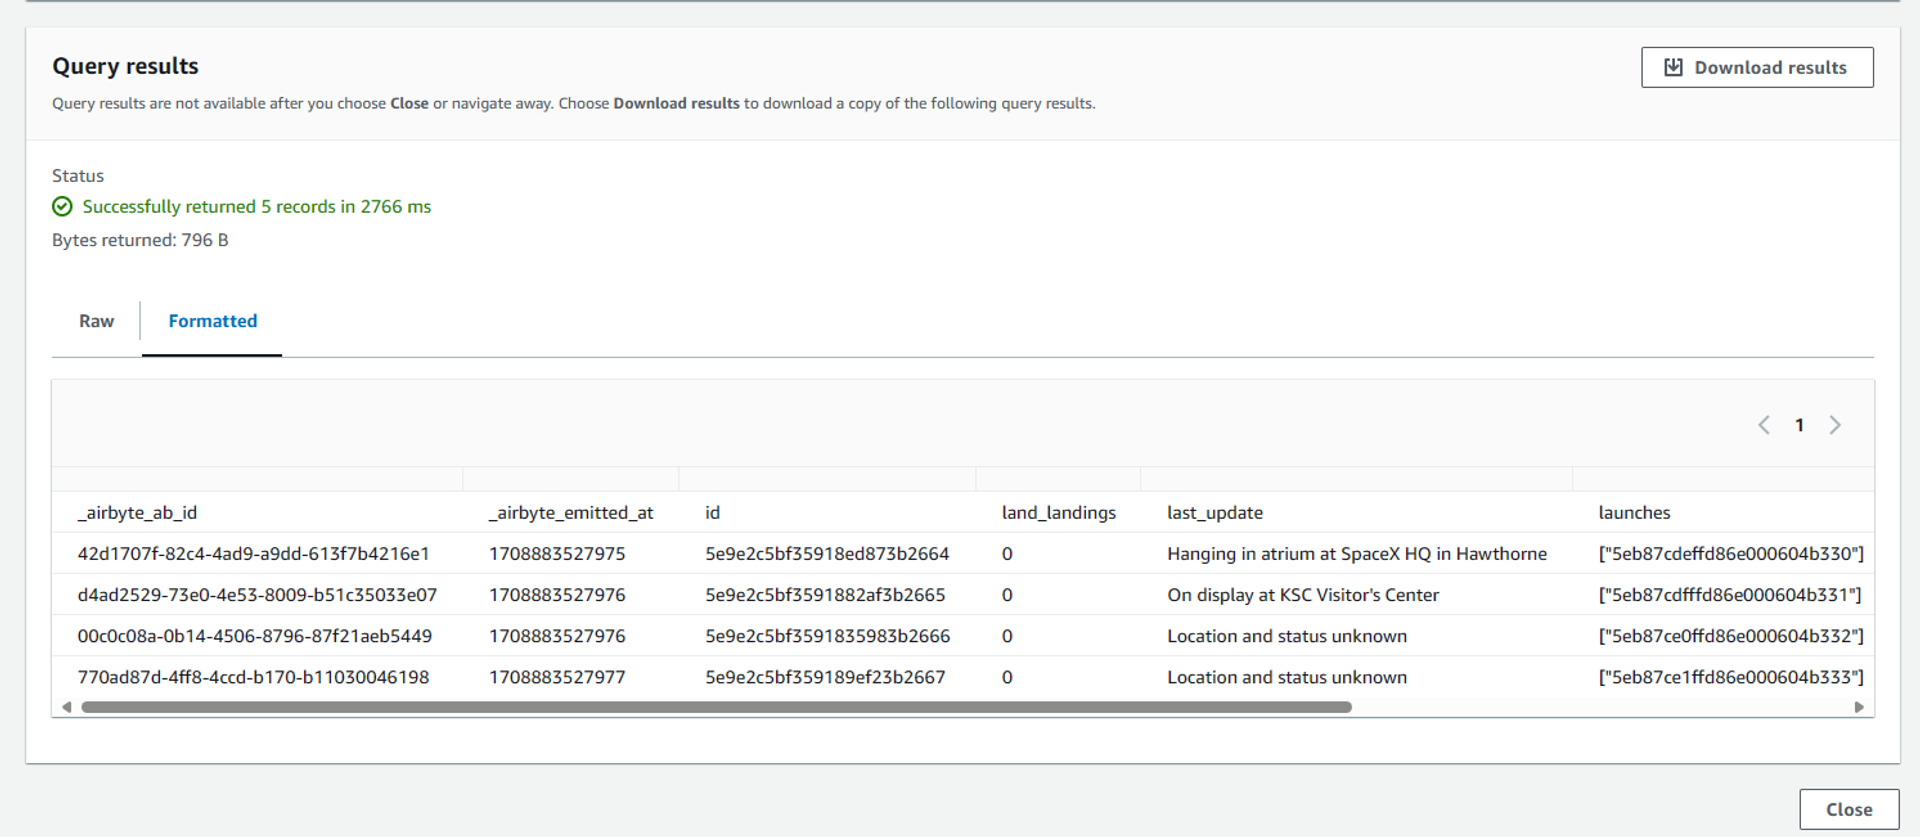
We can now preview this data by querying using s3 select

Conclusion
In conclusion, the ELT (Extract, Load, Transform) process, coupled with a data lake storage solution like Amazon S3, provides a powerful and scalable way to process and analyze large volumes of data. Airbyte, an open-source ELT platform, offers a user-friendly interface to configure data pipelines and automate data ingestion from various sources to destinations like S3. The combination of Airbyte and S3 allows for efficient data replication, transformation, and storage, making it ideal for handling diverse data types and sources. With the detailed steps outlined in this article, setting up an ELT pipeline with Airbyte and AWS S3 becomes straightforward, enabling organizations to leverage their data effectively for insights and decision-making.
Epilogue
Hence, the ELT process was completed using Airbyte, and the data was ingested from a REST API into our Amazon S3 data lake. In the second part of this project, I will read this ingested data in AWS Glue and perform EDA and some transformations on the ingested data using Apache Spark in AWS Glue. Finally, I will load the transformed processed data into AWS Redshift, which will be our final data warehouse for storing the processed data.