A Beginner’s Guide to Data Engineering: Harnessing the Power of Python to Access AWS Services
I am a computer engineering undergraduate highly interested in Data engineering, Artificial intelligence, Machine Learning and Natural language processing. I like exploring and learning new technologies and I will be writing various blogs here during my learning journey
Introduction
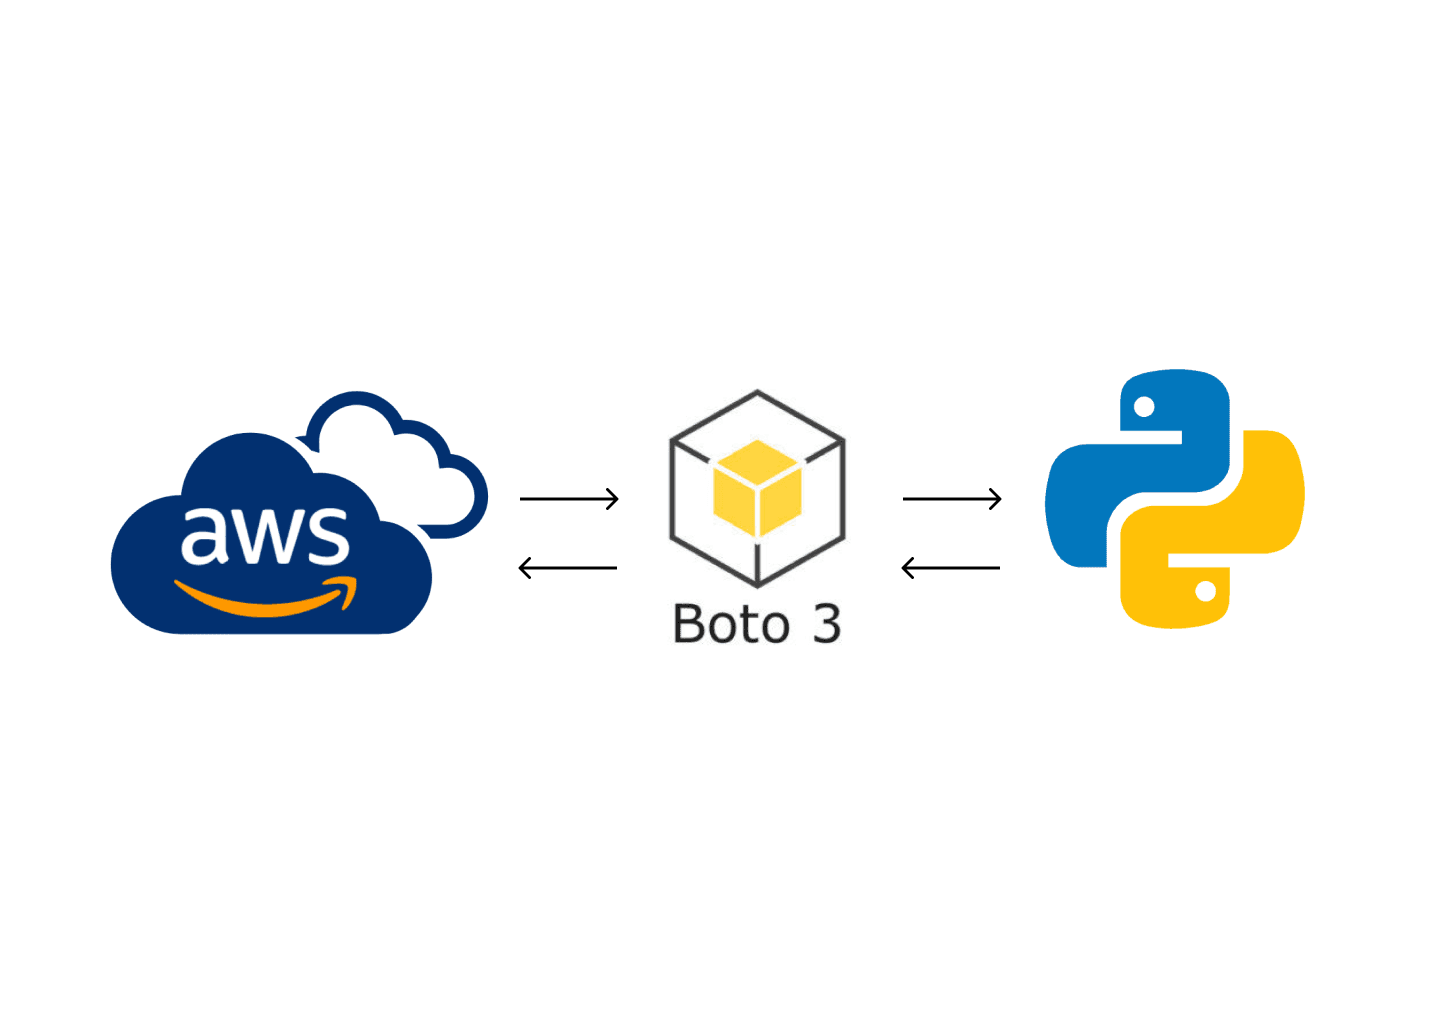
Hello There 👋🏻. Hope you all are doing well. In my previous blog, I discussed various AWS services that are commonly used in the data engineering field to store, manage, and process large volumes of data. As a widely popular cloud computing platform, Amazon Web Services (AWS) offers a range of tools and features for building data infrastructures such as ETL pipelines, data warehouses, and databases, and for automating data pipelines. As a programmer, I often rely on Python for its simplicity, flexibility, and a vast collection of libraries and frameworks, including those for data engineering, data science, and machine learning. Therefore, when I started learning and using AWS services for data engineering, I was keen to find a way to programmatically access the services using Python. After some research, I discovered that AWS offers a Python SDK(Software Development Kit) called Boto3 that enables programmatic access and interaction with AWS services. This discovery proved to be a game-changer for me, as it allowed me to automate and streamline many data engineering tasks easily using Python which saved a lot of time. In this blog post, I will provide a comprehensive guide on how to use Boto3 to access AWS services programmatically in Python along with a suitable example that will help you understand the step-by-step process of accessing and utilizing AWS services using Boto3. Please note that AWS services can also be accessed through several other means like AWS management console(GUI), AWS CLI and AWS APIs.

Steps to access AWS services using Python
In this blog post, I will demonstrate how to access AWS services programmatically using Python within a Jupyter Notebook. The steps involved in this process are outlined below:
Setting up AWS credentials
Installing Boto3
Configuring the Boto3 client
Utilizing the Boto3 client to interact with the desired AWS service.
Following these steps will enable you to access and utilize AWS services in your data engineering projects using Python.
1. Setting up AWS Credentials
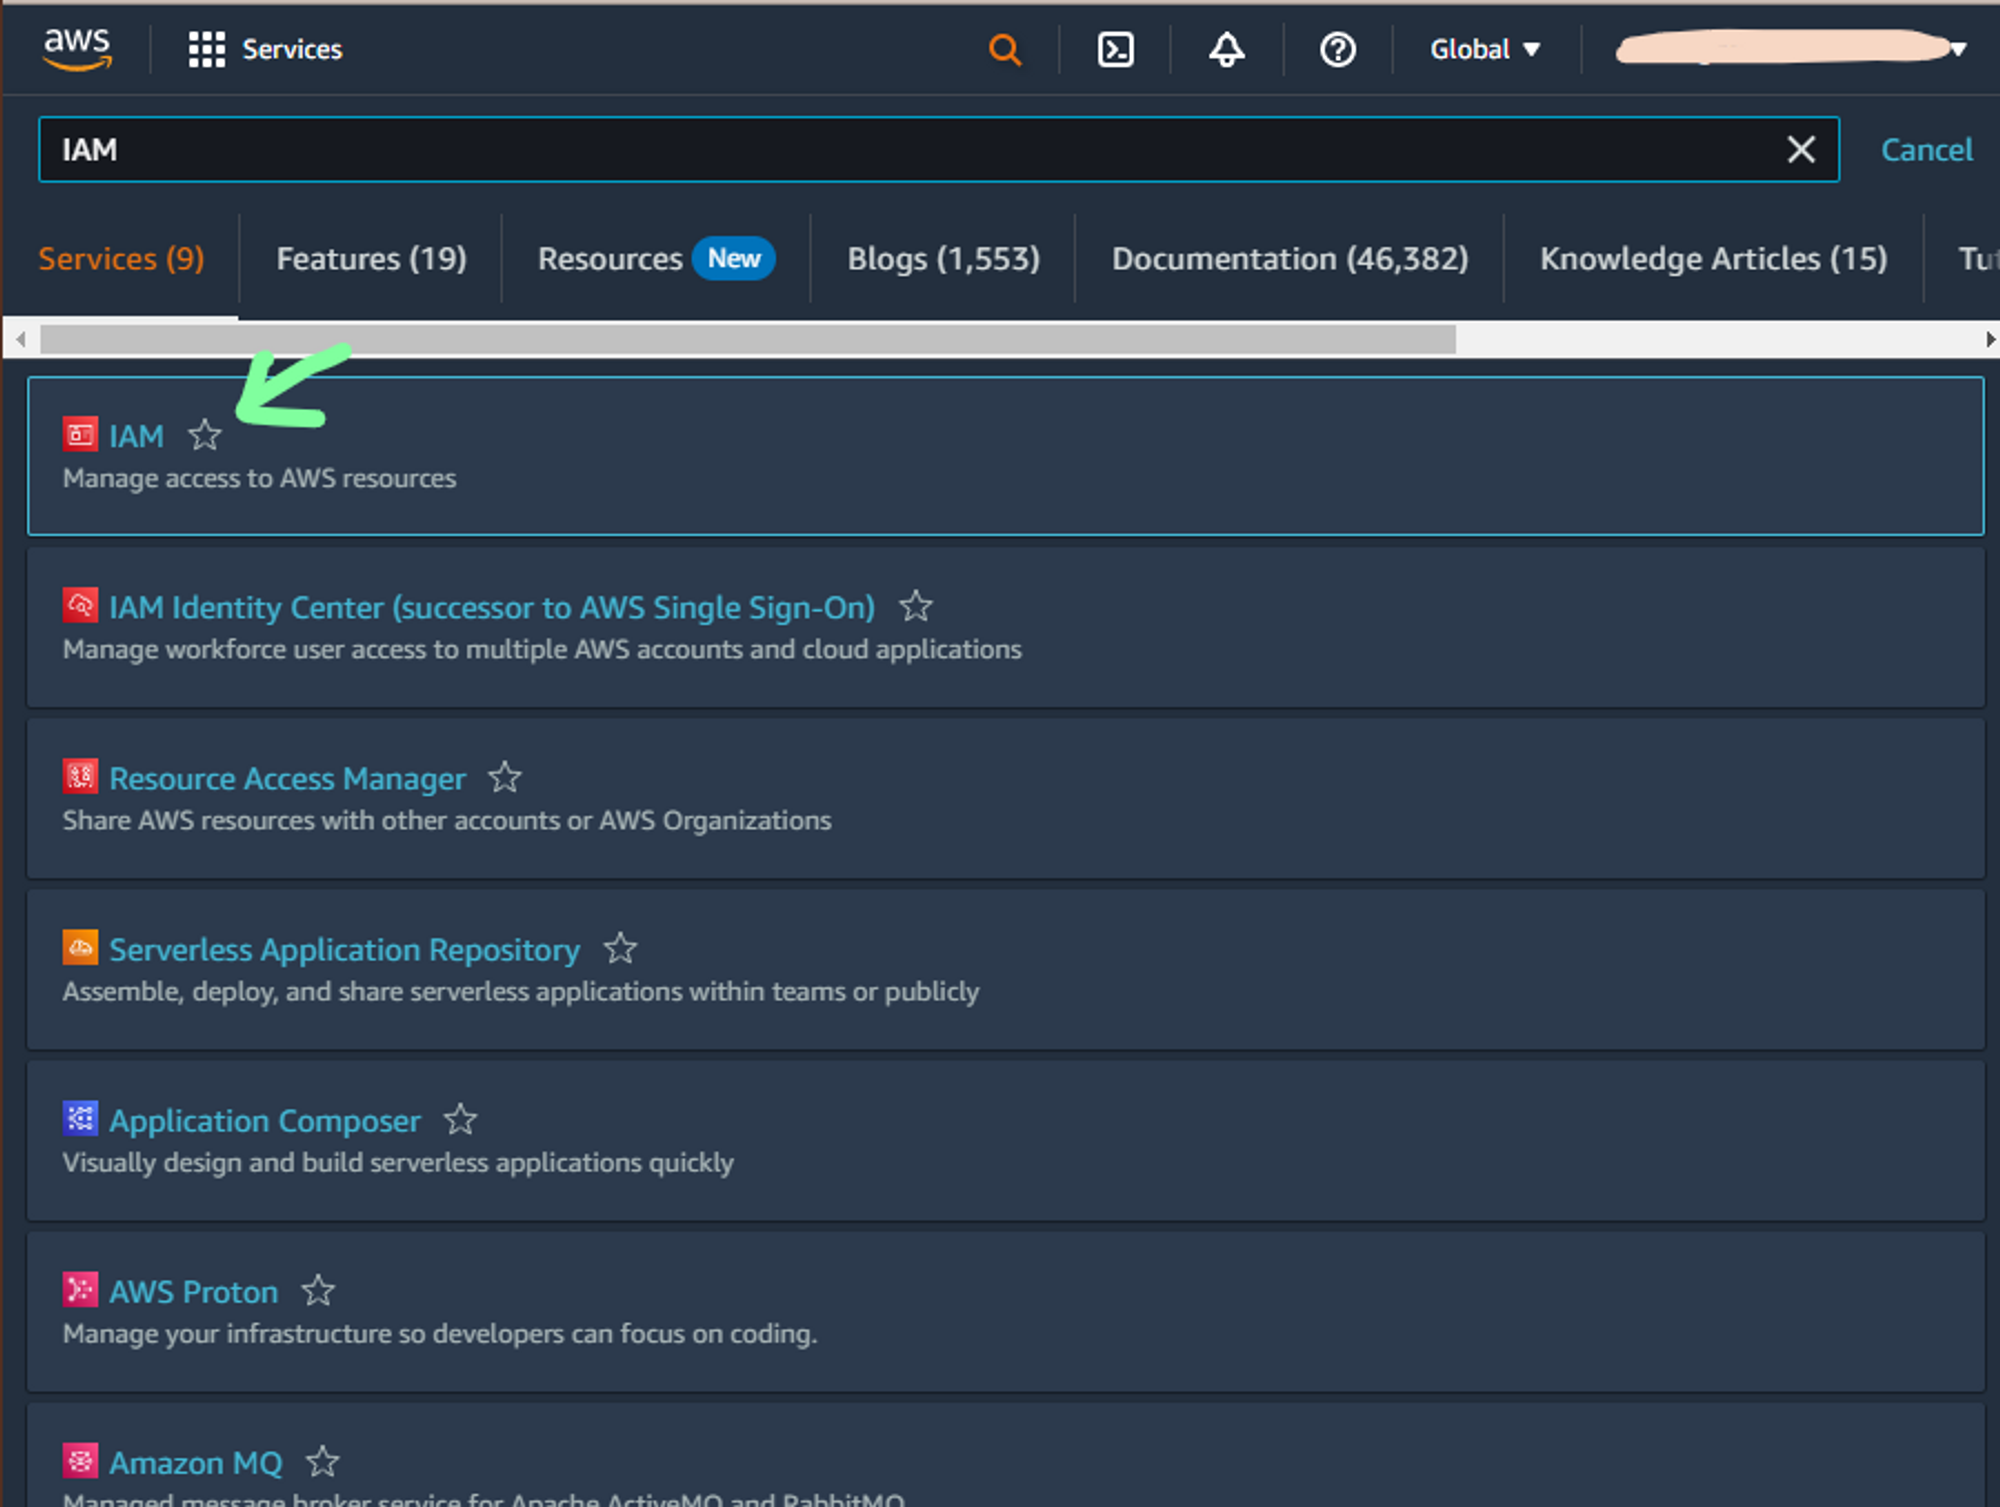
To connect to AWS using Python, we must first configure AWS credentials, specifically the ACCESS_KEY and SECRET_ACCESS_KEY for the AWS user. In the following example, I will demonstrate how to create a new IAM user to access these security credentials. Please follow the steps outlined below:
a. Navigate to IAM console
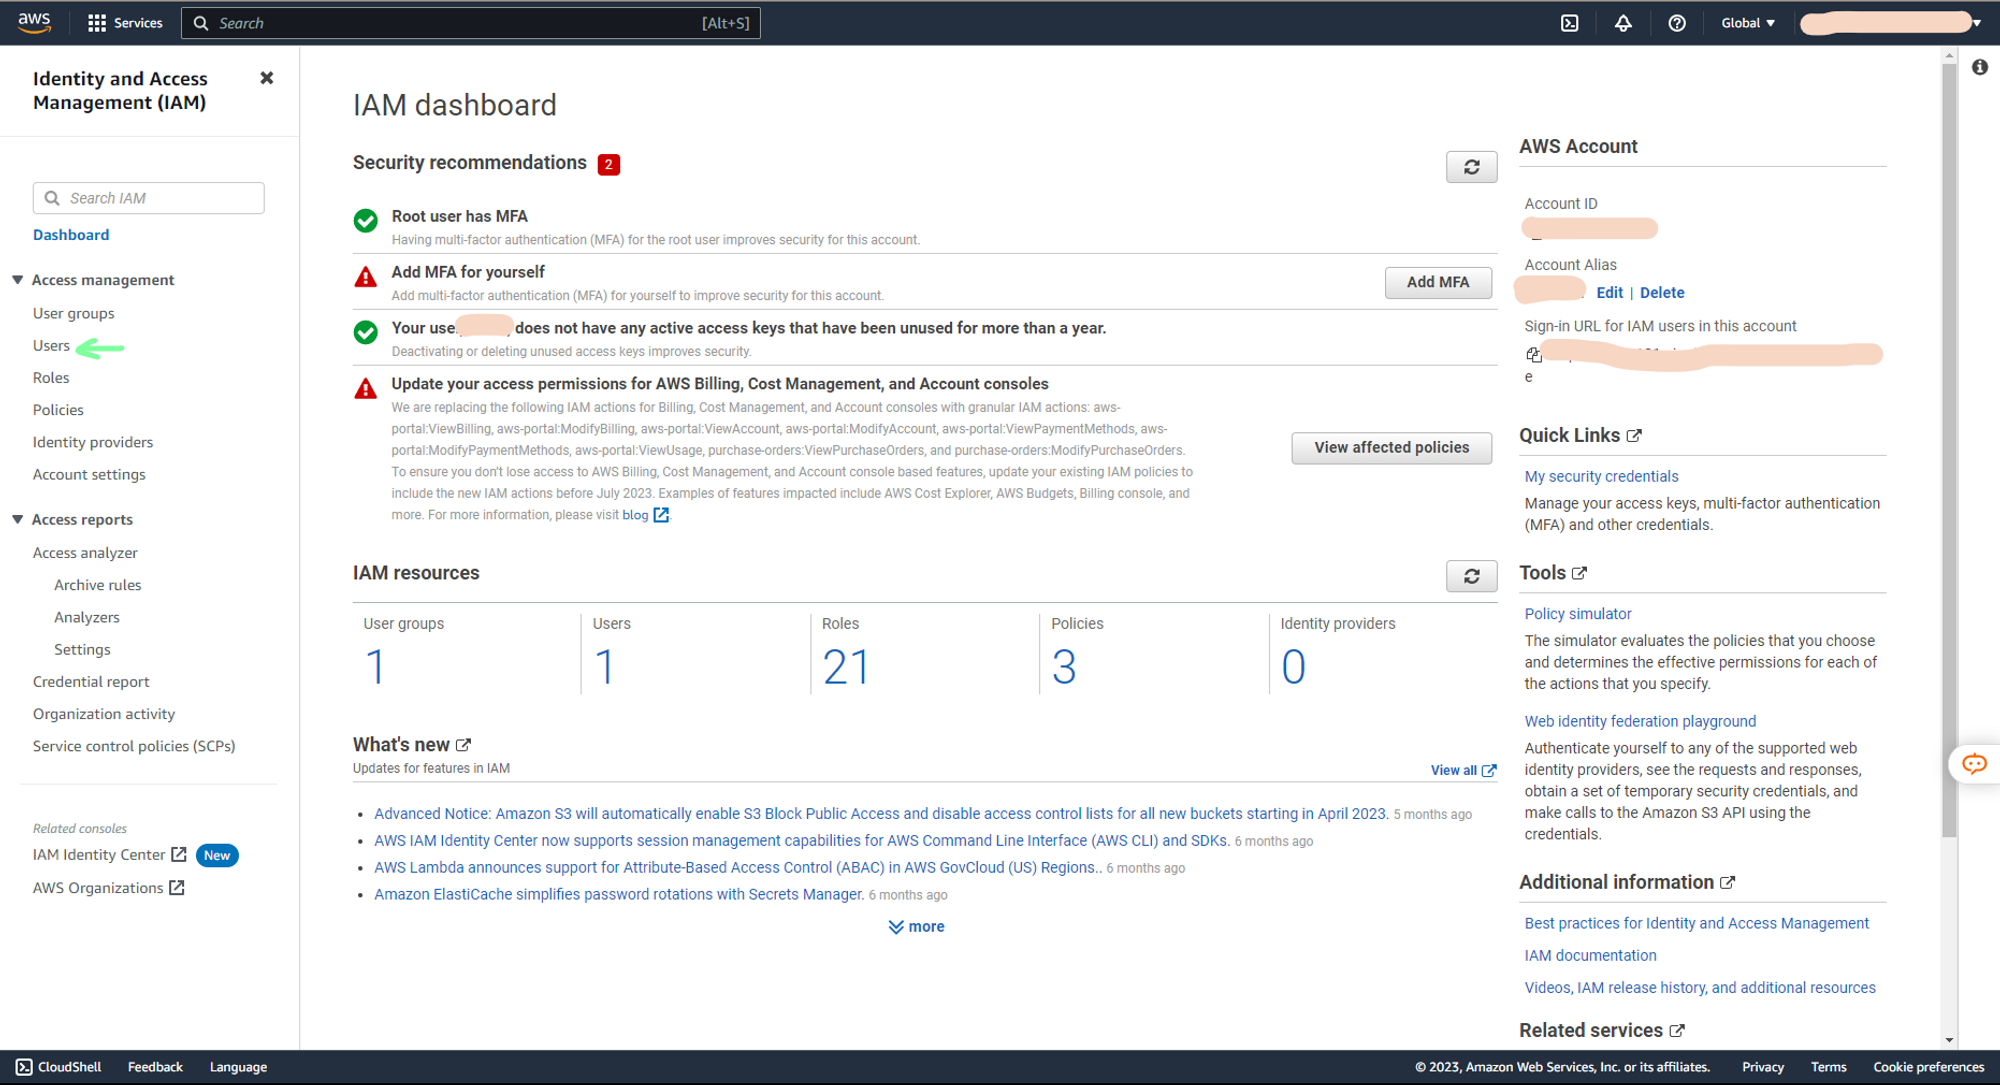
b. In access management tab select Users
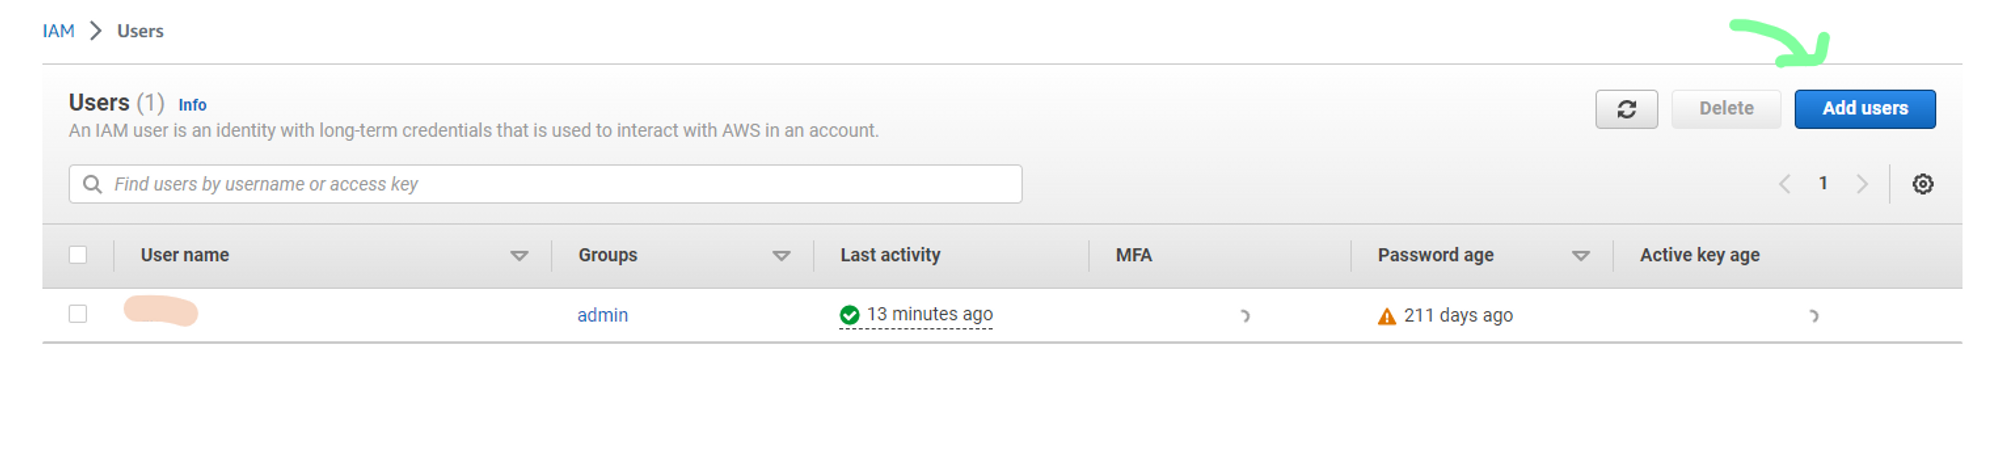
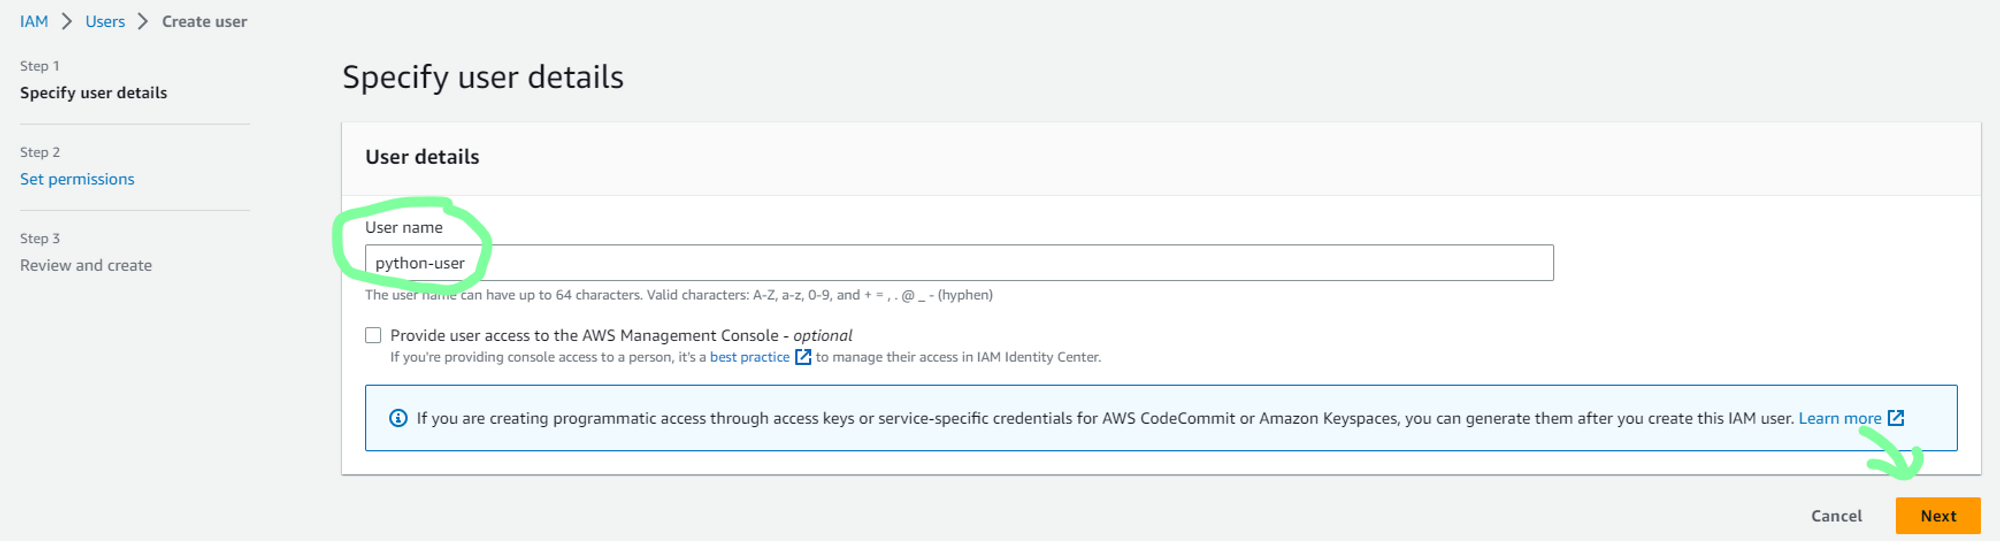
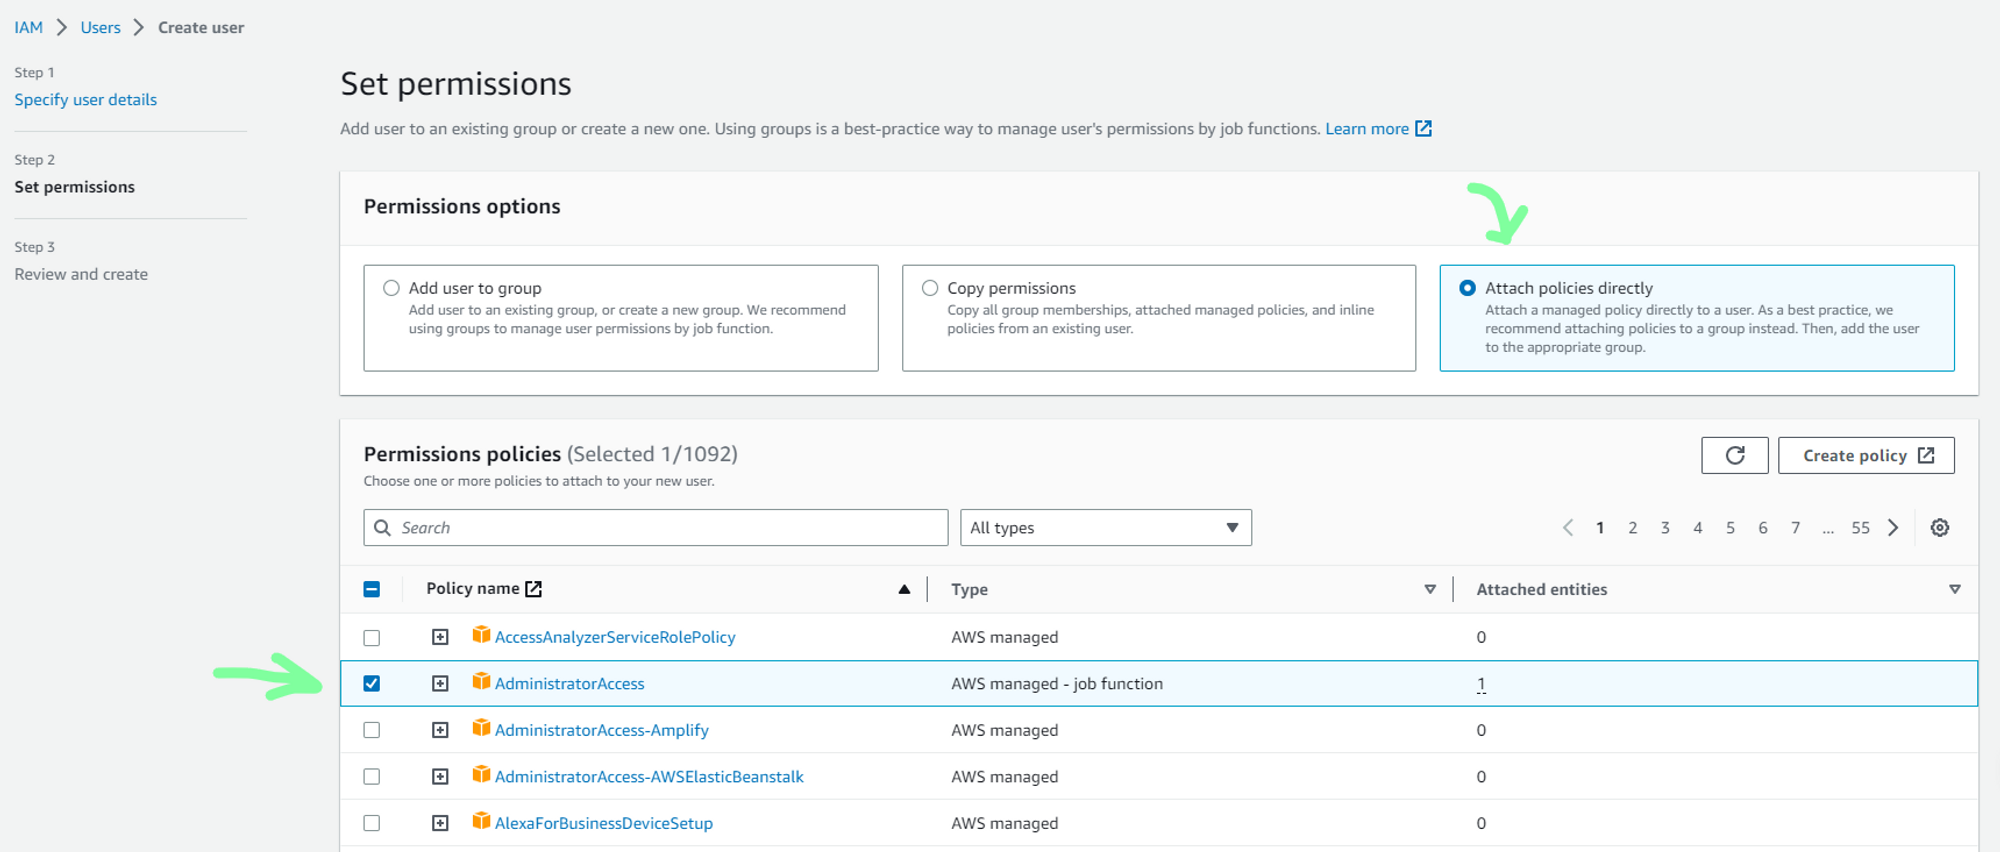
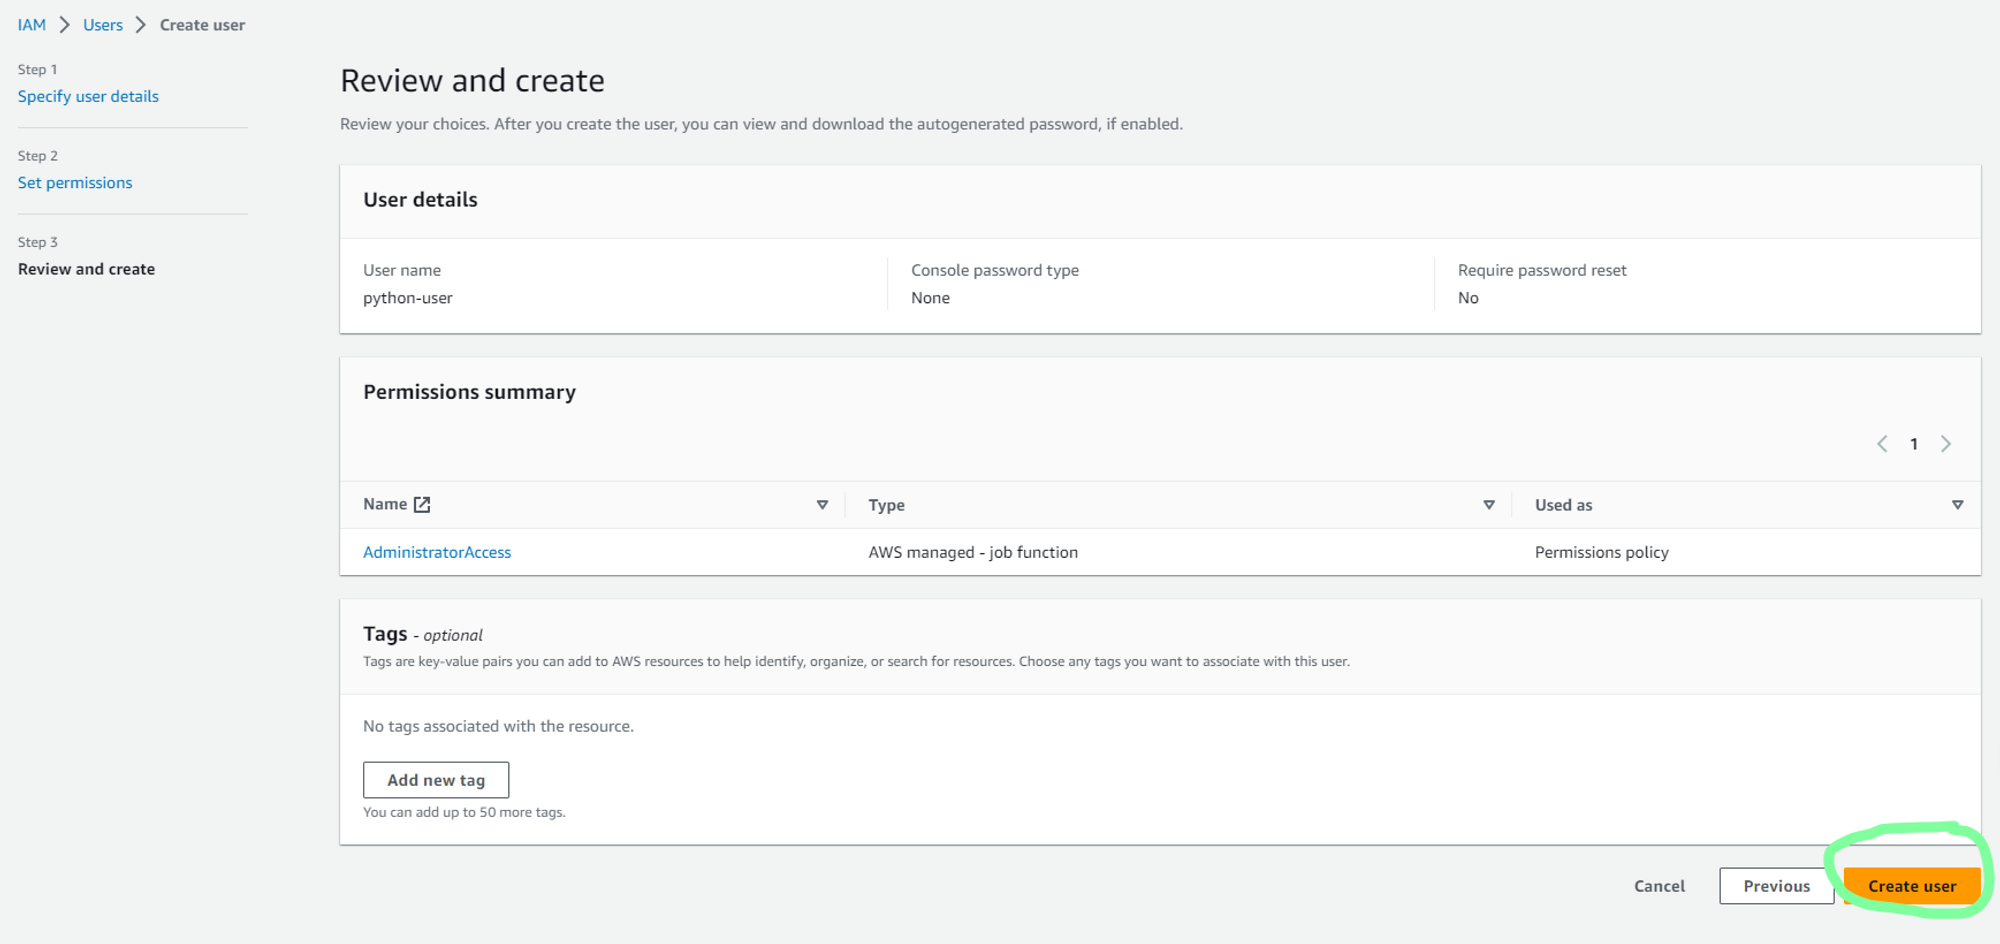
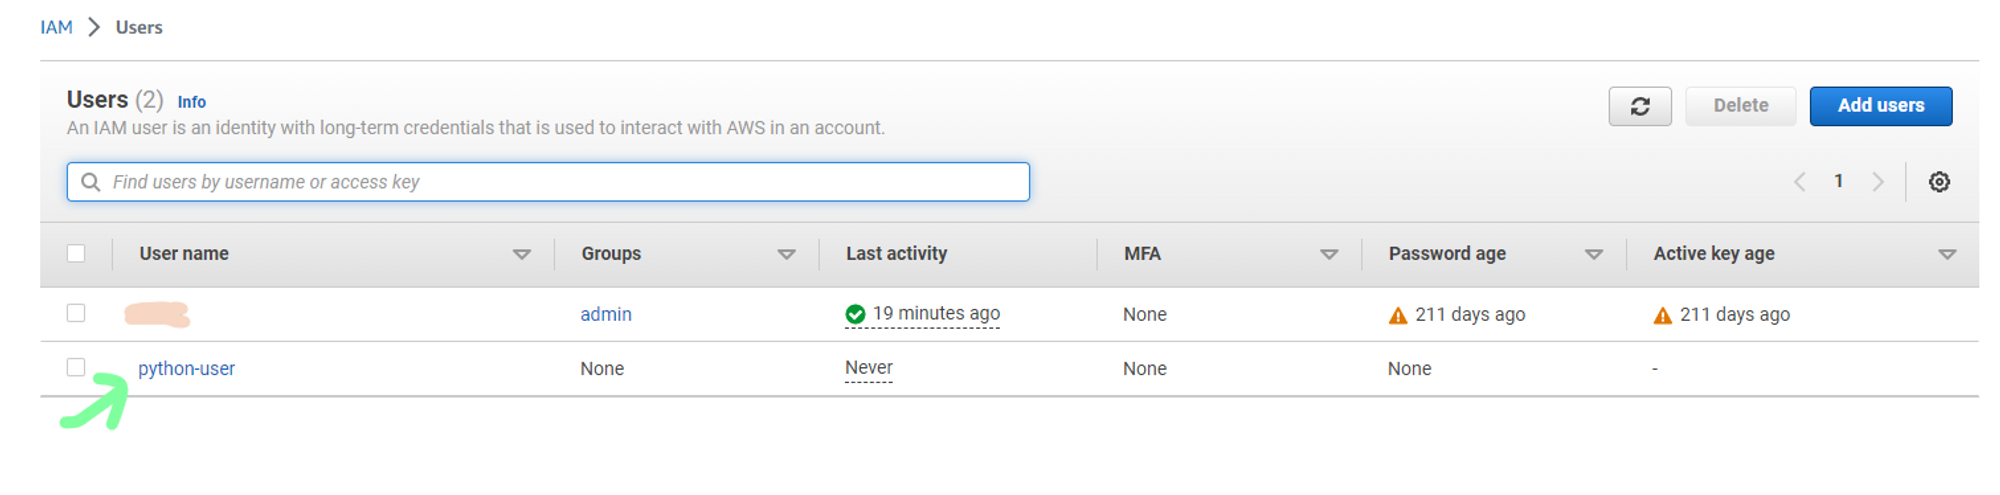
c. In Users, create a new user. As I will be accessing AWS services using this user, I will be creating a new user with AdministratorAccess policy to grant this new user full Administrator privileges.
d. Now to generate security credentials, select newly created user.
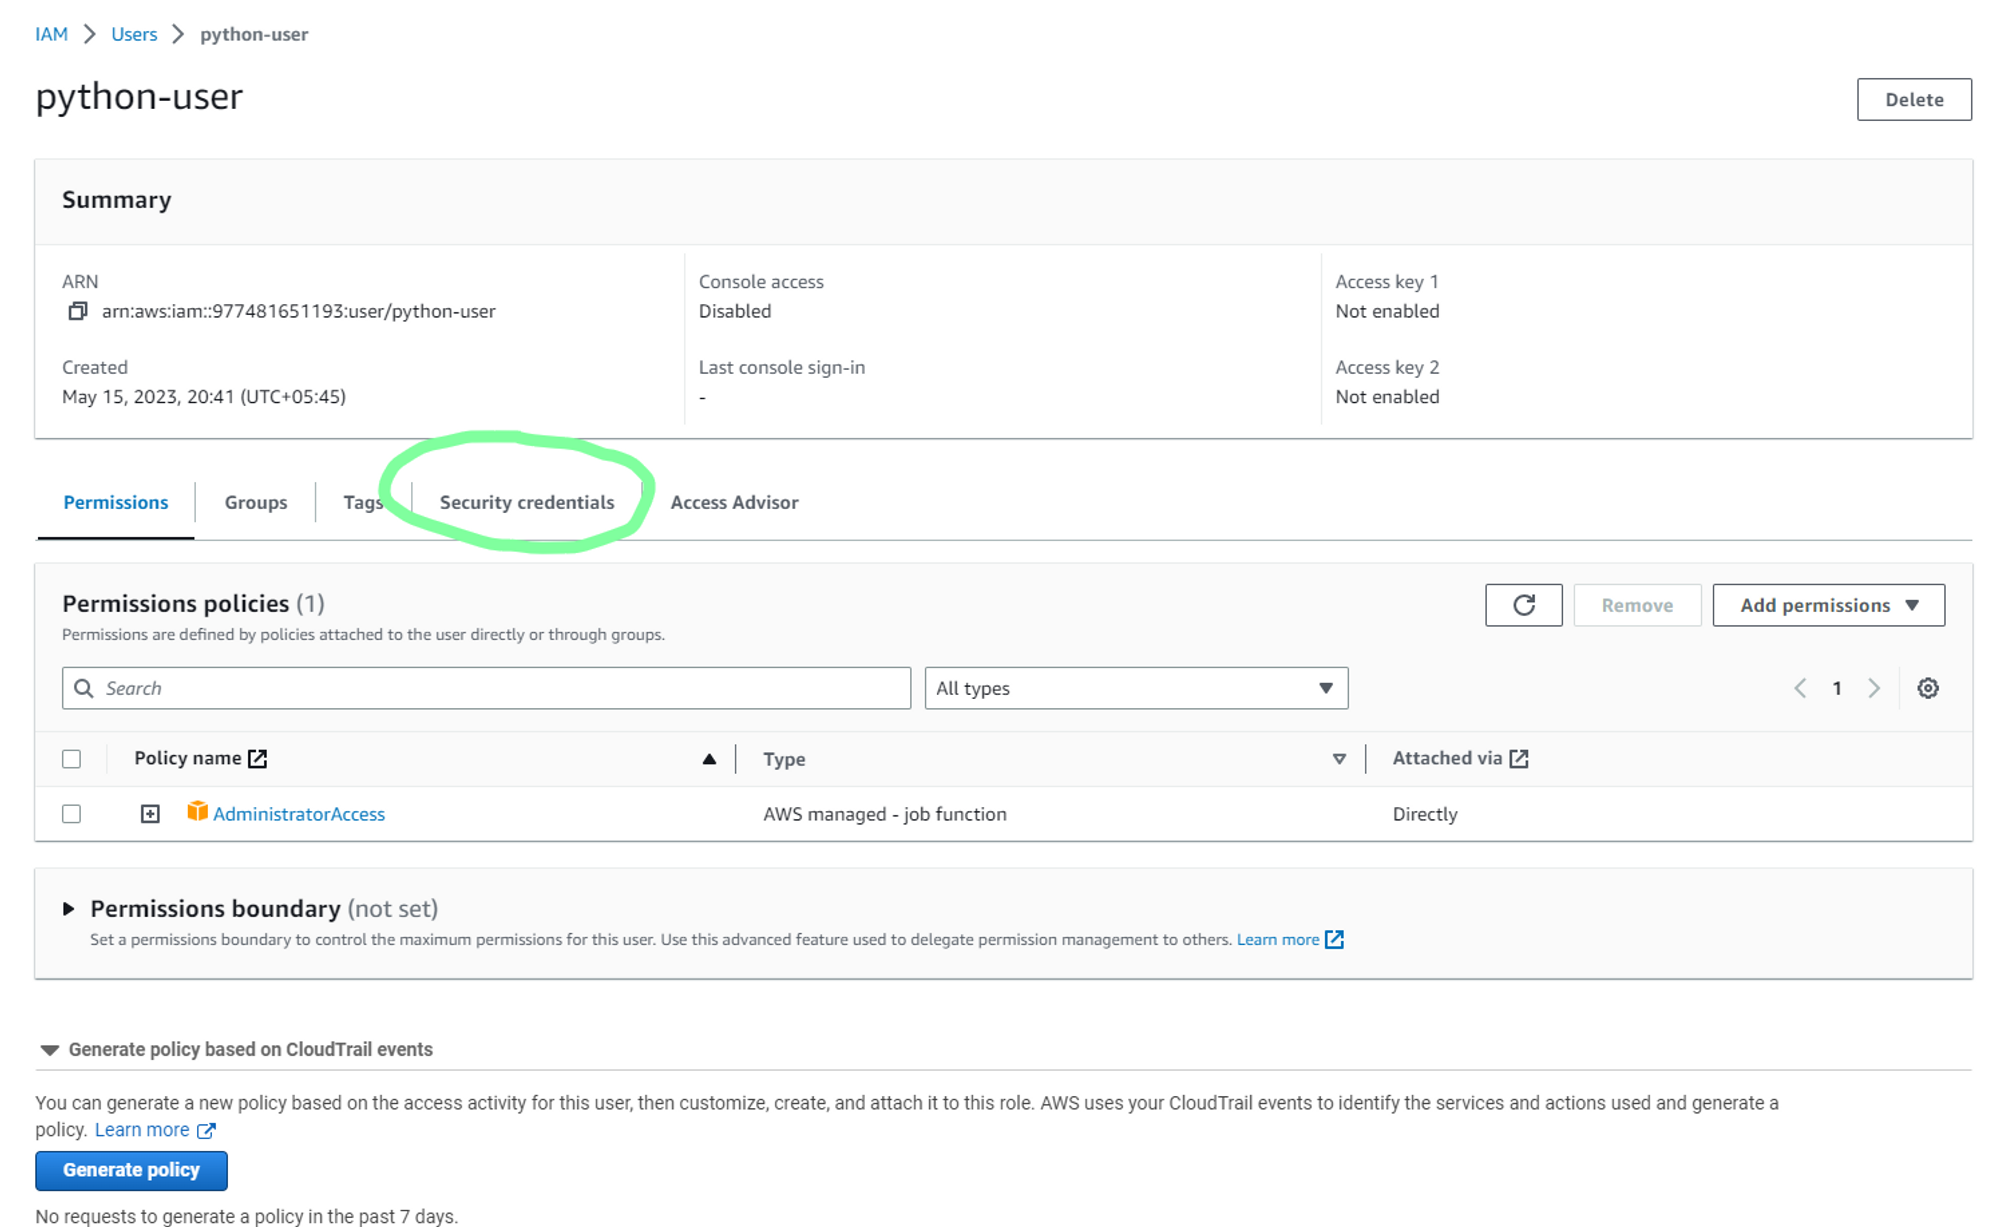
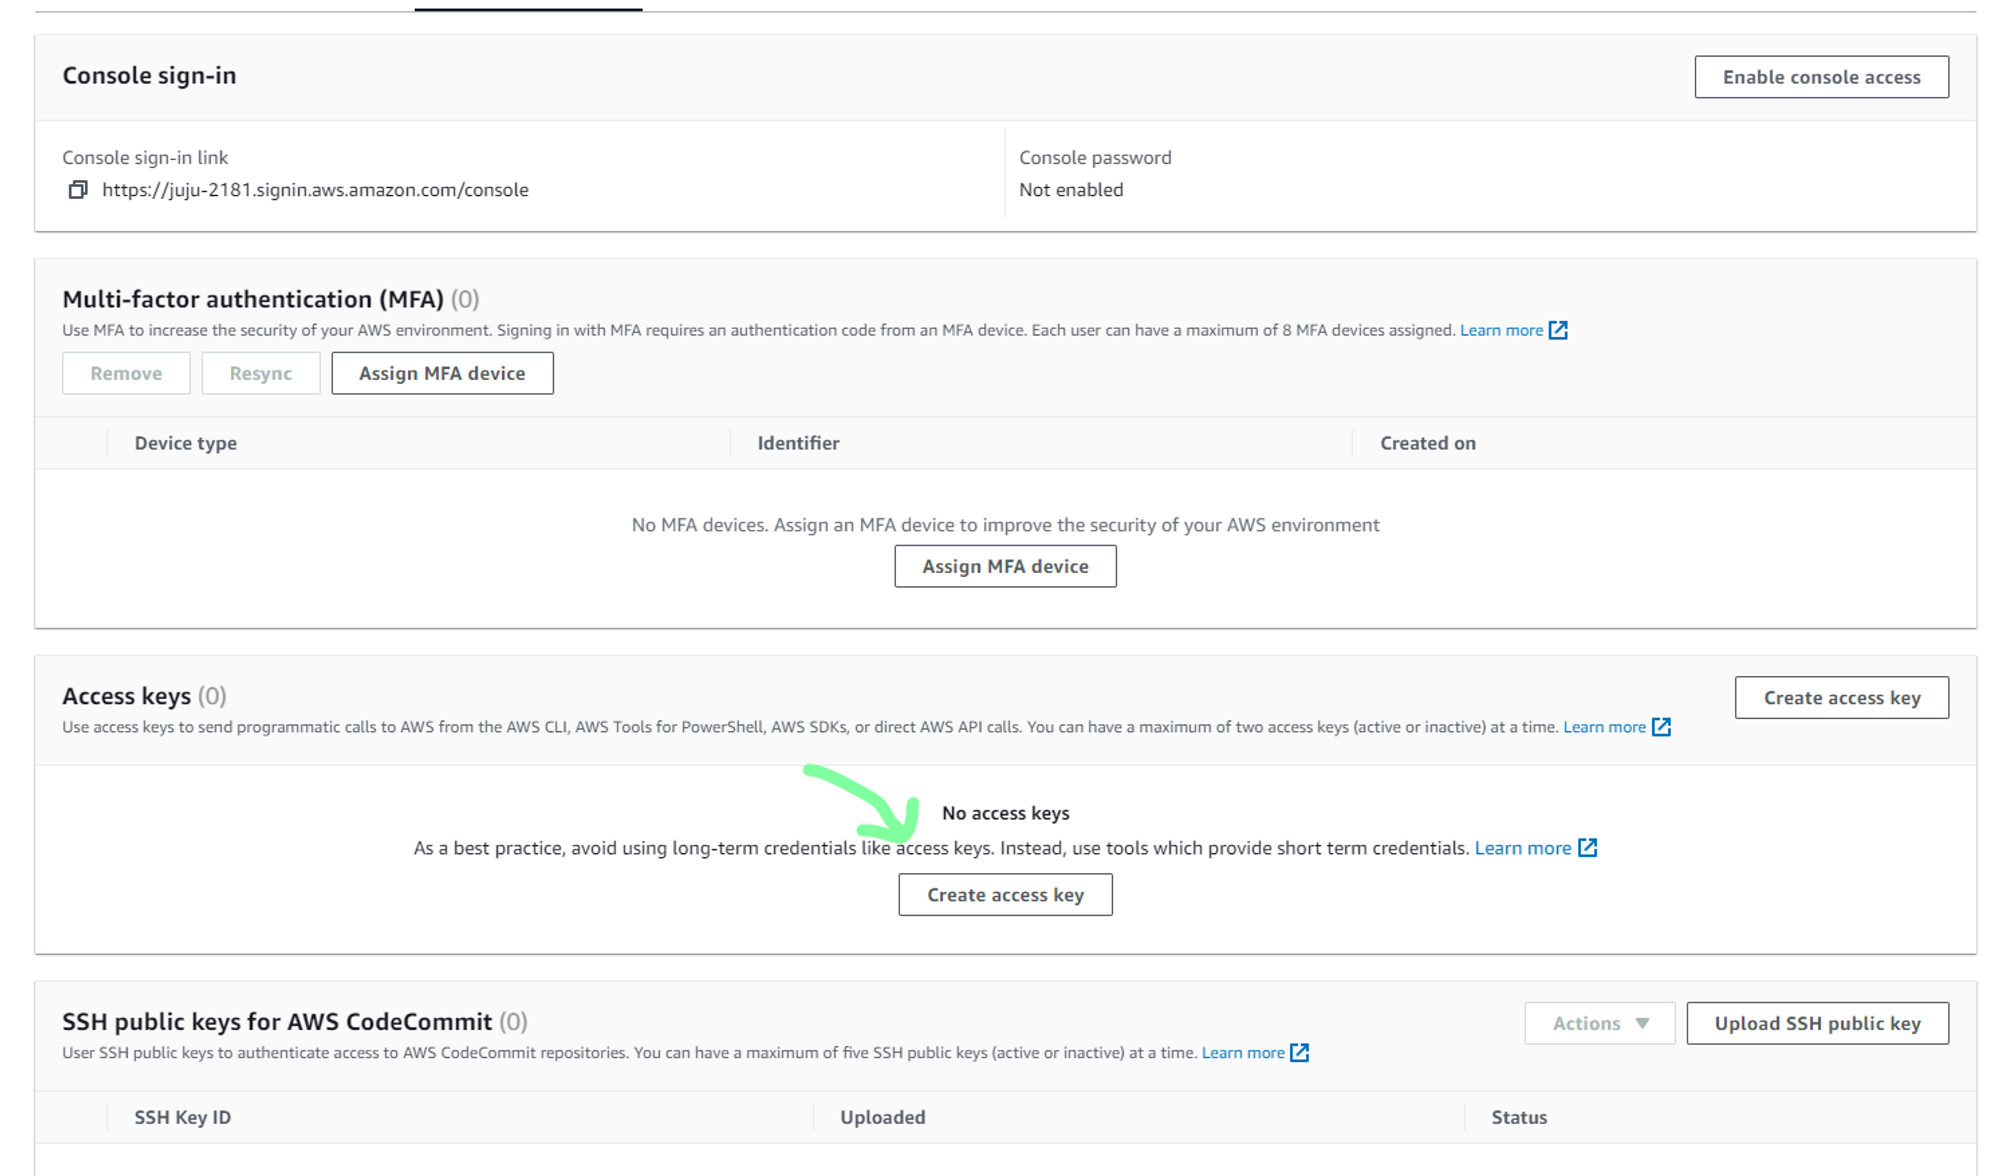


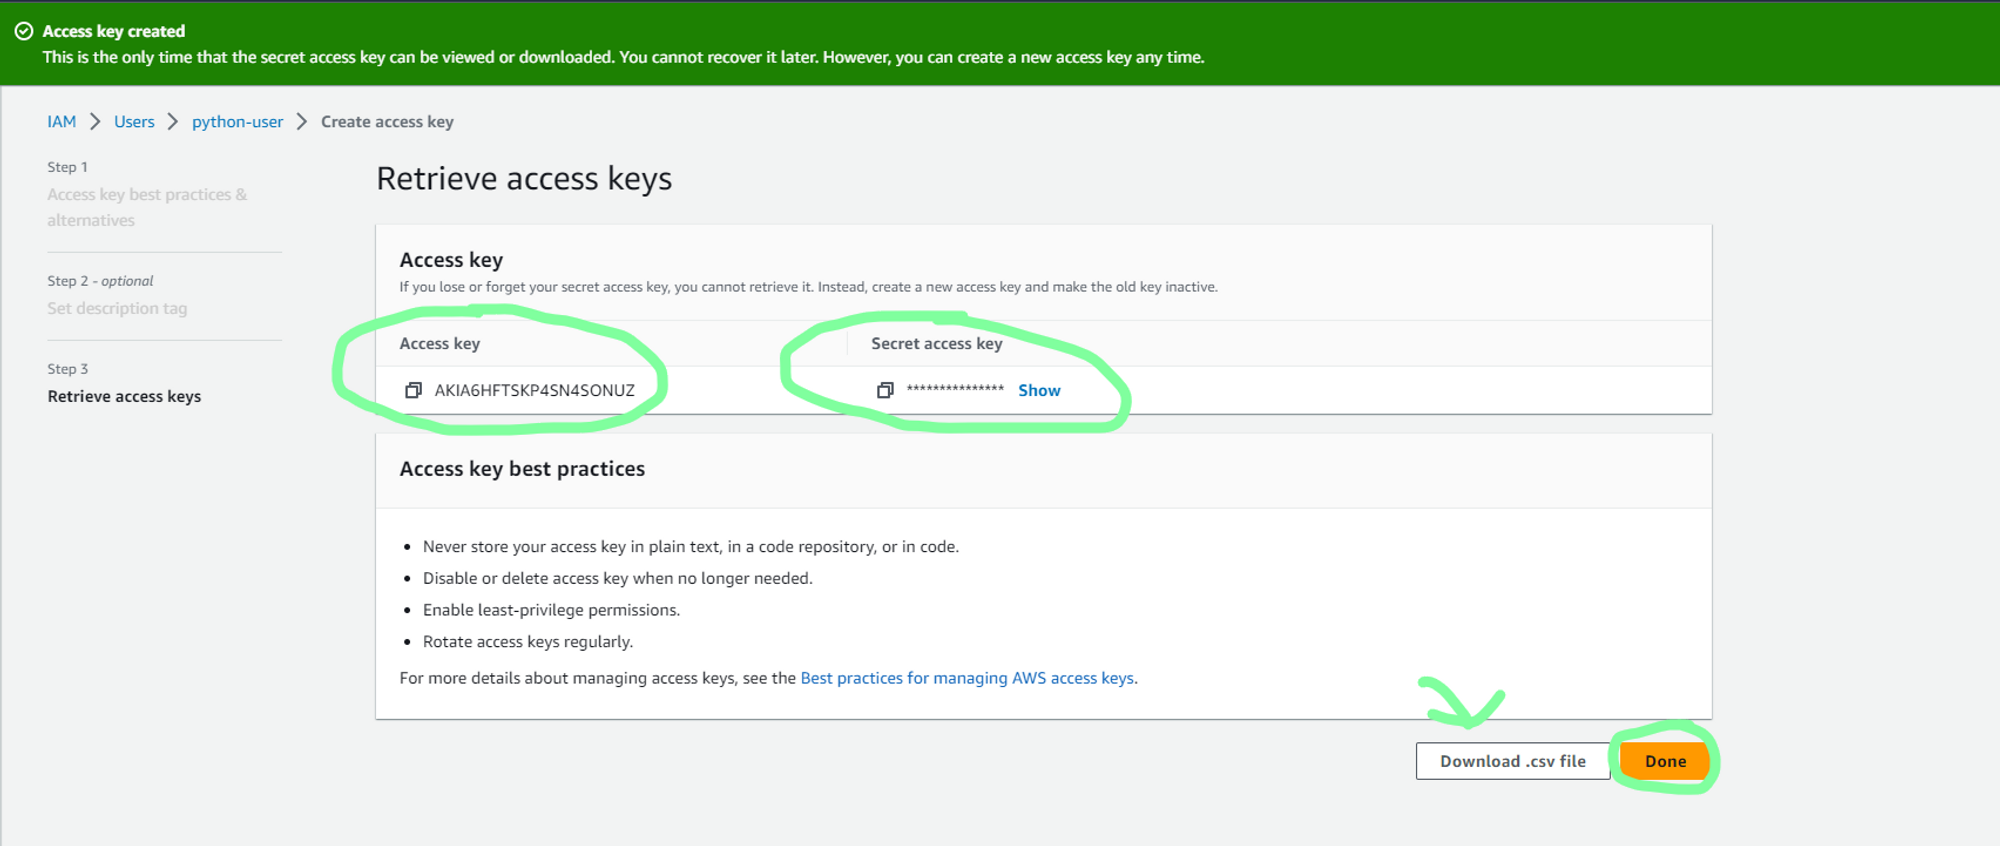
e. You can now either save the access key and the secret access key. Also, download the .csv file for future access.

f. To access these security credentials in Python, it is recommended to store them in a secure location such as an .env or .cfg file. In this example, we will use a configuration file called "credentials.cfg" to store the security credentials. Please follow the steps outlined below:
Create a new file called "credentials.cfg" in the same directory where you saved the Jupyter Notebook file. In this “credentials.cfg” add the access key and secret access key for the AWS user as shown below and save this file.
[AWS]
ACCESS_KEY=YOUR_ACCESS_KEY
SECRET_ACCESS_KEY=YOUR_SECRET_ACCESS_KEY
AWS_REGION=YOUR_DEFAULT_AWS_REGION
Now, you can run the following code in a Jupyter Notebook cell to access these security credentials.
import configparser
# Initialize the configparser object
config = configparser.ConfigParser()
# read the configuration from local file
config.read_file(open('credentials.cfg'))
# Load the parameters from the config file into variables
ACCESS_KEY             = config.get('AWS','ACCESS_KEY')
SECRET_ACCESS_KEY      = config.get('AWS','SECRET_ACCESS_KEY')
AWS_REGION             = config.get("AWS","AWS_REGION")
print("Configuration loaded successfully !")
2. Install Boto3
To access AWS services programmatically using Python, we can use a software development kit (SDK) called Boto3. Boto3 is an AWS SDK for Python that provides a simple yet powerful interface for interacting with AWS services such as EC2, S3, RDS, and many others. With Boto3, data engineers can automate AWS tasks such as launching an EC2 instance, creating an S3 bucket, and managing security groups, which can save a lot of time and effort.Boto3 offers an easy-to-use object-oriented API that simplifies the process of creating and managing AWS resources, along with low-level access to AWS services. In addition, Boto3 also provides simple documentation which makes it easy to learn and use. You can check out Boto3 documentation at Boto3 1.26.133 documentation (amazonaws.com).
Before using Boto3, you need to install it using pip. This can be done easily by running the following command in a terminal or command prompt:
pip install boto3
3. Configure Boto3 Client
Once Boto3 has been installed, we need to configure Boto3 client using the security credentials, so that we will be able to access the AWS services. The following code shows the configuration of Boto3 client for S3 service.
import boto3

# configure S3 client
s3_client = boto3.client('s3',
                region_name=AWS_REGION,
                aws_access_key_id=ACCESS_KEY,
                aws_secret_access_key=SECRET_ACCESS_KEY)
4. Using Boto3 Client to Access AWS Service
In the previous step, I configured the boto3 client for the S3 service. So now, I will show you how we can use this s3 client to access S3 services directly from Jupyter notebook.
To demonstrate how to access AWS S3 services using Boto3, let's perform the following tasks in this example:
List all the S3 buckets available in the AWS account
Create a new S3 bucket
Upload data to the newly created S3 bucket
These steps will showcase how to perform common data engineering tasks using Boto3 and AWS S3.
- List all the S3 buckets available in the AWS account
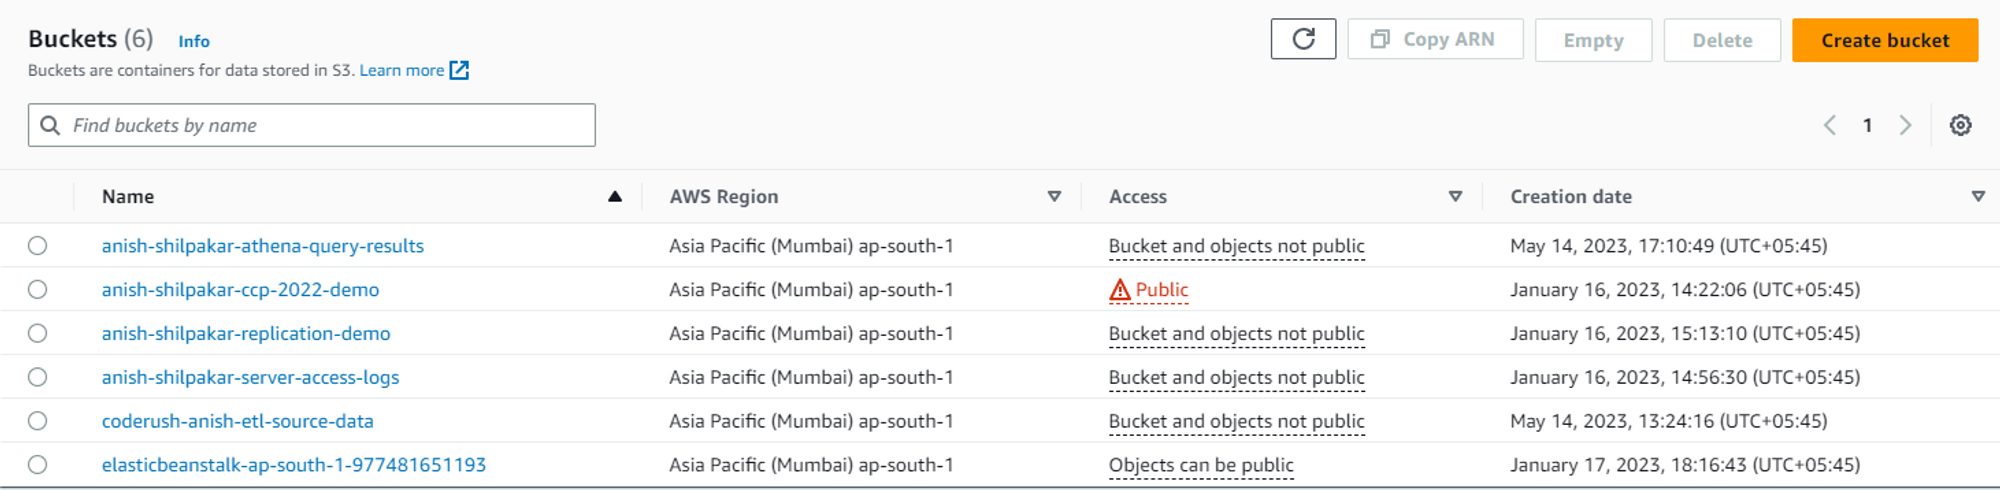
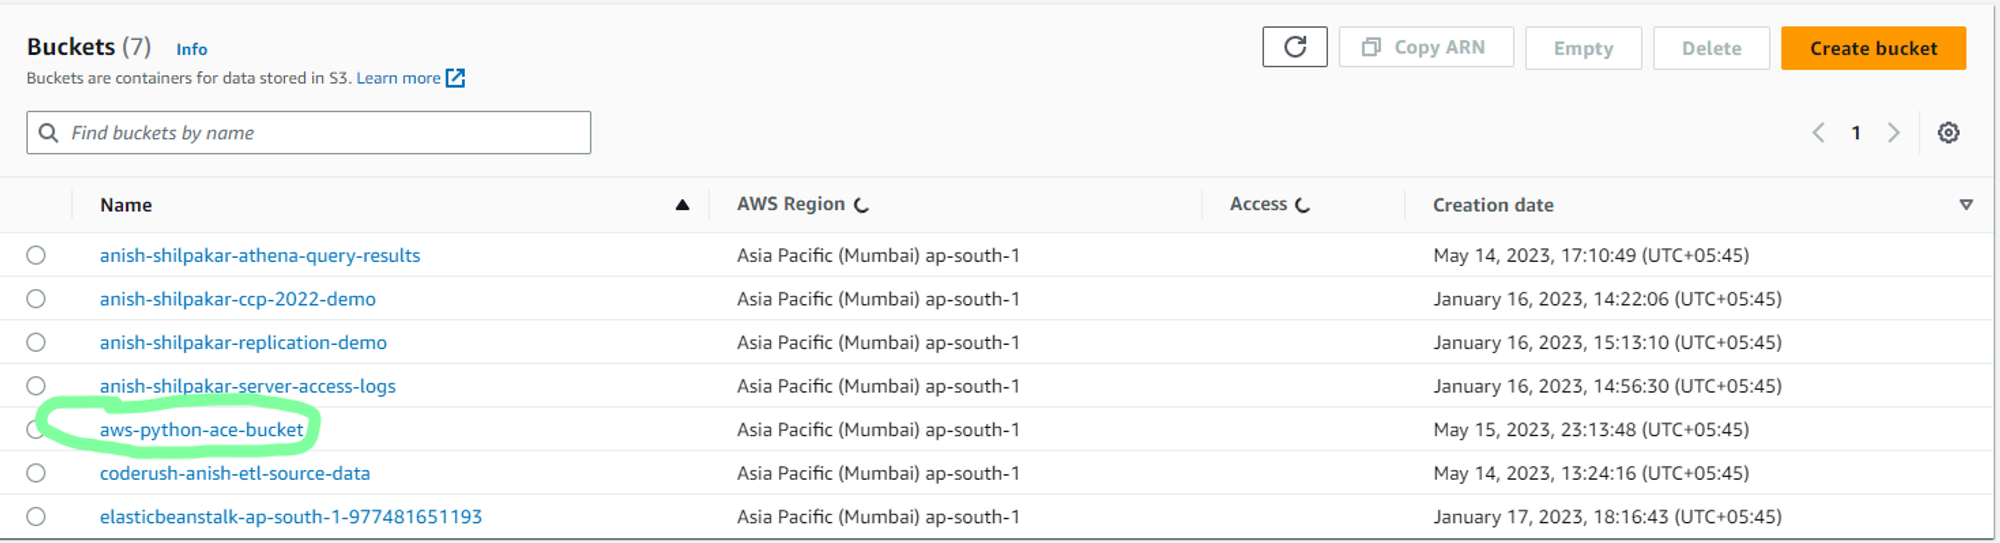
Currently, I have the following buckets available in S3.
Now, s3_client can be used to fetch the list of all the available s3 buckets in an account using the following code
try:
    # get the list of all available buckets
    response = s3_client.list_buckets()
    # print(response)
    buckets_list = []
    for res in response['Buckets']:
        buckets_list.append(res['Name'])
    print(f"Bucket list fetched successfully.\\nThere are currently {len(buckets_list)} S3 buckets in your account.\\nIt includes:{buckets_list}")
except Exception as e:
    print(f"Failed to fetch the list of all available buckets\\nFollowing error occured:{e}")
It should return output like this
Bucket list fetched successfully.
There are currently 6 S3 buckets in your account.
It includes:['anish-shilpakar-athena-query-results', 'anish-shilpakar-ccp-2022-demo', 'anish-shilpakar-replication-demo', 'anish-shilpakar-server-access-logs', 'coderush-anish-etl-source-data', 'elasticbeanstalk-ap-south-1-977481651193']
2. Create a new S3 bucket
Now, I will create a new bucket using this s3_client. Remember, when creating an s3 bucket the name of the s3 bucket should be globally unique so choose it carefully to avoid errors.
# Name of data bucket : Should be globally unique
SOURCE_DATA_BUCKET="aws-python-ace-bucket"
# check if S3 bucket already exists or not
if SOURCE_DATA_BUCKET not in buckets_list:
    print(f"Creating new S3 bucket: {SOURCE_DATA_BUCKET} . . .")
    try:
        response = s3_client.create_bucket(
            Bucket=SOURCE_DATA_BUCKET,
            CreateBucketConfiguration={
                    'LocationConstraint': AWS_REGION
                    }
        )
        print(f"S3 bucket: {SOURCE_DATA_BUCKET} created successfully !")
    except Exception as e:
        print(f"Failed to create s3 bucket: {SOURCE_DATA_BUCKET}. Following error encountered:\\n{e}")
else:
    print(f"{SOURCE_DATA_BUCKET} already exists!")
It should return the following output
Creating new S3 bucket: aws-python-ace-bucket . . .
S3 bucket: aws-python-ace-bucket created successfully !
You can also verify the creation of a new s3 bucket from AWS management console or by fetching the list of s3 buckets again.
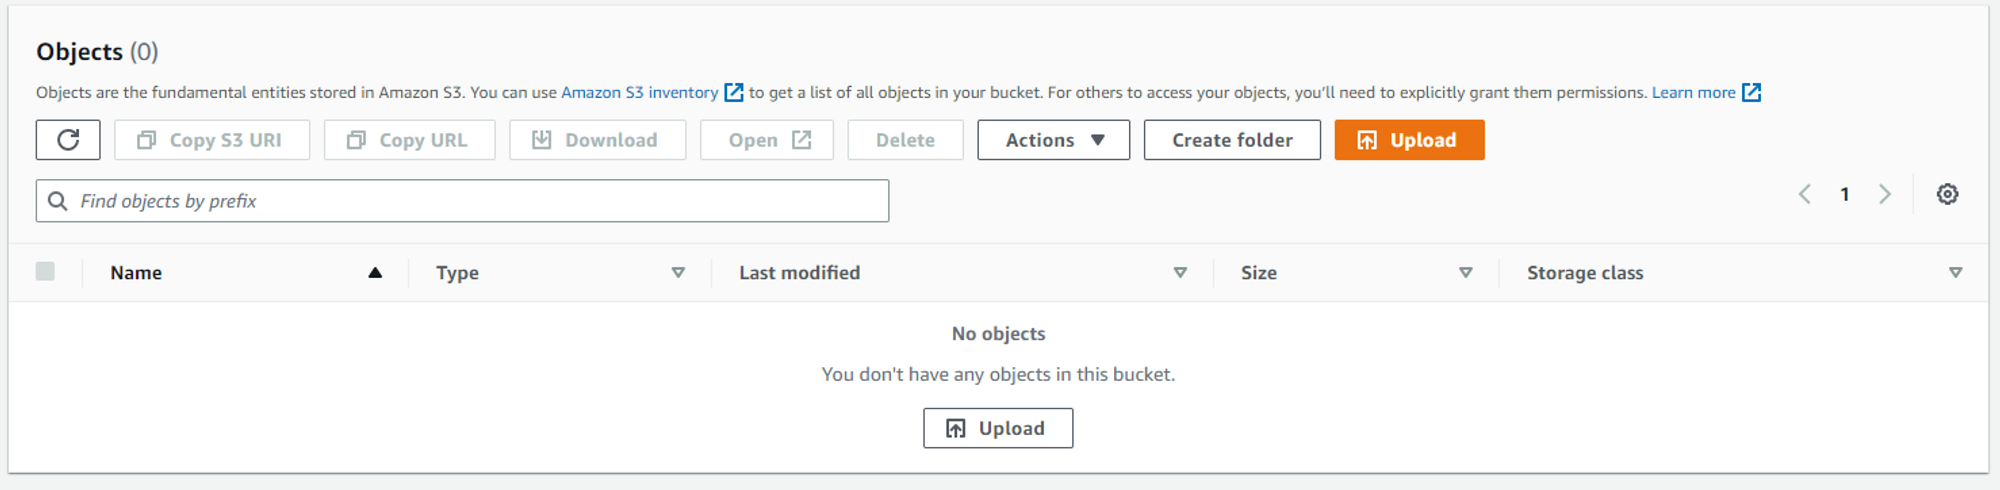
3. Upload the data to the newly created S3 bucket
Finally, I will upload the data from the local directory to this newly created s3 bucket using the s3_client. Currently, the s3 bucket “aws-python-ace-bucket” is empty as shown below:
Now, data will be uploaded to this bucket by executing the following code
FILE_TO_UPLOAD="test_data.csv"

# Uploading the dataset files from local directory to s3 bucket
try:
    print("Started uploading the files . . .")
    # here in upload_file the first parameter specifies the path of local file to upload, 2nd parameter specifies the s3 bucket where data will be uploaded to and 3rd parameter specifies the name of key to upload to.
    s3_client.upload_file(FILE_TO_UPLOAD,SOURCE_DATA_BUCKET,FILE_TO_UPLOAD)
    print(f'Successfully uploaded the data {FILE_TO_UPLOAD} to {SOURCE_DATA_BUCKET}')
except Exception as e:
    print(f"Failed to upload datasets to s3 bucket.\\nFollowing error occured:\\n{e}")
It should return the following output
Started uploading the files . . .
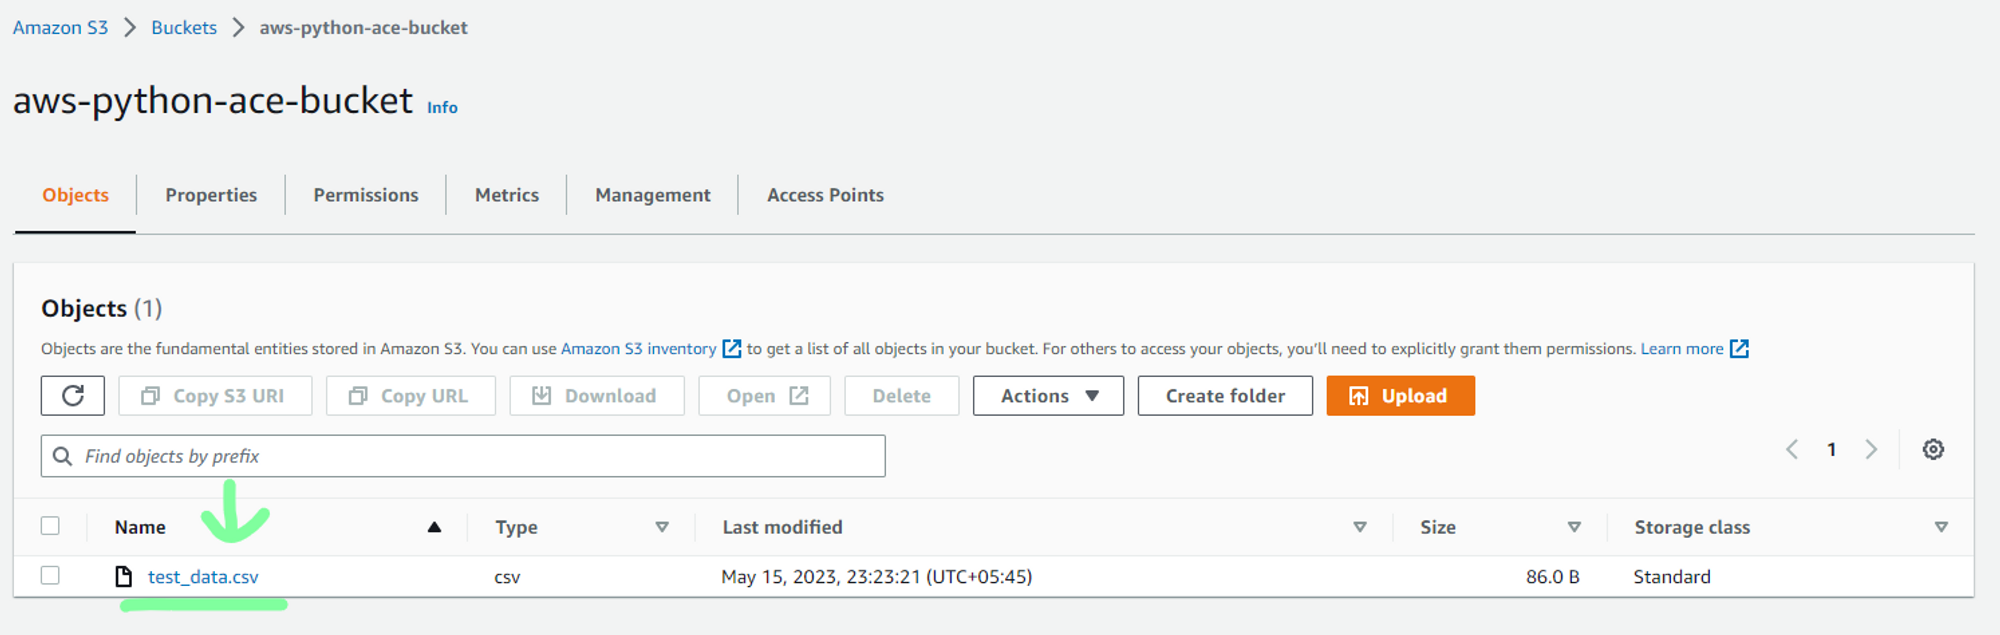
Successfully uploaded the data test_data.csv to aws-python-ace-bucket
Now if you check the S3 bucket in the AWS management console, you will see the data uploaded in the bucket as shown below.
Hence, in this example, I have shown you how the s3 boto3 client can be used to access the S3 service and use it to list available buckets, create a new bucket and upload new data to the bucket. You can similarly use other AWS services using the boto3 client. You can consult the Boto3 documentation for accessing various AWS services programmatically using Python.
Conclusion
In summary, AWS offers a user-friendly SDK called Boto3 that enables developers and data engineers to programmatically access AWS services directly from the Python program. This blog post has provided a clear and concise guide on how to set up a Boto3 client for accessing AWS services in Python, including creating IAM users, configuring the Boto3 client, and using it to interact with S3 services. With this knowledge, you can now automate AWS tasks and simplify data engineering workflows. The complete code for this tutorial is available at https://github.com/JuJu2181/aws_python_test.
Epilogue
I am a computer engineering undergraduate and am highly interested in the data and AI field. I recently started learning data engineering and am writing blogs to share my learning. This is my third blog in the data engineering series and I hope you enjoyed this read. Next, I will be writing blogs related to some data engineering projects including AWS services, so stay tuned ✌🏻. This is the way ☄️.